Blog

  • Free Crochet Dachshund Pattern

    Free Crochet Dachshund Pattern

    A Dachshund’s famously long body and short legs make it an instantly recognisable, fun animal to crochet. This pattern stretches the body out for that classic sausage-dog silhouette.

    Quick Pattern Overview

    Skill level Easy to intermediate
    Finished size About 22 cm (8.5 in) nose to tail
    Yarn DK or 8-ply cotton yarn, brown or tan
    Hook size 2.5 mm
    Estimated time 4 to 5 hours
    Techniques Magic ring, single crochet, increase, decrease
    Project type Amigurumi, elongated body

    Materials You’ll Need

    Essential Materials

    • DK cotton yarn in brown or tan
    • A small amount of black or dark brown yarn for the nose
    • 2.5 mm crochet hook
    • 6 mm safety eyes, or thread to embroider the eyes
    • Polyester stuffing
    • Tapestry needle, stitch marker and scissors

    Optional Materials

    • A tiny felt hat, cape or bandana for a costume look

    Crochet Abbreviations

    MR magic ring
    ch chain
    sc single crochet
    inc increase (2 sc in same st)
    dec decrease (sc 2 sts together)
    st(s) stitch(es)
    FO fasten off

    Before You Start

    • Work in continuous rounds; do not join or turn.
    • Use a stitch marker in the first stitch of each round and move it up as you go.
    • The number in brackets at the end of a round is your stitch count for that round.
    • Stuff firmly but stop before the stitches start to gap.

    Free Crochet Dachshund Pattern

    Head

    1. Round 1: 6 sc in MR (6)
    2. Round 2: inc in each st (12)
    3. Round 3: (1 sc, inc) x 6 (18)
    4. Round 4: (2 sc, inc) x 6 (24)
    5. Rounds 5 to 9: sc in each st (24). Add safety eyes between rounds 6 and 7, about 6 sts apart.
    6. Round 10: (2 sc, dec) x 6 (18)
    7. Round 11: (1 sc, dec) x 6 (12). Stuff firmly.
    8. Round 12: dec x 6 (6). FO and close the hole.

    Ears (make 2, long and floppy)

    1. Round 1: 6 sc in MR (6)
    2. Round 2: (1 sc, inc) x 3 (9)
    3. Rounds 3 to 9: sc in each st (9)
    4. Round 10: (1 sc, dec) x 3 (6)

    FO and leave a long tail. Do not stuff. Flatten before sewing so the ear hangs down softly.

    Body (long)

    1. Round 1: 6 sc in MR (6)
    2. Round 2: inc in each st (12)
    3. Round 3: (1 sc, inc) x 6 (18)
    4. Round 4: (2 sc, inc) x 6 (24)
    5. Rounds 5 to 14: sc in each st (24)
    6. Round 15: (2 sc, dec) x 6 (18)
    7. Round 16: (1 sc, dec) x 6 (12). Stuff firmly.
    8. Round 17: dec x 6 (6). FO and close the hole.

    Legs (make 4, short)

    1. Round 1: 6 sc in MR (6)
    2. Rounds 2 to 4: sc in each st (6)

    FO and leave a short tail. Stuff very lightly.

    Tail

    1. Round 1: 6 sc in MR (6)
    2. Rounds 2 to 5: sc in each st (6)

    FO and leave a long tail. Stuff very lightly.

    Assembly

    1. Sew the head to the front end of the long body.
    2. Sew the two floppy ears to the sides of the head, so they hang downward.
    3. Sew all four short legs evenly along the underside of the body so the dog stands low to the ground.
    4. Sew the tail to the back end of the body.

    Facial Features & Finishing

    Embroider a small dark nose at the front of the head and a simple curved mouth just below it for a warm, friendly expression.

    Tips for a Better Result

    • Use a hook one size smaller than the yarn label suggests, so the stitches stay tight and no stuffing shows.
    • Work rounds a little tighter than usual for a firm, well-shaped body.
    • Count your stitches after every round to catch mistakes early.

    Care & Safety

    If this toy is for a baby or small child, embroider the eyes instead of using safety eyes, and check all small parts are sewn on securely. Spot clean with a damp cloth and let it air dry.

    Frequently Asked Questions

    Why does the body have so many plain rounds?

    The extra even rounds are what stretch the body out into the Dachshund’s signature long, low shape.

    Can I add a costume to this dog?

    Yes, a tiny hat, cape or bandana tied around the neck is an easy, removable way to dress it up for Halloween.

    How do I keep the legs even?

    Work all four legs with exactly the same number of rounds and check their height against each other before sewing them on.

    Related Crochet Patterns

    Love dog patterns? Try our crochet bunny pattern next, or browse all our free crochet patterns.
  • Easy Crochet Owl Pattern

    Easy Crochet Owl Pattern

    With its round shape, big eyes and short neck, an owl is a naturally easy and rewarding animal to crochet. This pattern keeps the head and body as one piece to keep things simple.

    Quick Pattern Overview

    Skill level Easy
    Finished size About 12 cm (4.75 in) tall
    Yarn DK or 8-ply cotton yarn, brown or grey, plus cream and orange
    Hook size 2.5 mm
    Estimated time 3 to 4 hours
    Techniques Magic ring, single crochet, increase, decrease
    Project type Amigurumi

    Materials You’ll Need

    Essential Materials

    • DK cotton yarn in brown or grey
    • A small amount of cream yarn for the face and belly
    • A small amount of orange yarn for the beak and feet
    • 2.5 mm crochet hook
    • 9 mm safety eyes, or thread to embroider the eyes (owls look best with large eyes)
    • Polyester stuffing
    • Tapestry needle, stitch marker and scissors

    Crochet Abbreviations

    MR magic ring
    ch chain
    sc single crochet
    inc increase (2 sc in same st)
    dec decrease (sc 2 sts together)
    st(s) stitch(es)
    FO fasten off

    Before You Start

    • Work in continuous rounds; do not join or turn.
    • Use a stitch marker in the first stitch of each round and move it up as you go.
    • The number in brackets at the end of a round is your stitch count for that round.
    • Stuff firmly but stop before the stitches start to gap.

    Easy Crochet Owl Pattern

    Body and Head (worked as one piece)

    1. Round 1: 6 sc in MR (6)
    2. Round 2: inc in each st (12)
    3. Round 3: (1 sc, inc) x 6 (18)
    4. Round 4: (2 sc, inc) x 6 (24)
    5. Round 5: (3 sc, inc) x 6 (30)
    6. Rounds 6 to 13: sc in each st (30). Change to cream for the face around round 8, working a wide oval patch, then continue in brown. Add safety eyes close together, high on the face, around round 9.
    7. Round 14: (3 sc, dec) x 6 (24)
    8. Round 15: (2 sc, dec) x 6 (18). Stuff firmly.
    9. Round 16: (1 sc, dec) x 6 (12)
    10. Round 17: dec x 6 (6). FO and close the hole.

    Wings (make 2)

    1. Round 1: 6 sc in MR (6)
    2. Round 2: (1 sc, inc) x 3 (9)
    3. Round 3: sc in each st (9)
    4. Round 4: (2 sc, inc) x 3 (12)
    5. Rounds 5 to 6: sc in each st (12)

    FO and leave a long tail. Do not stuff. Flatten before sewing.

    Ear Tufts (make 2, tiny)

    1. Round 1: 6 sc in MR (6)
    2. Round 2: sc in each st (6)

    FO and leave a short tail. Do not stuff; pinch flat into a point.

    Feet (make 2, flat, orange)

    1. Round 1: 6 sc in MR (6)
    2. Round 2: sc in each st (6)

    FO and leave a short tail. Do not stuff; flatten before sewing.

    Assembly

    1. Sew the two wings to the sides of the body, folded slightly forward like a closed wing.
    2. Sew the two ear tufts to the top of the head, close together.
    3. Sew the two feet to the bottom of the body so the owl can perch upright.

    Facial Features & Finishing

    Embroider a small orange triangle beak just below and between the eyes. A few short stitches around the cream face patch help define the classic heart or round owl face shape.

    Tips for a Better Result

    • Use a hook one size smaller than the yarn label suggests, so the stitches stay tight and no stuffing shows.
    • Work rounds a little tighter than usual for a firm, well-shaped body.
    • Count your stitches after every round to catch mistakes early.

    Care & Safety

    If this toy is for a baby or small child, embroider the eyes instead of using safety eyes, and check all small parts are sewn on securely. Spot clean with a damp cloth and let it air dry.

    Frequently Asked Questions

    Can I skip the ear tufts?

    Yes, leaving them off simply gives you a different owl species look, such as a barn owl instead of a horned owl.

    What colours work well for an owl?

    Brown, grey and rust are the most realistic choices, though pastel colours make a lovely soft, decorative version.

    How do I make the owl stand upright?

    Flatten the feet well and sew them flush to the body, positioned slightly forward for balance.

    Related Crochet Patterns

    Continue with more woodland projects like our crochet opossum pattern, or see all our free crochet patterns.

  • Free Crochet Ghost Amigurumi Pattern

    Free Crochet Ghost Amigurumi Pattern

    This kawaii-style ghost swaps scary for sweet, with a soft rounded body, a friendly embroidered face and simple little arms. It is a quick, beginner-friendly Halloween project.

    Quick Pattern Overview

    Skill level Easy
    Finished size About 11 cm (4.5 in) tall
    Yarn DK or 8-ply cotton yarn, white or pastel
    Hook size 2.5 mm
    Estimated time 2 to 3 hours
    Techniques Magic ring, single crochet, increase

    Materials You’ll Need

    Essential Materials

    • DK cotton yarn in white or a soft pastel colour
    • 2.5 mm crochet hook
    • 6 mm safety eyes, or thread to embroider the face
    • Polyester stuffing
    • Tapestry needle, stitch marker and scissors

    Optional Materials

    • A tiny pink or black felt heart or star to sew onto the front

    Crochet Abbreviations

    MR magic ring
    ch chain
    sc single crochet
    inc increase (2 sc in same st)
    dec decrease (sc 2 sts together)
    st(s) stitch(es)
    FO fasten off

    Before You Start

    • Work in continuous rounds; do not join or turn.
    • Use a stitch marker in the first stitch of each round and move it up as you go.
    • The number in brackets at the end of a round is your stitch count for that round.
    • Stuff firmly but stop before the stitches start to gap.

    Free Crochet Ghost Amigurumi Pattern

    Body (worked in one piece, wider at the bottom)

    1. Round 1: 6 sc in MR (6)
    2. Round 2: inc in each st (12)
    3. Round 3: (1 sc, inc) x 6 (18)
    4. Round 4: (2 sc, inc) x 6 (24)
    5. Round 5: (3 sc, inc) x 6 (30)
    6. Rounds 6 to 14: sc in each st (30). Add safety eyes between rounds 8 and 9, about 8 sts apart.
    7. Round 15: work in back loops only, sc in each st, to create a subtle waistline (30)
    8. Rounds 16 to 20: sc in each st (30)

    Do not close the bottom with decreases. Instead, work a final round of (skip 1 st, 3 sc in next st, skip 1 st, sl st) repeated evenly around the last round to create a wavy, scalloped hem, then fasten off. Stuff firmly through the open bottom before finishing the last few stitches of the scalloped edge.

    Arms (make 2, tiny)

    1. Round 1: 6 sc in MR (6)
    2. Rounds 2 to 4: sc in each st (6)

    FO and leave a long tail. Stuff very lightly, or leave unstuffed and simply flatten for a soft, floppy arm.

    Assembly

    Sew the two tiny arms to the sides of the body, positioned a little below the eyes, so they stick out in a simple, friendly wave.

    Facial Features & Finishing

    Embroider two small pink circles for rosy cheeks below the eyes, and a simple round or oval mouth in black or dark grey for a sweet, surprised expression.

    Tips for a Better Result

    • Use a hook one size smaller than the yarn label suggests, so the stitches stay tight.
    • Work rounds a little tighter than usual for a firm, well-shaped piece.
    • Count your stitches after every round to catch mistakes early.

    Care & Safety

    If this toy is for a baby or small child, embroider the face instead of using safety eyes, and check all small parts are sewn on securely. Spot clean with a damp cloth and let it air dry.

    Frequently Asked Questions

    What if the scalloped hem feels too tricky?

    You can simply decrease the last few rounds as usual and close it like a normal ball shape; the ghost will still look adorable with a plain rounded bottom.

    What colour works best for a kawaii ghost?

    Classic white is the easiest to recognise, but soft pastels like lavender or mint also give a lovely gentle look.

    Can I add a costume accessory to the ghost?

    Yes, a tiny witch hat or a small bow sewn to the top of the head is an easy way to add extra character.

    Related Crochet Patterns

    Love cute-not-creepy Halloween projects? Browse all our free crochet patterns for more amigurumi ideas.

  • Free Crochet Duck Pattern

    Free Crochet Duck Pattern

    A duck’s round shape and cheerful waddle make it a fun, forgiving animal to crochet. This pattern uses simple flat pieces for the bill and feet, so no special techniques are needed.

    Quick Pattern Overview

    Skill level Easy
    Finished size About 10 cm (4 in) tall
    Yarn DK or 8-ply cotton yarn, yellow, plus orange and white
    Hook size 2.5 mm
    Estimated time 3 to 4 hours
    Techniques Magic ring, single crochet, increase, decrease, flat pieces
    Project type Amigurumi

    Materials You’ll Need

    Essential Materials

    • DK cotton yarn in yellow
    • A small amount of orange yarn for the bill and feet
    • 2.5 mm crochet hook
    • 6 mm safety eyes, or thread to embroider the eyes
    • Polyester stuffing
    • Tapestry needle, stitch marker and scissors

    Optional Materials

    • A tiny scrap of white yarn for a costume bandana or wing tips

    Crochet Abbreviations

    MR magic ring
    ch chain
    sc single crochet
    inc increase (2 sc in same st)
    dec decrease (sc 2 sts together)
    st(s) stitch(es)
    FO fasten off

    Before You Start

    • Work in continuous rounds; do not join or turn.
    • Use a stitch marker in the first stitch of each round and move it up as you go.
    • The number in brackets at the end of a round is your stitch count for that round.
    • Stuff firmly but stop before the stitches start to gap.

    Free Crochet Duck Pattern

    Body (worked in one piece with the head)

    1. Round 1: 6 sc in MR (6)
    2. Round 2: inc in each st (12)
    3. Round 3: (1 sc, inc) x 6 (18)
    4. Round 4: (2 sc, inc) x 6 (24)
    5. Round 5: (3 sc, inc) x 6 (30)
    6. Rounds 6 to 12: sc in each st (30). Add safety eyes between rounds 7 and 8, about 7 sts apart.
    7. Round 13: (3 sc, dec) x 6 (24)
    8. Round 14: (2 sc, dec) x 6 (18). Stuff firmly as you go.
    9. Round 15: (1 sc, dec) x 6 (12)
    10. Round 16: dec x 6 (6). FO and close the hole.

    Wings (make 2)

    1. Round 1: 6 sc in MR (6)
    2. Round 2: (1 sc, inc) x 3 (9)
    3. Round 3: sc in each st (9)

    FO and leave a long tail. Do not stuff. Flatten before sewing.

    Bill (flat, orange)

    1. Round 1: 6 sc in MR (6)
    2. Round 2: inc in each st (12)
    3. Round 3: sc in each st (12)

    FO and leave a long tail. Do not stuff. Fold in half to form a flat bill shape before sewing.

    Feet (make 2, flat, orange)

    1. Round 1: 6 sc in MR (6)
    2. Round 2: (1 sc, inc) x 3 (9)

    FO and leave a short tail. Do not stuff; flatten into a webbed foot shape.

    Assembly

    1. Sew the bill to the front of the head, just below the eyes.
    2. Sew the two wings to the sides of the body.
    3. Sew the two feet to the bottom of the body so the duck can stand.

    Facial Features & Finishing

    The safety eyes and orange bill give the duck most of its expression. For extra charm, embroider two tiny rosy cheeks below the eyes with pink thread.

    Tips for a Better Result

    • Use a hook one size smaller than the yarn label suggests, so the stitches stay tight and no stuffing shows.
    • Work rounds a little tighter than usual for a firm, well-shaped body.
    • Count your stitches after every round to catch mistakes early.

    Care & Safety

    If this toy is for a baby or small child, embroider the eyes instead of using safety eyes, and check all small parts are sewn on securely. Spot clean with a damp cloth and let it air dry.

    Frequently Asked Questions

    Can I make a costumed version of this duck?

    Yes, a tiny fabric or felt hat, cape or bandana sewn or tied around the neck works well and can be removed easily.

    What if my duck will not stand up?

    Make sure the feet are flattened wide enough and sewn flush to the body; a slightly wider base helps with balance.

    Can I use a different colour than yellow?

    Yes, white or brown both make realistic alternatives, and pastel colours work well for a softer, kawaii style duck.

    Related Crochet Patterns

    Try more bird-themed projects with our crochet goose pattern, or browse all our free crochet patterns.

  • Free Crochet Ferret Pattern

    Free Crochet Ferret Pattern

    A ferret’s long, playful body and curious expression make for a fun amigurumi shape. This pattern uses an elongated body and a long tail to capture that stretched-out, mischievous look.

    Quick Pattern Overview

    Skill level Easy to intermediate
    Finished size About 20 cm (8 in) nose to tail
    Yarn DK or 8-ply cotton yarn, cream or brown, plus white for the face
    Hook size 2.5 mm
    Estimated time 4 to 5 hours
    Techniques Magic ring, single crochet, increase, decrease, colour change
    Project type Amigurumi, elongated body

    Materials You’ll Need

    Essential Materials

    • DK cotton yarn in cream or brown
    • A small amount of white yarn for the face mask
    • A small amount of pink yarn for the nose
    • 2.5 mm crochet hook
    • 6 mm safety eyes, or thread to embroider the eyes
    • Polyester stuffing, plus a pipe cleaner or chenille stem for the tail (optional)
    • Tapestry needle, stitch marker and scissors

    Optional Materials

    • A tiny bandana or hat accessory for a Halloween look

    Crochet Abbreviations

    MR magic ring
    ch chain
    sc single crochet
    inc increase (2 sc in same st)
    dec decrease (sc 2 sts together)
    st(s) stitch(es)
    FO fasten off

    Before You Start

    • Work in continuous rounds; do not join or turn.
    • Use a stitch marker in the first stitch of each round and move it up as you go.
    • The number in brackets at the end of a round is your stitch count for that round.
    • Stuff firmly but stop before the stitches start to gap.

    Free Crochet Ferret Pattern

    Head

    1. Round 1: 6 sc in MR (6)
    2. Round 2: inc in each st (12)
    3. Round 3: (1 sc, inc) x 6 (18)
    4. Rounds 4 to 6: sc in each st (18). Work a white face patch across rounds 4 to 6 if desired, then continue in the main colour.
    5. Round 7: (1 sc, dec) x 6 (12). Add safety eyes here, about 6 sts apart.
    6. Round 8: dec x 6 (6). Stuff firmly. FO and close the hole.

    Ears (make 2, tiny)

    1. Round 1: 6 sc in MR (6)
    2. Round 2: sc in each st (6)

    FO and leave a short tail. Do not stuff; flatten before sewing.

    Body (elongated)

    1. Round 1: 6 sc in MR (6)
    2. Round 2: inc in each st (12)
    3. Round 3: (1 sc, inc) x 6 (18)
    4. Rounds 4 to 12: sc in each st (18)
    5. Round 13: (1 sc, dec) x 6 (12). Stuff firmly.
    6. Round 14: dec x 6 (6). FO and close the hole.

    Legs (make 4, tiny)

    1. Round 1: 6 sc in MR (6)
    2. Rounds 2 to 3: sc in each st (6)

    FO and leave a short tail. Stuff very lightly.

    Tail (long)

    1. Round 1: 6 sc in MR (6)
    2. Rounds 2 to 12: sc in each st (6)

    FO and leave a long tail. Stuff lightly and insert a pipe cleaner first if you want the tail to hold a curved pose.

    Assembly

    1. Sew the head to the front end of the elongated body.
    2. Sew the two tiny ears to the top of the head, close together.
    3. Sew all four legs evenly along the underside of the body.
    4. Sew the long tail to the back end of the body.

    Facial Features & Finishing

    Embroider a small pink triangle nose at the centre of the white face patch (or directly on the main colour if you skipped the patch), with two short stitches for the mouth.

    Tips for a Better Result

    • Use a hook one size smaller than the yarn label suggests, so the stitches stay tight and no stuffing shows.
    • Work rounds a little tighter than usual for a firm, well-shaped body.
    • Count your stitches after every round to catch mistakes early.

    Care & Safety

    If this toy is for a baby or small child, embroider the eyes instead of using safety eyes, and check all small parts are sewn on securely. Spot clean with a damp cloth and let it air dry.

    Frequently Asked Questions

    Why is the body worked so long?

    Ferrets have a distinctively long, stretched-out shape, and extending the plain rounds on the body captures that look accurately.

    Do I need a pipe cleaner in the tail?

    No, it is optional. It simply lets the tail hold a curved or draped pose instead of standing straight.

    Can I skip the face mask colour change?

    Yes, a single solid colour still makes a lovely ferret; the white patch is just an extra detail.

    Related Crochet Patterns

    Have a rat too? Try our crochet rat pattern, or browse all our free crochet patterns.
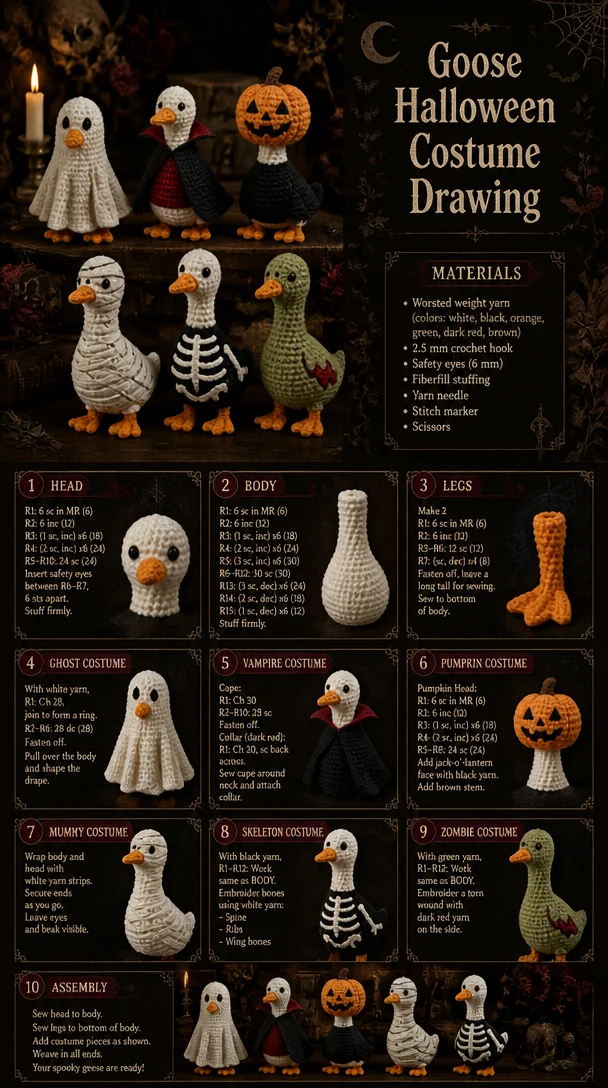
  • Free Crochet Goose Pattern

    Free Crochet Goose Pattern

    With its long neck and confident waddle, a goose brings its own goofy charm to any amigurumi collection. This pattern uses a simple neck tube to get that unmistakable silhouette.

    Quick Pattern Overview

    Skill level Easy to intermediate
    Finished size About 14 cm (5.5 in) tall
    Yarn DK or 8-ply cotton yarn, white or grey, plus orange
    Hook size 2.5 mm
    Estimated time 3 to 4 hours
    Techniques Magic ring, single crochet, increase, decrease

    Materials You’ll Need

    Essential Materials

    • DK cotton yarn in white or grey
    • A small amount of orange yarn for the beak and feet
    • 2.5 mm crochet hook
    • 6 mm safety eyes, or thread to embroider the eyes
    • Polyester stuffing
    • Tapestry needle, stitch marker and scissors

    Optional Materials

    • A tiny scrap of white or black fabric for a ghost or skeleton costume overlay

    Crochet Abbreviations

    MR magic ring
    ch chain
    sc single crochet
    inc increase (2 sc in same st)
    dec decrease (sc 2 sts together)
    st(s) stitch(es)
    FO fasten off

    Before You Start

    • Work in continuous rounds; do not join or turn.
    • Use a stitch marker in the first stitch of each round and move it up as you go.
    • The number in brackets at the end of a round is your stitch count for that round.
    • Stuff firmly but stop before the stitches start to gap.

    Free Crochet Goose Pattern

    Head

    1. Round 1: 6 sc in MR (6)
    2. Round 2: inc in each st (12)
    3. Round 3: sc in each st (12). Add safety eyes here, about 6 sts apart.
    4. Round 4: dec x 6 (6). Stuff firmly. FO, leave a long tail.

    Neck (long tube)

    1. Round 1: 6 sc in MR (6)
    2. Round 2: inc in each st (12)
    3. Rounds 3 to 10: sc in each st (12)

    FO and leave a long tail. Stuff lightly but firmly enough to stay upright.

    Body

    1. Round 1: 6 sc in MR (6)
    2. Round 2: inc in each st (12)
    3. Round 3: (1 sc, inc) x 6 (18)
    4. Round 4: (2 sc, inc) x 6 (24)
    5. Rounds 5 to 9: sc in each st (24)
    6. Round 10: (2 sc, dec) x 6 (18)
    7. Round 11: (1 sc, dec) x 6 (12). Stuff firmly.
    8. Round 12: dec x 6 (6). FO and close the hole.

    Wings (make 2)

    1. Round 1: 6 sc in MR (6)
    2. Round 2: (1 sc, inc) x 3 (9)
    3. Round 3: sc in each st (9)
    4. Round 4: (2 sc, inc) x 3 (12)

    FO and leave a long tail. Do not stuff. Flatten before sewing.

    Beak (flat, orange)

    1. Round 1: 6 sc in MR (6)
    2. Round 2: sc in each st (6)

    FO and leave a short tail. Do not stuff; flatten before sewing.

    Feet (make 2, flat, orange)

    1. Round 1: 6 sc in MR (6)
    2. Round 2: (1 sc, inc) x 3 (9)

    FO and leave a short tail. Do not stuff; flatten into a webbed shape.

    Assembly

    1. Sew one end of the neck tube to the top of the body, and the head to the other end of the neck.
    2. Sew the beak to the front of the head, just below the eyes.
    3. Sew the two wings to the sides of the body.
    4. Sew the two feet to the bottom of the body so the goose can stand.

    Facial Features & Finishing

    The orange beak and safety eyes give the goose most of its confident, slightly comical expression; no extra embroidery is needed.

    Tips for a Better Result

    • Use a hook one size smaller than the yarn label suggests, so the stitches stay tight and no stuffing shows.
    • Work rounds a little tighter than usual for a firm, well-shaped body.
    • Count your stitches after every round to catch mistakes early.

    Care & Safety

    If this toy is for a baby or small child, embroider the eyes instead of using safety eyes, and check all small parts are sewn on securely. Spot clean with a damp cloth and let it air dry.

    Frequently Asked Questions

    How do I keep the long neck from flopping over?

    Stuff the neck tube firmly, especially near the base, and take care to sew it on straight and centred to the body.

    Can I make the neck shorter?

    Yes, simply work fewer plain rounds on the neck tube for a shorter, stockier goose.

    Can I dress this goose up for Halloween?

    Yes, a small draped piece of white or black fabric makes an easy no-sew ghost or skeleton overlay costume.

    Related Crochet Patterns

    Love farmyard birds? Try our crochet chicken pattern, or browse all our free crochet patterns.

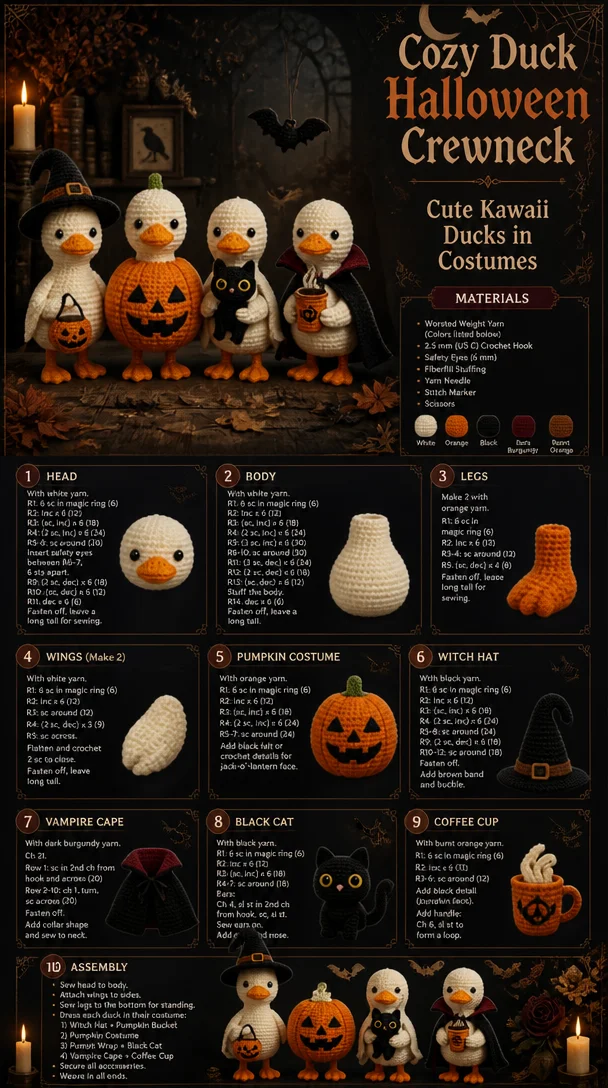
  • Free Crochet Black Cat Pattern

    Free Crochet Black Cat Pattern

    Black cats have a long, undeserved reputation for bad luck, but there is nothing but good fortune in stitching your own sleek little companion. This easy amigurumi pattern makes a sitting cat with pointed ears and a long curled tail, ready for Halloween or any day of the year.

    Quick Pattern Overview

    Skill level Easy
    Finished size About 11 cm (4.5 in) tall, sitting
    Yarn DK or 8-ply cotton yarn, black and a little pink
    Hook size 2.5 mm
    Estimated time 3 to 4 hours
    Techniques Magic ring, single crochet, increase, decrease
    Project type Amigurumi, sitting pose

    Materials You’ll Need

    Essential Materials

    • DK cotton yarn in black
    • A small amount of pink yarn or embroidery thread for the nose
    • 2.5 mm crochet hook
    • 6 mm safety eyes, or black thread to embroider the eyes
    • Polyester stuffing
    • Tapestry needle, stitch marker and scissors

    Optional Materials

    • A small strip of orange felt or yarn for a pumpkin accessory
    • A thin ribbon for a simple collar

    Crochet Abbreviations

    MR magic ring
    ch chain
    sc single crochet
    inc increase (2 sc in same st)
    dec decrease (sc 2 sts together)
    st(s) stitch(es)
    FO fasten off

    Before You Start

    • Work in continuous rounds; do not join or turn.
    • Use a stitch marker in the first stitch of each round and move it up as you go.
    • The number in brackets at the end of a round is your stitch count for that round.
    • Stuff firmly but stop before the stitches start to gap.

    Free Crochet Black Cat Pattern

    Head

    1. Round 1: 6 sc in MR (6)
    2. Round 2: inc in each st (12)
    3. Round 3: (1 sc, inc) x 6 (18)
    4. Round 4: (2 sc, inc) x 6 (24)
    5. Round 5: (3 sc, inc) x 6 (30)
    6. Rounds 6 to 11: sc in each st (30)
    7. Round 12: (3 sc, dec) x 6 (24)
    8. Round 13: (2 sc, dec) x 6 (18). Add safety eyes between rounds 8 and 9, about 7 sts apart.
    9. Round 14: (1 sc, dec) x 6 (12). Stuff firmly.
    10. Round 15: dec x 6 (6). FO, close the hole and weave in the tail.

    Ears (make 2)

    1. Round 1: 6 sc in MR (6)
    2. Round 2: (1 sc, inc) x 3 (9)
    3. Round 3: sc in each st (9)
    4. Round 4: (2 sc, inc) x 3 (12)
    5. Rounds 5 to 6: sc in each st (12)

    FO and leave a long tail. Do not stuff. Pinch the ear flat into a triangle before sewing.

    Body

    1. Round 1: 6 sc in MR (6)
    2. Round 2: inc in each st (12)
    3. Round 3: (1 sc, inc) x 6 (18)
    4. Round 4: (2 sc, inc) x 6 (24)
    5. Rounds 5 to 9: sc in each st (24)
    6. Round 10: (2 sc, dec) x 6 (18)
    7. Round 11: (1 sc, dec) x 6 (12). Stuff firmly.
    8. Round 12: dec x 6 (6). FO and close the hole.

    Legs (make 4)

    1. Round 1: 6 sc in MR (6)
    2. Rounds 2 to 5: sc in each st (6)

    FO and leave a long tail. Stuff very lightly, flatten the open end for sewing flush to the body.

    Tail

    1. Round 1: 6 sc in MR (6)
    2. Rounds 2 to 9: sc in each st (6)

    FO, leave a long tail. Stuff very lightly so the tail can curl.

    Assembly

    1. Sew the head to the top of the body, keeping the cat sitting upright.
    2. Sew the two ears to the top of the head, about 3 sts apart, angled slightly outward.
    3. Sew all four legs to the underside and front of the body so the cat sits balanced.
    4. Curl the tail gently and sew it to one side of the back.

    Facial Features & Finishing

    Embroider a small pink triangle nose just below the eyes, then add two short straight stitches for the mouth. A few short straight stitches above each eye make simple, expressive eyebrows.

    Tips for a Better Result

    • Use a hook one size smaller than the yarn label suggests, so the stitches stay tight and no stuffing shows.
    • Work rounds a little tighter than usual for a firm, well-shaped body.
    • Count your stitches after every round; it is much easier to fix a mistake right away.

    Care & Safety

    If this toy is for a baby or small child, embroider the eyes instead of using safety eyes, and check all small parts are sewn on securely before giving it to little hands. Spot clean with a damp cloth and let it air dry.

    Frequently Asked Questions

    Are black cats really bad luck?

    No. This is an old superstition with no basis in fact, and this pattern is a fun way to celebrate black cats instead.

    Can I make this cat in another colour?

    Yes, the pattern works the same in any colour; just swap the black yarn for your favourite shade.

    How do I make the tail curl nicely?

    Stuff it very lightly and curve it gently with your fingers before sewing, then tack the tip in place so it holds its curl.

    Related Crochet Patterns

    Love a good Halloween amigurumi? Try our crochet bat pattern next, or browse all our free crochet patterns.