Category: Easy Beginner Patterns

Simple, easy crochet patterns for beginners, including first amigurumi projects and relaxed weekend makes.

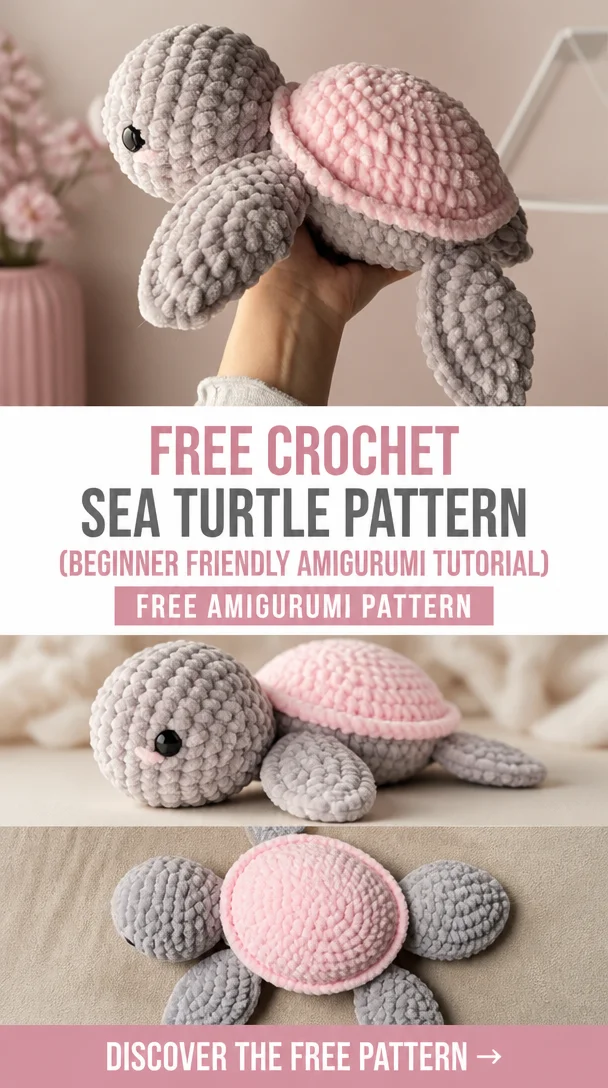
  • Free Crochet Sea Turtle Pattern (Beginner Friendly Amigurumi Tutorial)

    Free Crochet Sea Turtle Pattern (Beginner Friendly Amigurumi Tutorial)

    Free Crochet Sea Turtle Pattern (Beginner Friendly Amigurumi Tutorial)

    Are you ready to craft a delightful and squishy crochet toy? This free chunky crochet sea turtle pattern is perfect for beginners and provides a charming project that you can complete in no time! 🐢🩷 Using super soft blanket yarn, this amigurumi tutorial guides you step-by-step in creating your very own cute plushie. The sea turtle design is not just adorable but also highly cuddly, making it an excellent gift for children or a whimsical decor addition. Follow along with this easy tutorial and start your crochet journey today!

    Crochet Sea Turtle Pattern Overview

    • Skill Level: Beginner
    • Finished Size: Approximately 12 inches (depending on yarn and hook size)
    • Crochet Hook: Size suitable for blanket yarn
    • Yarn Type: Super soft blanket yarn
    • Main Colors: Green, with color accents optional
    • Construction Method: Amigurumi (crocheted in continuous rounds)
    • Approximate Time: A few hours depending on your crochet speed
    • Beginner-Friendly: Yes

    Materials You’ll Need

    • Chunky blanket yarn (main color and optional accent colors)
    • Crochet hook suitable for yarn thickness
    • Stuffing (fiberfill)
    • Safety eyes (recommended size)
    • Yarn needle
    • Stitch marker
    • Scissors
    • Embroidery thread for details

    Crochet Abbreviations

    • ch: chain
    • sc: single crochet
    • inc: increase (2 sc in the same stitch)
    • dec: decrease (sc two stitches together)
    • rnd: round

    Before You Start

    Before diving into the crochet sea turtle pattern, here are a few practical tips:

    • Work in continuous rounds to avoid seams.
    • Use a stitch marker to keep track of your rounds.
    • Check your stitch counts regularly to ensure proper size.
    • Stuff your turtle gradually to achieve a soft yet firm plush.
    • Have your pieces ready for assembly as you finish crocheting them.

    Free Crochet Sea Turtle Pattern

    Shell

    Round 1: Start with a magic ring, 6 sc in the ring.
    Round 2: Inc in each stitch (12 sc).
    Round 3: (1 sc, inc) around (18 sc).
    Round 4: (2 sc, inc) around (24 sc).
    Round 5-7: Sc around (24 sc).
    Fasten off and leave a long tail for sewing.

    Body

    Round 1: Magic ring, 6 sc in the ring.
    Round 2: Inc in each stitch (12 sc).
    Round 3: (1 sc, inc) around (18 sc).
    Round 4: (2 sc, inc) around (24 sc).
    Round 5-10: Sc around (24 sc).
    Round 11: (2 sc, dec) around (18 sc).
    Round 12: (1 sc, dec) around (12 sc).
    Stuff lightly.

    Head

    Round 1: Magic ring, 6 sc in the ring.
    Round 2: Inc in each stitch (12 sc).
    Round 3: (1 sc, inc) around (18 sc).
    Round 4: Sc around (18 sc).
    Round 5: (1 sc, dec) around (12 sc).
    Stuff and fasten off, leaving a long tail for sewing.

    Arms (Make 4)

    Round 1: Magic ring, 6 sc in the ring.
    Round 2: Inc in each stitch (12 sc).
    Round 3-4: Sc around (12 sc).
    Fasten off and leave a long tail for sewing.

    Assembly

    • Body and Shell: Sew the shell to the body securely.
    • Head: Attach the head to the top of the body, ensuring it is centered.
    • Arms: Position the arms evenly around the lower section of the body and sew in place.
    • Eyes: Attach safety eyes to the head, spaced appropriately.
    • Finishing: Lightly stuff areas as needed to maintain shape.

    Facial Features and Finishing Details

    Embellish your sea turtle’s face with a simple embroidered smile using embroidery thread. This adds charm! Position the safety eyes above the smile for a sweet expression.

    Tips for a Better Result

    • Keep your tension consistent throughout to ensure an even finish.
    • If you encounter uneven stuffing, adjust it while shaping the limbs.
    • Use contrasting yarn to highlight different sections for added texture.

    Customization Ideas

    • Experiment with vibrant colors for the turtle’s shell.
    • Add stripes or polka dots to make your turtle unique.
    • Consider using different yarn types, such as cotton, for varied textures.

    Common Problems and Troubleshooting

    • Uneven Stuffing: Ensure you distribute stuffing evenly and adjust after assembly.
    • Loose Stitches: Check your tension to avoid gaps between stitches.
    • Alignment Issues: Pin pieces together before sewing to achieve perfect placement.

    Care and Safety

    For care, hand wash your crochet sea turtle with mild soap and air dry. Be mindful of safety with small parts like safety eyes, especially if intended for young children.

    Frequently Asked Questions

    • Is this crochet turtle pattern beginner-friendly?
      Yes, it’s designed for beginners with simple stitches.
    • What yarn is best for this crochet turtle?
      Super soft blanket yarn is ideal for a plush texture.
    • How long does it take to crochet this animal?
      It typically takes a few hours depending on your crochet speed.
    • Can I make this crochet animal larger or smaller?
      Yes, you can adjust the size by using different yarn weights and hook sizes.
    • Can I use different yarn colors?
      Absolutely! Feel free to mix and match colors for a unique look.
    • How do I keep the finished animal in shape?
      Store it flat, and freshen it up by fluffing the stuffing as needed.

    Conclusion

    Crafting your own adorable crochet sea turtle is not only satisfying but also a fantastic way to boost your crochet skills. We hope you enjoy creating this delightful plushie—so grab your yarn and get started today!
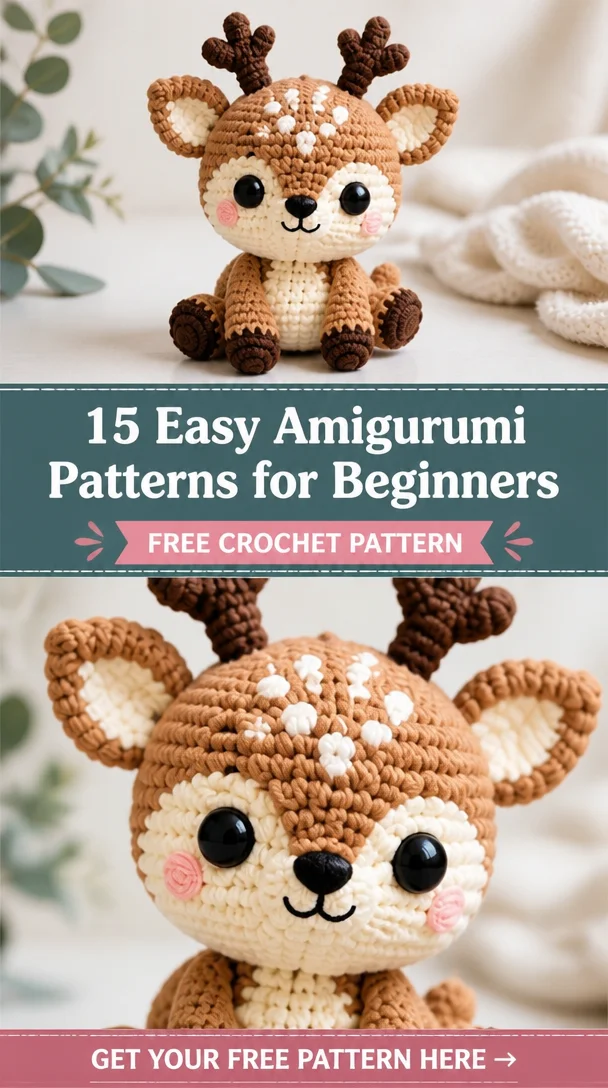
     

  • 15 Easy Amigurumi Patterns for Beginners

    15 Easy Amigurumi Patterns for Beginners

    15 Easy Amigurumi Patterns for Beginners

    If you love cute crochet animals, then amigurumi is the perfect craft for you! Amigurumi, the Japanese art of crocheting small stuffed creatures, offers endless opportunities for creativity. In this guide, we present you with 15 easy amigurumi patterns, featuring adorable animals like bees, koalas, penguins, cows, bunnies, puppies, and turtles. These beginner-friendly projects not only introduce you to the fundamentals of amigurumi but also make fantastic handmade gifts. Each pattern is designed to inspire your creativity, and with our straightforward instructions, even novice crocheters will find joy in creating these charming critters!

    Crochet Animal Pattern Overview

    • Skill Level: Beginner-Friendly
    • Finished Size: Varies by pattern
    • Crochet Hook: Depends on yarn choice
    • Yarn Type: Acrylic or cotton yarn
    • Main Colors: Various based on the animal chosen
    • Construction Method: Rounds
    • Approximate Time: 1-2 hours per animal
    • Beginner-Friendly: Yes, perfect for learning amigurumi techniques

    Materials You’ll Need

    • Worsted weight yarn in desired colors
    • Appropriate crochet hook
    • Stuffing (polyester fiberfill)
    • Safety eyes (if applicable)
    • Yarn needle
    • Stitch marker
    • Scissors
    • Embroidery thread (for facial features)
    • Animal-specific accessories (e.g., for hats or outfits)

    Crochet Abbreviations

    • ch – chain
    • sc – single crochet
    • st – stitch
    • rnd – round
    • dec – decrease
    • inc – increase
    • sl st – slip stitch

    Before You Start

    • Work in continuous rounds to avoid visible seams.
    • Use a stitch marker to keep track of your rounds.
    • Check your stitch counts regularly to avoid mistakes.
    • Stuff your animal gradually to shape it nicely.
    • Prepare all pieces before assembly for a smoother process.

    Free Crochet Animal Patterns

    Head

    Round 1: Start with a magic ring, sc 6 into ring.
    Round 2: Inc in each stitch around (12).
    Round 3: sc 1, inc around (18).
    … (continue with specific rounds until head is completed).

    Body

    Round 1: Start with a magic ring, sc 6 into ring.
    … (follow with rounds to create body shape).

    Ears

    For each ear:
    Round 1: Start with a magic ring, sc 4 into ring.
    Round 2: Inc in each stitch around (8).
    … (complete ears before attaching).

    Legs

    Make 4 legs using the following pattern:
    Round 1: Start with a magic ring, sc 6 into ring.
    Round 2: sc 1, inc around (9).
    … (continue rounds according to your pattern).

    Tail

    Round 1: Start with a magic ring, sc 4 into ring.
    Round 2: Inc in each stitch (8).
    … (complete tail).

    (… Continue with any additional animal-specific parts as needed, such as beak, wings, etc.)

    Assembly

    • Start by securely attaching the head to the body.
    • Position the ears on the head and sew them in place.
    • Attach the legs to the body at even intervals for balanced support.
    • Add the tail to the back for added cuteness.

    Facial Features and Finishing Details

    • Sew safety eyes securely into the head.
    • Use embroidery thread to create a small nose and mouth.
    • Add any additional details such as whiskers or eyebrows to enhance facial expression.

    Tips for a Better Result

    • Take your time when sewing pieces together to avoid any visible seams.
    • Experiment with different stuffing densities to achieve desired animal shapes.
    • Use contrasting colors to make features pop (like eyes or accessories).

    Customization Ideas

    • Change the main colors to represent different animals or seasons.
    • Use varying yarn types for texture (such as a fluffy yarn).
    • Adjust the size by changing your hook size or using lighter weight yarn.
    • Add toys or hats to personalize your animal.

    Common Problems and Troubleshooting

    • Uneven Stuffing: Adjust by adding or removing stuffing gradually to find balance.
    • Loose Stitches: Tighten your tension if stitches seem loose; practice makes perfect.
    • Assembly Alignment: Use pins to position parts before sewing for precise placement.

    Care and Safety

    To care for your handmade crochet animal, hand wash with mild soap and air dry. If used as a toy, ensure that all components (like safety eyes) are securely attached to avoid choking hazards for small children.

    Frequently Asked Questions

    • Is this crochet animal pattern beginner-friendly?
      Yes, these patterns are designed specifically for beginners with clear instructions.

    • What yarn is best for this crochet animal?
      Worsted weight acrylic or cotton yarn works well for amigurumi projects.

    • How long does it take to crochet this animal?
      Each project typically takes 1-2 hours, depending on your skill level.

    • Can I make this crochet animal larger or smaller?
      Yes, you can adjust the size by using different yarn weights or hook sizes.

    • Can I use different yarn colors?
      Absolutely! Feel free to pick any colors that inspire you.

    • How do I keep the finished animal in shape?
      Be mindful of stuffing and shaping during assembly to maintain form.

    Conclusion

    Creating your own crochet animals through these easy amigurumi patterns is a wonderful way to explore your creativity and make heartfelt gifts. So grab your hooks and yarn, and let your imagination run wild as you start crafting these adorable creatures!

  • Easy Roll-Up Armadillo Crochet Pattern

    Easy Roll-Up Armadillo Crochet Pattern

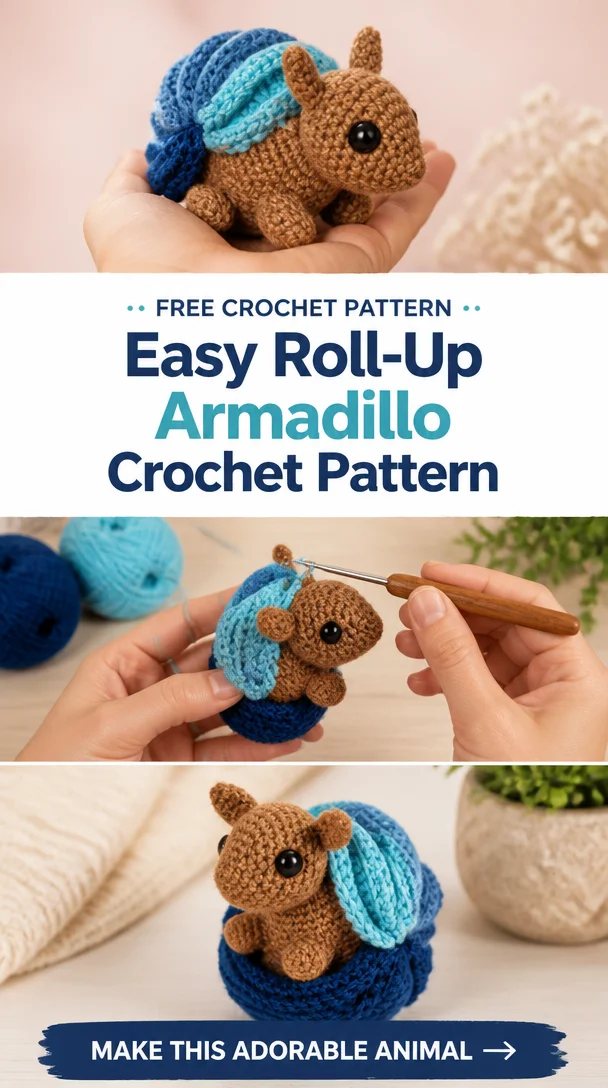
    Meet this roll-up armadillo, a sweet, easy-to-make plushie with a banded shell worked in rows so it can curl into a little ball, just like the real thing.

    Quick Pattern Overview

    Skill level Easy to intermediate
    Finished size About 12 cm (4.75 in) long
    Yarn DK or 8-ply cotton yarn, tan or grey, plus cream
    Hook size 2.5 mm
    Estimated time 4 to 5 hours

    Materials You’ll Need

    • DK cotton yarn in tan or grey, plus cream for the belly
    • 2.5 mm crochet hook
    • 6 mm safety eyes, or thread to embroider the eyes
    • Polyester stuffing
    • A flexible plastic canvas strip or stiff felt, optional, for the shell bands
    • Tapestry needle, stitch marker and scissors

    Crochet Abbreviations

    MR magic ring
    ch chain
    sc single crochet
    inc increase (2 sc in same st)
    dec decrease (sc 2 sts together)
    st(s) stitch(es)
    FO fasten off

    Before You Start

    • Work in continuous rounds; do not join or turn.
    • Use a stitch marker in the first stitch of each round.
    • The number in brackets at the end of a round is your stitch count.
    • Stuff firmly but stop before the stitches start to gap.

    Easy Roll-Up Armadillo Crochet Pattern

    Body (cream belly, worked first)

    1. Round 1: 6 sc in MR (6)
    2. Round 2: inc in each st (12)
    3. Round 3: (1 sc, inc) x 6 (18)
    4. Round 4: (2 sc, inc) x 6 (24)
    5. Rounds 5 to 11: sc in each st (24). Add safety eyes near the front, between rounds 5 and 6, about 7 sts apart.
    6. Round 12: (2 sc, dec) x 6 (18)
    7. Round 13: (1 sc, dec) x 6 (12). Stuff firmly.
    8. Round 14: dec x 6 (6). FO and close the hole.

    Shell Bands (make 5 to 7 flat strips, tan or grey)

    For each band, chain 10, then sc in the 2nd chain from the hook and across (9 sts). Work 2 more rows of sc, 9 sts each, then FO leaving a long tail. Make enough bands to cover the back of the body from the head to the tail.

    Ears (make 2, tiny)

    1. Round 1: 6 sc in MR (6)

    FO and leave a short tail. Do not stuff; flatten before sewing.

    Tail (tapered)

    1. Round 1: 6 sc in MR (6)
    2. Rounds 2 to 6: sc in each st (6)
    3. Round 7: dec x 3 (3)

    FO, stuff lightly and close.

    Assembly

    1. Sew the shell bands side by side over the back of the body, slightly overlapping, from just behind the head to the base of the tail.
    2. Sew the two tiny ears to the top of the head.
    3. Sew the tapered tail to the back end of the body.

    Facial Features & Finishing

    Embroider a small nose at the tip of the snout and keep the face simple; the banded shell is the star of this pattern.

    Tips for a Better Result

    • Use a hook one size smaller than the yarn label suggests, so no stuffing shows.
    • Work rounds a little tighter than usual for a firm, well-shaped body.
    • Count your stitches after every round to catch mistakes early.

    Care & Safety

    If this toy is for a baby or small child, embroider the eyes instead of using safety eyes. Spot clean with a damp cloth and let it air dry.

    Frequently Asked Questions

    0

    Will the armadillo actually curl into a ball?

    1

    Because the shell bands are worked as separate flexible strips rather than one solid piece, the whole body can curl forward into a loose ball shape, especially if the body is not over-stuffed.

    Can I skip the plastic canvas in the bands?

    Yes, it is entirely optional. Soft yarn bands alone still give a nice ridged shell look, just with less rigid structure.

    Love a clever construction trick? Browse all our free crochet patterns.

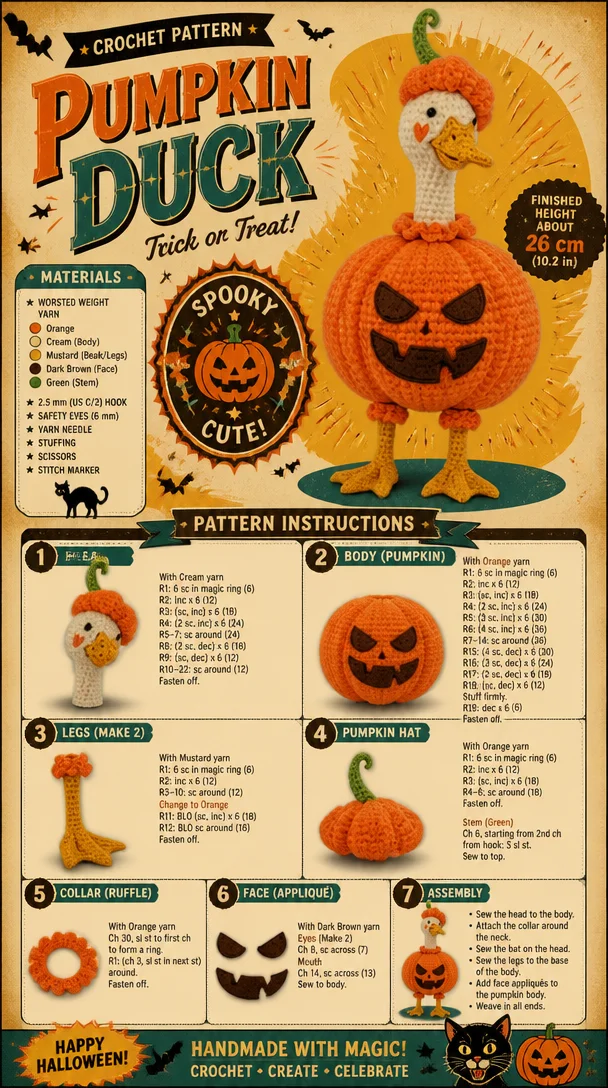
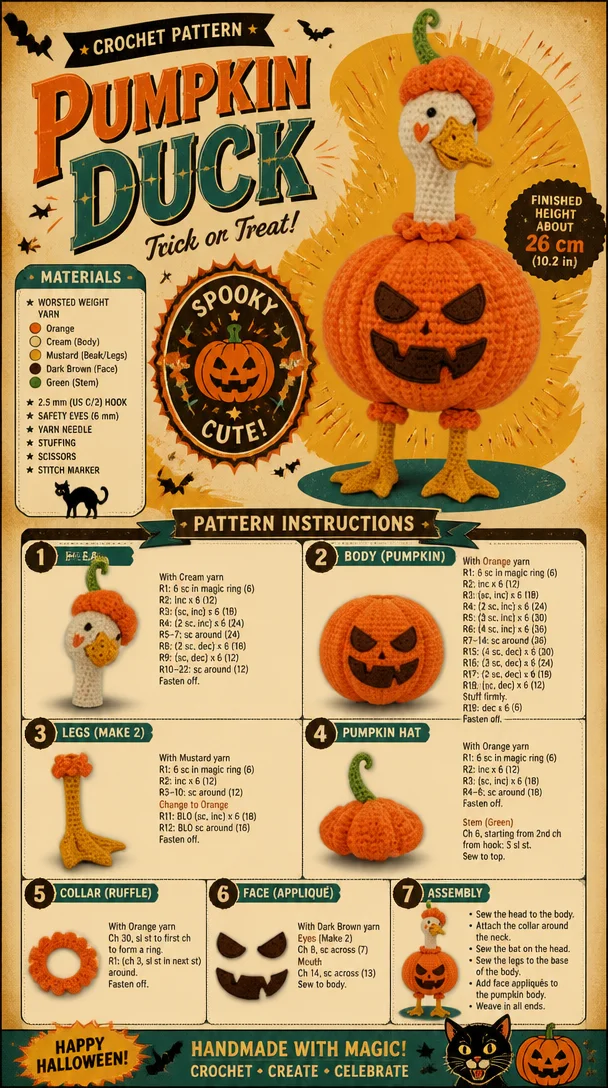
  • Easy Duck Painting: Cute Pumpkin Duck Drawing for Halloween

    Easy Duck Painting: Cute Pumpkin Duck Drawing for Halloween

    The Importance of Sustainable Practices in Modern Agriculture

    In recent years, the need for sustainable agricultural practices has become more pressing than ever. As the global population continues to grow, the demand for food increases, leading to heightened agricultural productivity. However, this productivity often comes at the cost of environmental degradation, depletion of natural resources, and adverse impacts on biodiversity.

    What is Sustainable Agriculture?

    Sustainable agriculture refers to farming practices that meet current food needs without compromising the ability of future generations to meet theirs. It encompasses a variety of techniques aimed at enhancing productivity while also preserving the ecological balance. Sustainable farming emphasizes the use of renewable resources, soil health, and the welfare of the communities involved in agriculture.

    Key Principles of Sustainable Agriculture

    1. Soil Health: Healthy soils are the foundation for sustainable farming. Techniques such as crop rotation, cover cropping, and reduced tillage help maintain soil fertility and structure.

    2. Water Management: Efficient water usage is crucial. Farmers are adopting methods like drip irrigation to minimize water waste and to enhance water conservation.

      Easy Duck Painting: Cute Pumpkin Duck Drawing for Halloween
    3. Crop Diversity: Introducing a variety of crops can reduce pest outbreaks and enhance ecosystem resilience. Monoculture farming often leads to increased vulnerability to pests and diseases.

    4. Natural Pest Management: Rather than relying solely on chemical pesticides, sustainable practices include integrated pest management (IPM) techniques that utilize beneficial insects and organic solutions to control pests.

    5. Community Involvement: Sustainable agriculture promotes the engagement of local communities, ensuring that farming practices support both social and economic well-being.

    Benefits of Sustainable Agriculture

    • Environmental Protection: By reducing reliance on harmful chemicals and fostering biodiversity, sustainable farming practices protect ecosystems.

    • Economic Viability: Sustainable practices can lead to lower input costs and improved market access for smallholder farmers, enhancing their financial stability.

    • Food Security: Sustainable agriculture improves food security by increasing the resilience of food systems against climate change and other disruptions.

    • Cultural Preservation: Many sustainable practices stem from traditional agricultural knowledge, helping to preserve cultural heritage while promoting innovation.

    Challenges Ahead

    Despite the apparent benefits of sustainable agriculture, there are significant challenges to its widespread adoption. These include:

    • Access to Resources: Many smallholder farmers lack access to the tools, training, and capital needed to implement sustainable practices.

    • Market Barriers: Consumers often prefer cheaper, conventionally produced food, making it difficult for sustainable farms to compete.

    • Climate Change: As climate change alters growing conditions, sustainable agriculture must adapt to maintain productivity and sustainability.

    Conclusion

    The future of global agriculture lies in our ability to implement sustainable practices that protect the environment, support community livelihoods, and ensure food security. As consumers become more aware of their food choices, the push for sustainably produced food will continue to grow. By embracing these practices, we can work towards a healthier planet for generations to come.

    For more insights on sustainable agriculture, visit FAO Sustainable Agriculture.

  • Easy Crochet Owl Pattern

    Easy Crochet Owl Pattern

    With its round shape, big eyes and short neck, an owl is a naturally easy and rewarding animal to crochet. This pattern keeps the head and body as one piece to keep things simple.

    Quick Pattern Overview

    Skill level Easy
    Finished size About 12 cm (4.75 in) tall
    Yarn DK or 8-ply cotton yarn, brown or grey, plus cream and orange
    Hook size 2.5 mm
    Estimated time 3 to 4 hours
    Techniques Magic ring, single crochet, increase, decrease
    Project type Amigurumi

    Materials You’ll Need

    Essential Materials

    • DK cotton yarn in brown or grey
    • A small amount of cream yarn for the face and belly
    • A small amount of orange yarn for the beak and feet
    • 2.5 mm crochet hook
    • 9 mm safety eyes, or thread to embroider the eyes (owls look best with large eyes)
    • Polyester stuffing
    • Tapestry needle, stitch marker and scissors

    Crochet Abbreviations

    MR magic ring
    ch chain
    sc single crochet
    inc increase (2 sc in same st)
    dec decrease (sc 2 sts together)
    st(s) stitch(es)
    FO fasten off

    Before You Start

    • Work in continuous rounds; do not join or turn.
    • Use a stitch marker in the first stitch of each round and move it up as you go.
    • The number in brackets at the end of a round is your stitch count for that round.
    • Stuff firmly but stop before the stitches start to gap.

    Easy Crochet Owl Pattern

    Body and Head (worked as one piece)

    1. Round 1: 6 sc in MR (6)
    2. Round 2: inc in each st (12)
    3. Round 3: (1 sc, inc) x 6 (18)
    4. Round 4: (2 sc, inc) x 6 (24)
    5. Round 5: (3 sc, inc) x 6 (30)
    6. Rounds 6 to 13: sc in each st (30). Change to cream for the face around round 8, working a wide oval patch, then continue in brown. Add safety eyes close together, high on the face, around round 9.
    7. Round 14: (3 sc, dec) x 6 (24)
    8. Round 15: (2 sc, dec) x 6 (18). Stuff firmly.
    9. Round 16: (1 sc, dec) x 6 (12)
    10. Round 17: dec x 6 (6). FO and close the hole.

    Wings (make 2)

    1. Round 1: 6 sc in MR (6)
    2. Round 2: (1 sc, inc) x 3 (9)
    3. Round 3: sc in each st (9)
    4. Round 4: (2 sc, inc) x 3 (12)
    5. Rounds 5 to 6: sc in each st (12)

    FO and leave a long tail. Do not stuff. Flatten before sewing.

    Ear Tufts (make 2, tiny)

    1. Round 1: 6 sc in MR (6)
    2. Round 2: sc in each st (6)

    FO and leave a short tail. Do not stuff; pinch flat into a point.

    Feet (make 2, flat, orange)

    1. Round 1: 6 sc in MR (6)
    2. Round 2: sc in each st (6)

    FO and leave a short tail. Do not stuff; flatten before sewing.

    Assembly

    1. Sew the two wings to the sides of the body, folded slightly forward like a closed wing.
    2. Sew the two ear tufts to the top of the head, close together.
    3. Sew the two feet to the bottom of the body so the owl can perch upright.

    Facial Features & Finishing

    Embroider a small orange triangle beak just below and between the eyes. A few short stitches around the cream face patch help define the classic heart or round owl face shape.

    Tips for a Better Result

    • Use a hook one size smaller than the yarn label suggests, so the stitches stay tight and no stuffing shows.
    • Work rounds a little tighter than usual for a firm, well-shaped body.
    • Count your stitches after every round to catch mistakes early.

    Care & Safety

    If this toy is for a baby or small child, embroider the eyes instead of using safety eyes, and check all small parts are sewn on securely. Spot clean with a damp cloth and let it air dry.

    Frequently Asked Questions

    Can I skip the ear tufts?

    Yes, leaving them off simply gives you a different owl species look, such as a barn owl instead of a horned owl.

    What colours work well for an owl?

    Brown, grey and rust are the most realistic choices, though pastel colours make a lovely soft, decorative version.

    How do I make the owl stand upright?

    Flatten the feet well and sew them flush to the body, positioned slightly forward for balance.

    Related Crochet Patterns

    Continue with more woodland projects like our crochet opossum pattern, or see all our free crochet patterns.