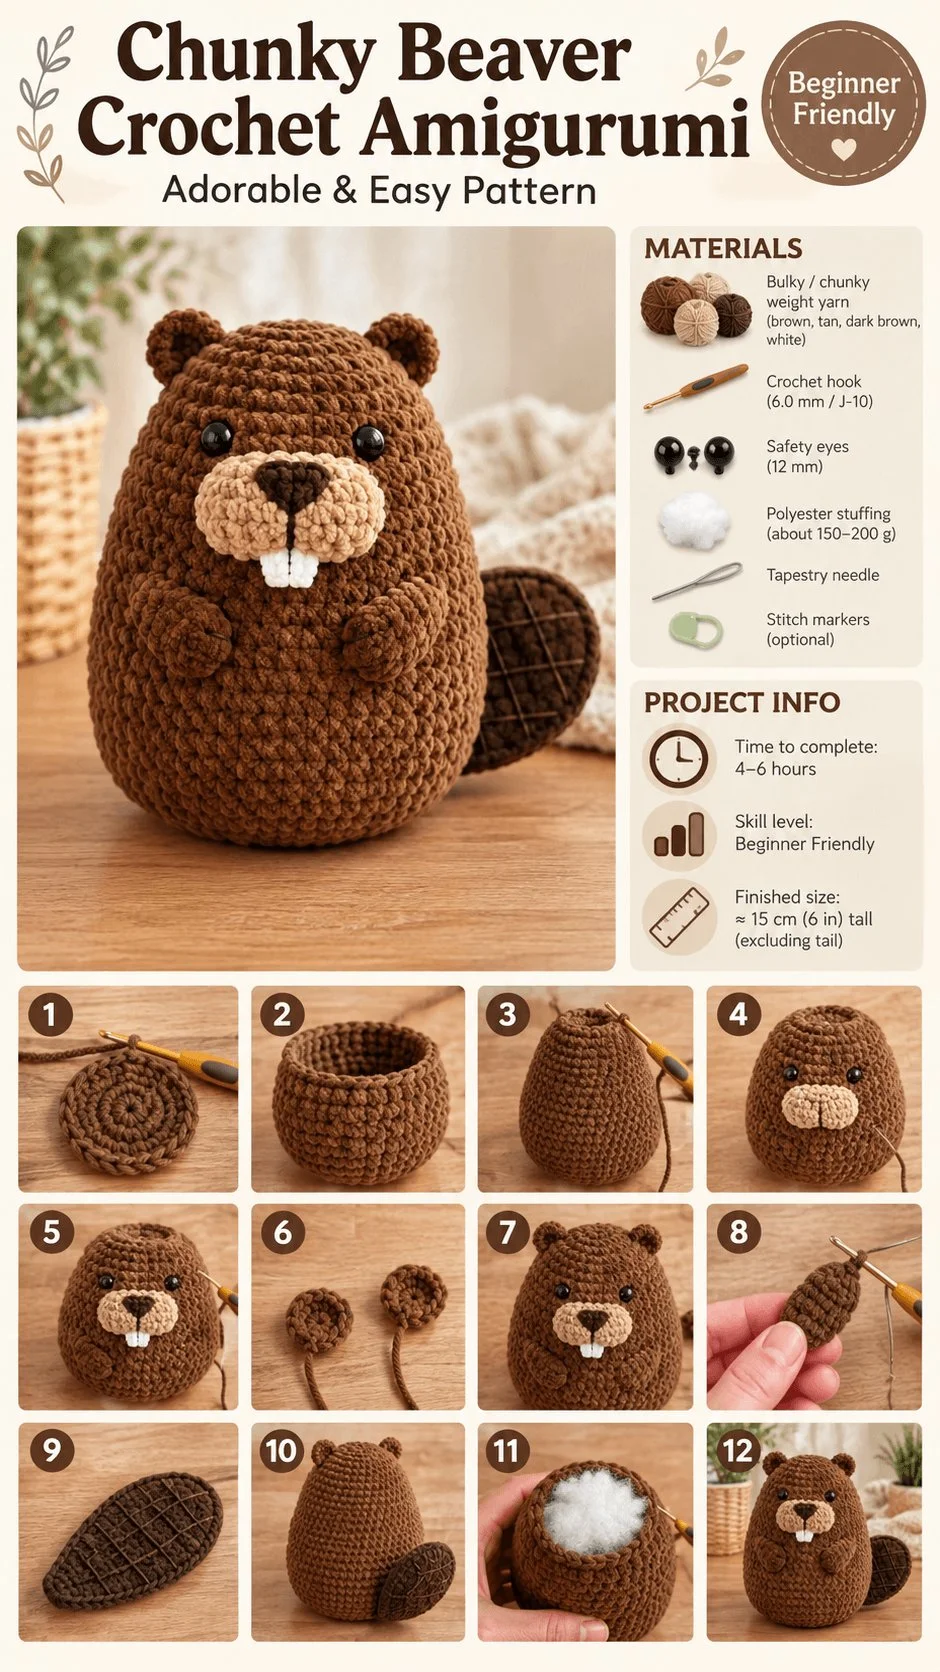
Are you ready to dive into the world of crochet with an adorable project? This chunky beaver amigurumi features a signature flat paddle tail and sweet round face, perfect for beginners.
Quick Pattern Overview
| Skill level | Easy |
| Finished size | About 12 cm (4.75 in) long |
| Yarn | DK or 8-ply cotton yarn, brown, plus a lighter tan for the tail and feet |
| Hook size | 2.5 mm |
| Estimated time | 3 to 4 hours |
Materials You’ll Need
- DK cotton yarn in brown and tan
- 2.5 mm crochet hook
- 6 mm safety eyes, or thread to embroider the eyes
- Polyester stuffing
- Tapestry needle, stitch marker and scissors
Crochet Abbreviations
| MR | magic ring |
| ch | chain |
| sc | single crochet |
| inc | increase (2 sc in same st) |
| dec | decrease (sc 2 sts together) |
| st(s) | stitch(es) |
| FO | fasten off |
Before You Start
- Work in continuous rounds; do not join or turn.
- Use a stitch marker in the first stitch of each round.
- The number in brackets at the end of a round is your stitch count.
- Stuff firmly but stop before the stitches start to gap.
Free Crochet Beaver Pattern
Head
- Round 1: 6 sc in MR (6)
- Round 2: inc in each st (12)
- Round 3: (1 sc, inc) x 6 (18)
- Rounds 4 to 7: sc in each st (18). Add safety eyes between rounds 4 and 5, about 6 sts apart.
- Round 8: (1 sc, dec) x 6 (12). Stuff firmly.
- Round 9: dec x 6 (6). FO and close the hole.
Teeth (tiny, white, optional)
Cut two tiny rectangles of white felt, or embroider two short wide stitches, and attach just below the nose area.
Ears (make 2, small and round)
- Round 1: 6 sc in MR (6)
FO and leave a short tail. Do not stuff; flatten before sewing.
Body (chunky and round)
- Round 1: 6 sc in MR (6)
- Round 2: inc in each st (12)
- Round 3: (1 sc, inc) x 6 (18)
- Round 4: (2 sc, inc) x 6 (24)
- Round 5: (3 sc, inc) x 6 (30)
- Rounds 6 to 9: sc in each st (30)
- Round 10: (3 sc, dec) x 6 (24)
- Round 11: (2 sc, dec) x 6 (18). Stuff firmly.
- Round 12: (1 sc, dec) x 6 (12)
- Round 13: dec x 6 (6). FO and close the hole.
Legs (make 4, short)
- Round 1: 6 sc in MR (6)
- Rounds 2 to 3: sc in each st (6)
FO and leave a short tail. Stuff lightly.
Tail (flat, paddle shaped, tan)
Chain 8, sc in the 2nd chain from the hook and across (7 sts). Work 5 more rows of sc, 7 sts each, then work 1 row decreasing to a rounded point. FO, leaving a long tail.
Assembly
- Sew the two ears to the top of the head.
- Sew the head to the front of the body.
- Sew the four short legs to the underside of the body.
- Sew the flat paddle tail to the back end of the body, angled slightly downward like a real beaver’s tail.
Facial Features & Finishing
Embroider a small nose above the teeth, if adding them, for a cheerful, buck-toothed beaver expression.
Tips for a Better Result
- Use a hook one size smaller than the yarn label suggests, so no stuffing shows.
- Work rounds a little tighter than usual for a firm, well-shaped body.
- Count your stitches after every round to catch mistakes early.
Care & Safety
If this toy is for a baby or small child, embroider the eyes instead of using safety eyes. Spot clean with a damp cloth and let it air dry.
Frequently Asked Questions
0
Is the paddle tail hard to make?
1
No, it is worked as a simple flat rectangle in rows, shaped at the end, making it one of the easiest parts of the whole pattern.
Can I leave off the teeth detail?
Yes, the beaver still looks great without them, though the little teeth add a lot of charm and personality.
Love chunky, easy amigurumi? Browse all our free crochet patterns.




Leave a Reply