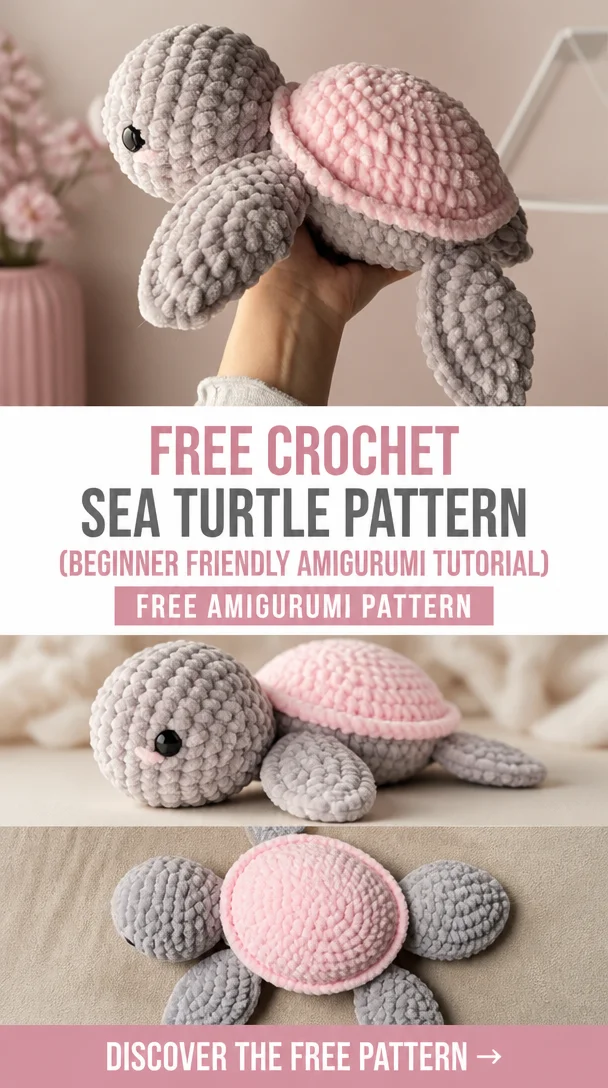
Free Crochet Sea Turtle Pattern (Beginner Friendly Amigurumi Tutorial)
Are you ready to craft a delightful and squishy crochet toy? This free chunky crochet sea turtle pattern is perfect for beginners and provides a charming project that you can complete in no time! 🐢🩷 Using super soft blanket yarn, this amigurumi tutorial guides you step-by-step in creating your very own cute plushie. The sea turtle design is not just adorable but also highly cuddly, making it an excellent gift for children or a whimsical decor addition. Follow along with this easy tutorial and start your crochet journey today!
Crochet Sea Turtle Pattern Overview
- Skill Level: Beginner
- Finished Size: Approximately 12 inches (depending on yarn and hook size)
- Crochet Hook: Size suitable for blanket yarn
- Yarn Type: Super soft blanket yarn
- Main Colors: Green, with color accents optional
- Construction Method: Amigurumi (crocheted in continuous rounds)
- Approximate Time: A few hours depending on your crochet speed
- Beginner-Friendly: Yes
Materials You’ll Need
- Chunky blanket yarn (main color and optional accent colors)
- Crochet hook suitable for yarn thickness
- Stuffing (fiberfill)
- Safety eyes (recommended size)
- Yarn needle
- Stitch marker
- Scissors
- Embroidery thread for details
Crochet Abbreviations
- ch: chain
- sc: single crochet
- inc: increase (2 sc in the same stitch)
- dec: decrease (sc two stitches together)
- rnd: round
Before You Start
Before diving into the crochet sea turtle pattern, here are a few practical tips:
- Work in continuous rounds to avoid seams.
- Use a stitch marker to keep track of your rounds.
- Check your stitch counts regularly to ensure proper size.
- Stuff your turtle gradually to achieve a soft yet firm plush.
- Have your pieces ready for assembly as you finish crocheting them.
Free Crochet Sea Turtle Pattern
Shell
Round 1: Start with a magic ring, 6 sc in the ring.
Round 2: Inc in each stitch (12 sc).
Round 3: (1 sc, inc) around (18 sc).
Round 4: (2 sc, inc) around (24 sc).
Round 5-7: Sc around (24 sc).
Fasten off and leave a long tail for sewing.
Body
Round 1: Magic ring, 6 sc in the ring.
Round 2: Inc in each stitch (12 sc).
Round 3: (1 sc, inc) around (18 sc).
Round 4: (2 sc, inc) around (24 sc).
Round 5-10: Sc around (24 sc).
Round 11: (2 sc, dec) around (18 sc).
Round 12: (1 sc, dec) around (12 sc).
Stuff lightly.
Head
Round 1: Magic ring, 6 sc in the ring.
Round 2: Inc in each stitch (12 sc).
Round 3: (1 sc, inc) around (18 sc).
Round 4: Sc around (18 sc).
Round 5: (1 sc, dec) around (12 sc).
Stuff and fasten off, leaving a long tail for sewing.
Arms (Make 4)
Round 1: Magic ring, 6 sc in the ring.
Round 2: Inc in each stitch (12 sc).
Round 3-4: Sc around (12 sc).
Fasten off and leave a long tail for sewing.
Assembly
- Body and Shell: Sew the shell to the body securely.
- Head: Attach the head to the top of the body, ensuring it is centered.
- Arms: Position the arms evenly around the lower section of the body and sew in place.
- Eyes: Attach safety eyes to the head, spaced appropriately.
- Finishing: Lightly stuff areas as needed to maintain shape.
Facial Features and Finishing Details
Embellish your sea turtle’s face with a simple embroidered smile using embroidery thread. This adds charm! Position the safety eyes above the smile for a sweet expression.
Tips for a Better Result
- Keep your tension consistent throughout to ensure an even finish.
- If you encounter uneven stuffing, adjust it while shaping the limbs.
- Use contrasting yarn to highlight different sections for added texture.
Customization Ideas
- Experiment with vibrant colors for the turtle’s shell.
- Add stripes or polka dots to make your turtle unique.
- Consider using different yarn types, such as cotton, for varied textures.
Common Problems and Troubleshooting
- Uneven Stuffing: Ensure you distribute stuffing evenly and adjust after assembly.
- Loose Stitches: Check your tension to avoid gaps between stitches.
- Alignment Issues: Pin pieces together before sewing to achieve perfect placement.
Care and Safety
For care, hand wash your crochet sea turtle with mild soap and air dry. Be mindful of safety with small parts like safety eyes, especially if intended for young children.
Frequently Asked Questions
- Is this crochet turtle pattern beginner-friendly?
Yes, it’s designed for beginners with simple stitches. - What yarn is best for this crochet turtle?
Super soft blanket yarn is ideal for a plush texture. - How long does it take to crochet this animal?
It typically takes a few hours depending on your crochet speed. - Can I make this crochet animal larger or smaller?
Yes, you can adjust the size by using different yarn weights and hook sizes. - Can I use different yarn colors?
Absolutely! Feel free to mix and match colors for a unique look. - How do I keep the finished animal in shape?
Store it flat, and freshen it up by fluffing the stuffing as needed.
Conclusion
Crafting your own adorable crochet sea turtle is not only satisfying but also a fantastic way to boost your crochet skills. We hope you enjoy creating this delightful plushie—so grab your yarn and get started today!




Leave a Reply