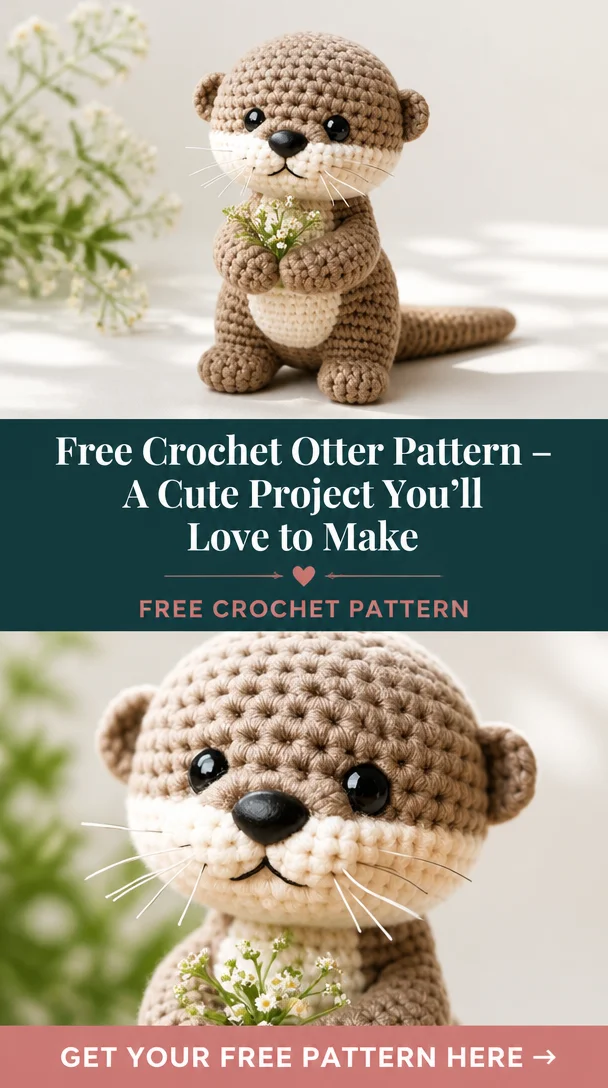
Amigurumi Cute Otter Crochet Free Pattern
Dive into the delightful world of crochet with this Amigurumi Cute Otter Crochet Free Pattern! Perfect for toy enthusiasts or anyone looking to add a playful companion to their home, this adorable otter will bring a smile to your face. The cute otter is not just easy to make, it’s also a fun project that showcases your crochet skills. Whether you’re a beginner or an experienced crocheter, this pattern is suitable for anyone wanting to create a charming amigurumi animal. So grab your crochet hook and let’s get started on this cuddly creation!
Crochet Otter Pattern Overview
- Skill level: Easy
- Finished size: Approximately 8 inches tall (depending on yarn choice and tension)
- Crochet hook: 3.5 mm (E)
- Yarn type: Worsted weight, medium yarn
- Main colors: Brown for the body, cream for the belly, and black for safety eyes
- Construction method: Worked in continuous rounds
- Approximate time: 3-5 hours
- Beginner-friendly: Yes
Materials You’ll Need
- Worsted weight yarn in brown and cream
- 3.5 mm crochet hook
- Fiberfill stuffing
- Safety eyes
- Yarn needle
- Stitch marker
- Scissors
- Embroidery thread in black and white
Crochet Abbreviations
- ch: chain
- sc: single crochet
- inc: increase
- dec: decrease
- st: stitch
- sl st: slip stitch
- rnd: round
Before You Start
Before diving into the pattern, keep these tips in mind:
- Work in continuous rounds unless otherwise specified.
- Use a stitch marker to keep track of your rounds.
- Check your stitch counts at the end of each round to ensure accuracy.
- Stuff your otter gradually as you work to maintain shape and structure.
- Keep track of your rounds for a consistent look during assembly.
Free Crochet Otter Pattern
Head
Round 1: Start with a magic ring and work 6 sc into the ring.
Round 2: Inc in each stitch around (12).
Round 3: Sc in next stitch, inc repeat around (18).
Round 4-7: Sc in each stitch around (18).
Round 8: Sc in next stitch, dec repeat around (12).
Round 9: Dec around (6).
Fasten off, leaving a long tail for sewing. Stuff the head firmly.
Body
Round 1: Start with a magic ring and work 6 sc into the ring.
Round 2: Inc in each stitch around (12).
Round 3: Sc in next stitch, inc repeat around (18).
Round 4-7: Sc in each stitch around (18).
Round 8: Sc in next stitch, dec repeat around (12).
Round 9: Dec around (6).
Fasten off.
Arms (Make 2)
Round 1: Start with a magic ring and work 6 sc into the ring.
Round 2-4: Sc in each stitch around (6).
Fasten off and leave a long tail for sewing.
Legs (Make 2)
Round 1: Start with a magic ring and work 6 sc into the ring.
Round 2-4: Sc in each stitch around (6).
Fasten off and leave a long tail for sewing.
Tail
Round 1: Ch 10, sc in second ch from hook and in each ch across.
Fasten off, leaving a long tail for sewing.
Assembly
- Attach the head: Align the head to the top of the body and sew securely in place.
- Position the arms: Sew each arm to the sides of the body, slightly below the head.
- Attach the legs: Sew each leg securely to the bottom of the body.
- Tail placement: Attach the tail to the back of the body.
- Facial features: Sew on the safety eyes and embroider a small nose and mouth using black and white embroidery thread.
Facial Features and Finishing Details
For the otter’s face, attach the safety eyes approximately two stitches apart. Use the embroidery thread to stitch a small oval-shaped nose and add a simple smile to give your otter a friendly appearance.
Tips for a Better Result
- To avoid uneven stuffing, add fiberfill gradually and shape the parts as you go.
- Ensure your stitches are tidy and tight for a polished look.
- Use contrasting colors for facial embroidery to enhance the otter’s expression.
Customization Ideas
Feel free to personalize your otter by experimenting with different yarn colors or patterns. You can also add small accessories, such as a tiny scarf or a small crochet fish to make it even more special!
Common Problems and Troubleshooting
- Uneven stuffing: Check that you are distributing fiberfill evenly.
- Loose stitches: Ensure your tension is consistent throughout the project.
- Incorrect stitch counts: Count stitches after each round to correct mistakes early.
- Parts looking uneven: Adjust stuffing levels and the tension of your stitches.
Care and Safety
To clean your crocheted otter, spot clean it with a damp cloth. Be cautious if using safety eyes, especially for small children. Ensure that all parts are securely attached to prevent any choking hazards.
Frequently Asked Questions
- Is this crochet otter pattern beginner-friendly?
Yes, the pattern is designed for beginners. - What yarn is best for this crochet otter?
Worsted weight, medium yarn works best for this project. - How long does it take to crochet this animal?
Expect 3-5 hours to complete the entire otter. - Can I make this crochet animal larger or smaller?
Yes, altering your yarn weight and hook size can change the finished size. - Can I use different yarn colors?
Absolutely! Feel free to customize your otter with your favorite colors. - How do I keep the finished animal in shape?
Store it carefully, and avoid crushing it to maintain its shape.
Conclusion
Creating your own Amigurumi Cute Otter adds a charming touch to your crochet collection. With this free pattern, you’re sure to enjoy the process and the delightful results. So, grab your materials and start crocheting your new favorite companion today!




Leave a Reply