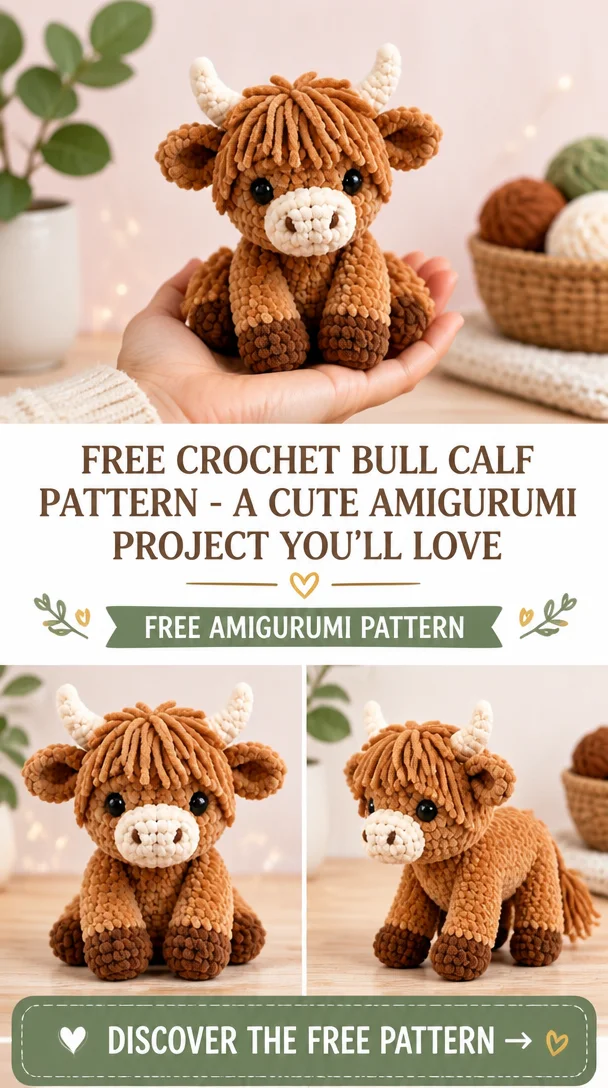
Cute Crochet Animal Patterns: Amigurumi Bull Calf Toy Tutorial
Unleash your creativity with this adorable Amigurumi Bull Calf Toy tutorial! Crocheting a bull calf not only brings a whimsical touch to your toy collection but also offers a rewarding crafting experience. This charming amigurumi character is perfect for gifting to friends, decorating your nursery, or even as a cozy companion for your little ones. Whether you’re a beginner eager to explore amigurumi techniques or an experienced crocheter searching for a fun project, this pattern provides straightforward instructions and delightful results. Let’s dive into this enjoyable crafting journey!
Crochet Bull Calf Pattern Overview
- Skill Level: Beginner
- Finished Size: Approximately 8 inches tall
- Crochet Hook: Size G (4.0mm)
- Yarn Type: Medium weight (4)
- Main Colors: Cream, light brown, dark brown
- Construction Method: Worked in continuous rounds
- Approximate Time: 4-6 hours
- Beginner-Friendly: Yes!
Materials You’ll Need
- Medium weight yarn (cream, light brown, dark brown)
- Crochet hook (size G)
- Polyester stuffing
- Safety eyes (12mm)
- Yarn needle
- Stitch marker
- Scissors
- Embroidery thread (black for details)
- Optional: fabric for accessories (like a scarf)
Crochet Abbreviations
- Ch: Chain
- Sc: Single Crochet
- Inc: Increase (2 sc in same stitch)
- Dec: Decrease (2 sc together)
- Rnd: Round
Before You Start
- Work in continuous rounds: This helps maintain a seamless look for your bull calf.
- Use a stitch marker: This is essential to track your rounds easily.
- Check your stitch counts regularly: Ensures your piece stays on track.
- Stuff gradually: As you crochet, add stuffing to help shape the limbs and body.
- Keep track of rounds: Refer back to stitch counts for accuracy during assembly.
Free Crochet Bull Calf Pattern
Head
Round 1: 6 sc in a magic ring (6)
Round 2: Inc in each stitch (12)
Round 3: (Sc in next stitch, inc) repeat around (18)
Round 4-6: Sc in each stitch (18)
Round 7: (Sc in next stitch, dec) repeat around (12)
Stuff the head lightly.
Round 8: Dec to close (6)
Body
Round 1: 6 sc in a magic ring (6)
Round 2: Inc in each stitch (12)
Round 3: (Sc in next stitch, inc) repeat around (18)
Round 4-8: Sc in each stitch (18)
Round 9: (Sc in next stitch, dec) repeat around (12)
Stuff the body lightly.
Round 10: Dec to close (6)
Ears (Make 2)
Round 1: 5 sc in a magic ring (5)
Round 2: (Sc in next stitch, inc) repeat around (7)
Round 3: Sc in each stitch (7)
Finish off, leaving a long tail for sewing.
Legs (Make 4)
Round 1: 6 sc in a magic ring (6)
Round 2: Inc in each stitch (12)
Round 3-5: Sc in each stitch (12)
Stuff lightly, finish off, and leave long tails for assembly.
Tail
Ch 10, sl st back to the first ch to form a loop. Finish and leave a tail for attaching.
Assembly
- Sew the head to the body: Position it centered and secure with a yarn needle and thread.
- Attach the ears: Position them on the top sides of the head.
- Affix the legs: Sew two legs to the front bottom and two to the back.
- Add the tail: Securely stitch at the rear of the body.
Facial Features and Finishing Details
- Attach safety eyes to the head, ensuring they are placed evenly.
- Use black embroidery thread to create a simple nose and a small mouth.
- Optional: Add accents or embellishments, like a scarf or a bell.
Tips for a Better Result
- Tighten your stitches for a neat finish, especially around the head and body.
- Use contrasting colors to enhance features and details, like the eyes or horns.
Customization Ideas
- Change color patterns for the calf’s coat, creating spots or stripes.
- Use different yarn textures for a unique feel.
- Experiment with accessories, such as a cute bow tie or a hat.
Common Problems and Troubleshooting
- Uneven stuffing: Utilize smaller amounts of stuffing gradually, ensuring a uniform shape.
- Loose stitches: Check your tension; tighter stitches will hold better.
- Mismatched parts: Verify stitch counts before assembly to avoid misshapen limbs.
Care and Safety
Handmade crochet toys should be washed gently by hand and dried flat to maintain their shape. For safety, ensure that all small parts, like safety eyes, are securely attached to avoid choking hazards in children.
Frequently Asked Questions
- Is this crochet bull calf pattern beginner-friendly? Yes, it is ideal for beginners learning amigurumi techniques.
- What yarn is best for this crochet bull calf? A medium weight (4) yarn works best for durability and softness.
- How long does it take to crochet this animal? Expect to spend around 4-6 hours from start to finish.
- Can I make this crochet animal larger or smaller? Adjust the yarn weight and hook size to create various sizes.
- Can I use different yarn colors? Absolutely! Feel free to mix and match colors to create your unique calf.
- How do I keep the finished animal in shape? Regularly check for loose stuffing and reshape as necessary.
Conclusion
Creating your very own Amigurumi Bull Calf is not only an enjoyable project but also a chance to craft an adorable friend for yourself or someone special. So gather your materials and get started on this delightful crochet journey!




Leave a Reply