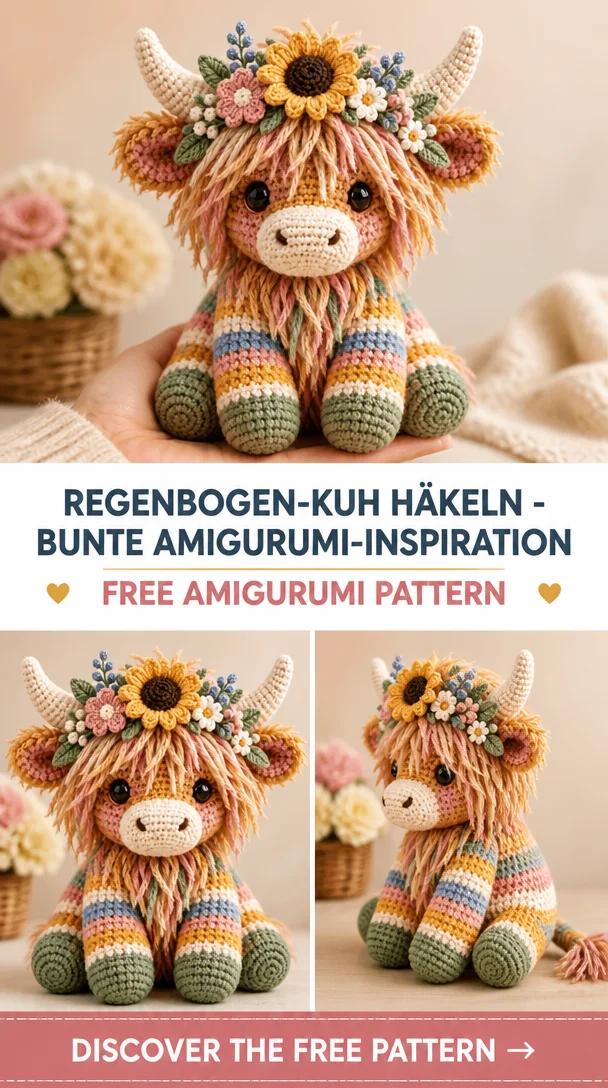
Crochet Rainbow Cow – Colorful Amigurumi Inspiration
Crocheting a Rainbow Cow is an exciting and joyful project that adds a splash of color to any space. With its vibrant stripes, floral accents, and friendly cow shape, this adorable amigurumi creation is perfect for anyone looking to brighten their décor or gift someone special. Beginners and experienced crocheters alike can enjoy making this charming animal, as it combines straightforward techniques with delightful results. Plus, who wouldn’t love a colorful cow as a companion? Dive into this fun project and watch your crochet skills blossom!
Crochet Rainbow Cow Pattern Overview
- Skill Level: Beginner to intermediate
- Finished Size: Approximately 10 inches tall
- Crochet Hook: 3.5 mm (E) or suitable for your yarn
- Yarn Type: Medium-weight yarn (worsted)
- Main Colors: Various vibrant colors for stripes, plus white for the body
- Construction Method: Worked in continuous rounds
- Approximate Time: 4-6 hours
- Beginner-Friendly: Yes
Materials You’ll Need
- Medium-weight yarn in assorted colors
- Crochet hook (3.5 mm / E)
- Polyester stuffing
- Safety eyes (9 mm)
- Yarn needle
- Stitch marker
- Scissors
- Embroidery thread for adding details (optional)
Crochet Abbreviations
- CH: Chain
- SC: Single crochet
- INC: Increase
- DEC: Decrease
- ST: Stitch
- RND: Round
- FO: Finish off
Before You Start
- Work in Continuous Rounds: This helps avoid seam lines in your work.
- Use a Stitch Marker: To keep track of your rounds, place a stitch marker in the first stitch of each round.
- Check Stitch Counts: Regularly check your stitch counts to ensure your piece remains even.
- Stuff Gradually: As you crochet, add stuffing to maintain desired shape.
- Track Your Rounds: Keep note of which round you’re on to avoid confusion later.
- Prepare for Assembly: Organize each piece as you finish to make assembly smoother.
Free Crochet Rainbow Cow Pattern
Body
Round 1: CH 2, 6 SC in the second CH from the hook.
Round 2: INC in each ST around (12).
Round 3: (1 SC, INC) around (18).
Round 4–11: SC in each ST around (18).
Round 12: (1 SC, DEC) around (12).
Round 13: DEC around (6). FO, leaving a long tail for sewing.
Head
Round 1: CH 2, 6 SC in the second CH from the hook.
Round 2: INC in each ST around (12).
Round 3: (1 SC, INC) around (18).
Round 4–9: SC in each ST around (18).
Round 10: (1 SC, DEC) around (12).
Round 11: DEC around (6). FO, leaving a long tail for sewing.
Ears (Make 2)
Round 1: CH 2, 6 SC in the second CH from the hook.
Round 2: (1 SC, INC) around (9).
Round 3: SC in each ST around. FO, leaving a tail for sewing.
Legs (Make 4)
Round 1: CH 2, 6 SC in the second CH from the hook.
Round 2: INC in each ST around (12).
Round 3–5: SC in each ST around (12). FO, leaving a tail for sewing.
Tail
CH 15. FO and leave long tails for sewing.
Assembly
- Sew the Head: Attach the head to the body using the long tail left.
- Position the Ears: Place the ears on the top of the head and sew securely.
- Attach the Legs: Sew the legs into position on the bottom of the body, ensuring they are evenly spaced.
- Add the Tail: Position the tail at the back of the cow and sew it in place.
- Stuff: Make sure to stuff as you assemble, to maintain shape.
Facial Features and Finishing Details
- Safety Eyes: Position and attach safety eyes on the head.
- Embroider the Mouth and Nose: Use embroidery thread to create a smiling mouth and two nostrils.
- Add Flowers: Optionally, sew on small flowers to the body for extra decoration.
Tips for a Better Result
- Use a consistent tension throughout your work for a more uniform look.
- Experiment with different colors for a unique appearance.
- Detail your cow with additional accessories like a scarf or bow.
Customization Ideas
- Experiment with a variety of colors for stripes beyond the usual rainbow palette.
- Play with yarn textures, like using soft cotton or fuzzy yarn for a different feel.
- Change the size by using different yarn weights and hooks.
- Add unique facial expressions by adjusting the mouth and eye placements.
Common Problems and Troubleshooting
- Uneven Stuffing: Add stuffing gradually and check for firmness.
- Loose Stitches: Check your tension and consider using a smaller hook.
- Incorrect Stitch Counts: Recount regularly and adjust if needed.
- Assembly Alignment: Lay pieces out before sewing to find the best placement.
Care and Safety
To ensure the longevity of your Crochet Rainbow Cow, hand wash gently and lay flat to dry. If using safety eyes, monitor for any loose pieces, especially if given to small children.
Frequently Asked Questions
-
Is this crochet Rainbow Cow pattern beginner-friendly?
Yes, this pattern is suitable for beginners with some experience. -
What yarn is best for this crochet animal?
A medium-weight yarn works best, allowing for vibrant colors and good structure. -
How long does it take to crochet this animal?
You can expect to spend around 4-6 hours completing this project. -
Can I make this crochet animal larger or smaller?
Yes, by adjusting your yarn weight and hook size, you can customize the size. -
Can I use different yarn colors?
Absolutely! Feel free to unleash your creativity with different color combinations. -
How do I keep the finished animal in shape?
Proper stuffing and gentle handling will keep your cow looking great.
Conclusion
Making your very own Crochet Rainbow Cow is not only a delightful challenge but also a rewarding experience. With its cheerful design and vibrant colors, this amigurumi will surely bring joy to any space. Gather your materials and start your crochet journey today!




Leave a Reply