Blog

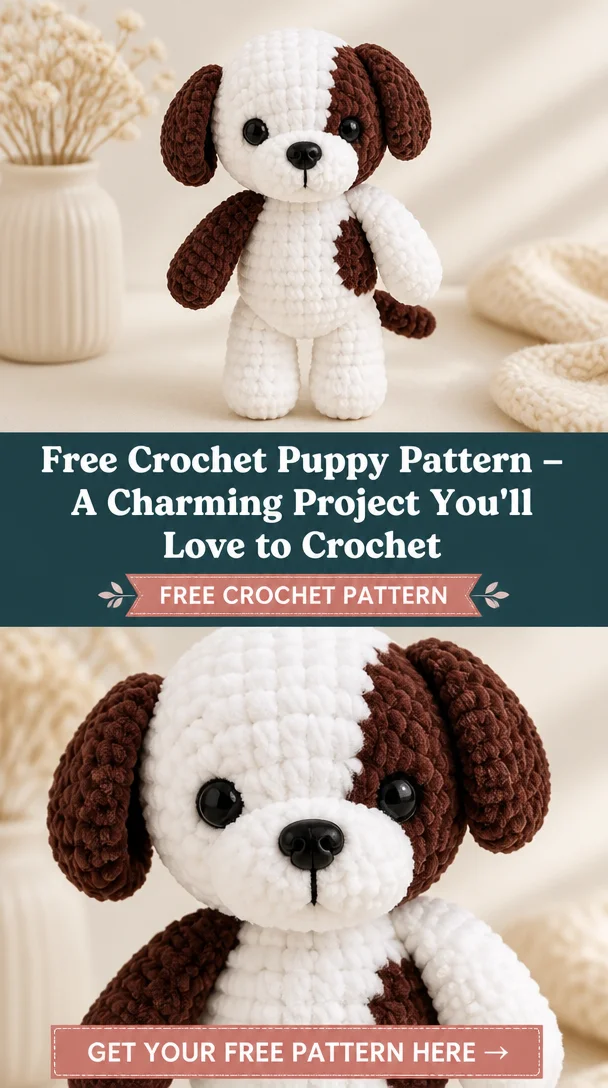
  • Free Crochet Puppy Pattern – A Charming Project You’ll Love to Crochet

    Free Crochet Puppy Pattern – A Charming Project You’ll Love to Crochet

    Cute Crochet Puppy Amigurumi Pattern | Easy Plush Stuffed Dog Tutorial

    Create the sweetest plush puppy with this easy crochet amigurumi pattern! This adorable fluffy stuffed dog is perfect for anyone looking to make a unique handmade gift or charming nursery decor. Featuring a cozy design and crafted with soft chunky yarn, this project is not only fun but also relatively quick to complete. With step-by-step instructions covering the head, body, paws, ears, and delightful face shaping, this pattern is ideal for confident beginners and intermediate crocheters alike. Get ready to embark on a cozy crocheting adventure as you bring this cute puppy to life! 🧶🐶

    Crochet Puppy Pattern Overview

    • Skill Level: Confident Beginners to Intermediate
    • Finished Size: Approximately 10 inches tall (varies with yarn and hook size)
    • Crochet Hook: Size I (5.5 mm) or as needed for gauge
    • Yarn Type: Soft chunky yarn
    • Main Colors: (suggested colors: brown, white, black) – feel free to vary
    • Construction Method: Worked in continuous rounds
    • Approximate Time: 4-6 hours
    • Beginner-Friendly: Yes, with guidance

    Materials You’ll Need

    • Soft chunky yarn in desired colors
    • Size I (5.5 mm) crochet hook
    • Stuffing (fiberfill or similar)
    • Safety eyes (optional, based on preference)
    • Yarn needle for sewing and weaving ends
    • Stitch marker (to mark rounds)
    • Scissors
    • Embroidery thread (for facial features)

    Crochet Abbreviations

    • ch = chain
    • sc = single crochet
    • inc = increase (2 sc in the same stitch)
    • dec = decrease (single crochet two together)
    • sl st = slip stitch
    • rnd = round

    Before You Start

    Before diving into the pattern, here are a few practical tips:

    • Working in Continuous Rounds: This pattern is made using continuous rounds, so be sure not to join at the end of each round unless specified.
    • Using a Stitch Marker: Use a stitch marker to keep track of your rounds.
    • Check Your Stitch Counts Regularly: This will help you avoid any potential mistakes.
    • Stuff Gradually: Add stuffing as you go to shape the body and head effectively.
    • Keep Track of Rounds: Maintain a notepad for rounds completed and your current round to ensure accuracy.

    Free Crochet Puppy Pattern

    Head

    Round 1: Start with a magic ring and make 6 sc in the ring.
    Round 2: Inc in each stitch around (12 sc).
    Round 3: Sc in next stitch, inc around (18 sc).
    Round 4: Sc in next 2 stitches, inc around (24 sc).
    Round 5-10: Sc in each stitch around (24 sc).
    Round 11: Sc in next 2 stitches, dec around (18 sc).
    Round 12: Sc in next stitch, dec around (12 sc).
    Round 13: Dec around (6 sc). Fasten off and leave long tail for sewing.

    Body

    Round 1: Start with a magic ring and make 6 sc in the ring.
    Round 2: Inc in each stitch around (12 sc).
    Round 3: Sc in next stitch, inc around (18 sc).
    Round 4: Sc in next 2 stitches, inc around (24 sc).
    Round 5-15: Sc in each stitch around (24 sc).
    Round 16: Sc in next 2 stitches, dec around (18 sc).
    Round 17: Sc in next stitch, dec around (12 sc).
    Add stuffing before closing. Fasten off and leave long tail for sewing.

    Ears (Make 2)

    Round 1: Start with a magic ring and make 6 sc in the ring.
    Round 2: Inc in each stitch around (12 sc).
    Round 3: Sc in next stitch, inc around (18 sc).
    Round 4: Sc in each stitch around (18 sc).
    Round 5: Dec in each stitch around (9 sc).
    Fasten off, leaving a long tail for sewing.

    Paws (Make 4)

    Round 1: Start with a magic ring and make 6 sc in the ring.
    Round 2: Inc in each stitch around (12 sc).
    Round 3-4: Sc in each stitch around (12 sc).
    Fasten off, leaving a long tail for sewing.

    Assembly

    1. Attach the Head: Position the head on the body and sew it securely.
    2. Attach the Ears: Sew ears to the sides of the head, placing them slightly back.
    3. Attach the Paws: Sew the front paws to the bottom of the body, and back paws to the corresponding sides.
    4. Shape Carefully: As you attach parts, ensure they are securely stuffed and positioned correctly.

    Facial Features and Finishing Details

    For the puppy face, securely attach safety eyes in place, then use embroidery thread to create a small nose and a smiling mouth. Add more detailing as needed for expression. Consider using different colors for various facial features to enhance cuteness.

    Tips for a Better Result

    • Use a Lighter Yarn: If you want a more delicate puppy, try using lighter-weight yarn for a smaller finish.
    • Experiment with Colors: Mix and match colors to keep each puppy unique.
    • Securely Attach Parts: Check that parts are firmly secured so they can withstand cuddling.

    Customization Ideas

    • Change the puppy’s colors to create a unique look.
    • Introduce stripes or spots using different color yarns.
    • Add accessories such as a collar made from ribbon or tiny beads.

    Common Problems and Troubleshooting

    • Uneven Stuffing: Make sure to distribute stuffing evenly to prevent lumps.
    • Loose Stitches: Ensure you are using the right tension for a snug finish.
    • Incorrect Stitch Counts: Keep track of your rounds carefully to avoid this issue.
    • Alignment Issues While Assembling: Position pieces before securing them to check alignment visually.

    Care and Safety

    To care for your crocheted puppy, hand wash it gently and lay it flat to dry. If safety eyes or other small parts are used, ensure they are securely attached, especially if the toy is for small children.

    Frequently Asked Questions

    • Is this crochet puppy pattern beginner-friendly?
      Yes, this pattern is suitable for confident beginners with clear instructions.

    • What yarn is best for this crochet puppy?
      Soft chunky yarn works best for a cuddly finish.

    • How long does it take to crochet this animal?
      It typically takes around 4-6 hours.

    • Can I make this crochet animal larger or smaller?
      Yes, using a different yarn weight or hook size will change the dimensions.

    • Can I use different yarn colors?
      Absolutely! Feel free to mix colors to create various puppy designs.

    • How do I keep the finished animal in shape?
      Regularly fluff the stuffing and avoid heavy washing to maintain its form.

    Conclusion

    This cute crochet puppy amigurumi pattern is a delightful project that’s perfect for any crocheter looking to create something charming and cuddly. With a few hours of fun stitching, you’ll have an adorable plush puppy ready to gift or decorate your nursery. Happy crocheting!
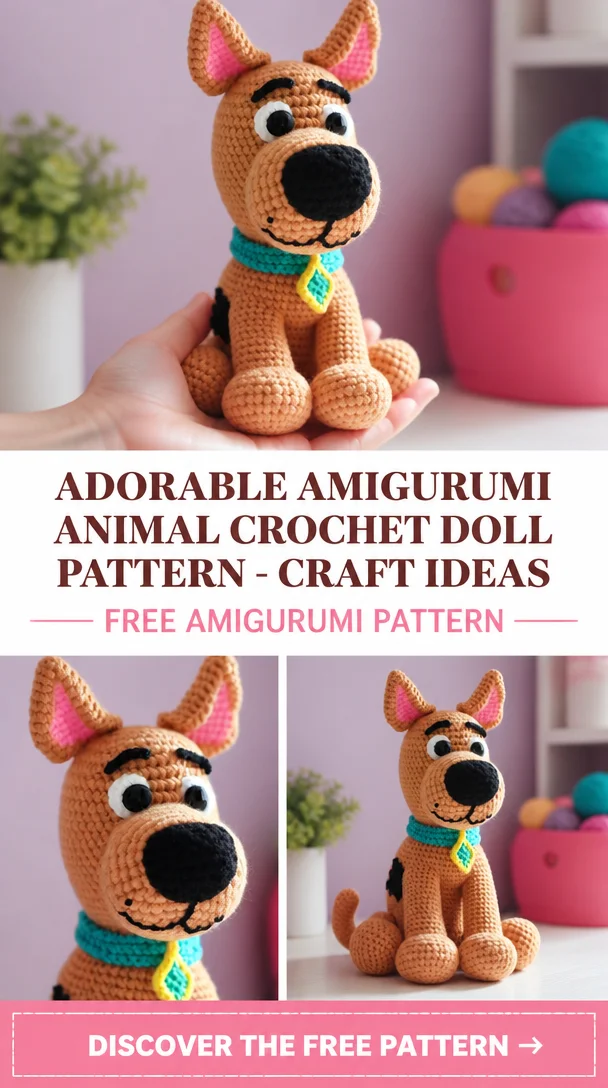
  • Scooby-Doo Amigurumi Crochet Doll Pattern – Crafts Ideas

    Scooby-Doo Amigurumi Crochet Doll Pattern – Crafts Ideas

    Scooby-Doo Amigurumi Crochet Doll Pattern – Crafts Ideas

    Dive into the world of crochet with the Scooby-Doo Amigurumi, a fun and delightful project that brings the beloved canine character from the classic cartoon to life. This crochet pattern is perfect for fans of all ages who want to create a charming representation of Scooby-Doo himself. Not only is this an enjoyable project to undertake, but it also allows you to craft a unique gift or decoration for any Scooby-Doo enthusiast. Suitable for intermediate crocheters who have some experience with amigurumi, this pattern offers a fulfilling challenge while rewarding you with a cuddly, finished creation.

    Crochet Scooby-Doo Pattern Overview

    • Skill Level: Intermediate
    • Finished Size: Approximately 10 inches tall
    • Crochet Hook: Size G (4.0 mm)
    • Yarn Type: Worsted weight yarn
    • Main Colors: Brown, black, and tan
    • Construction Method: Amigurumi (crocheted in continuous rounds)
    • Approximate Time: 6-8 hours
    • Beginner-Friendly: Some experience in amigurumi recommended

    Materials You’ll Need

    • Worsted weight yarn in brown, black, and tan
    • Size G (4.0 mm) crochet hook
    • Polyester stuffing
    • Safety eyes (12 mm)
    • Yarn needle
    • Stitch marker
    • Scissors
    • Embroidery thread in black
    • Craft felt (optional for details)

    Crochet Abbreviations

    • ch: chain
    • sl st: slip stitch
    • sc: single crochet
    • inc: increase (2 sc in the same stitch)
    • dec: decrease (single crochet two stitches together)
    • st: stitch
    • rnd: round

    Before You Start

    • Work in continuous rounds to avoid seams.
    • Use a stitch marker to keep track of your rounds.
    • Check stitch counts regularly to ensure evenness.
    • Stuff as you go for the best shape.
    • Keep track of rounds to maintain proper proportions.
    • Prepare the pieces for assembly before starting.

    Free Crochet Scooby-Doo Pattern

    Head

    Round 1: 6 sc in a magic ring.

    Round 2: inc in each st around (12 st).

    Round 3: (sc in the next st, inc) around (18 st).

    Round 4: (sc in the next 2 st, inc) around (24 st).

    Continue working in rounds until the head measures approximately 4 inches. After finishing, stuff lightly.

    Body

    Round 1: 6 sc in a magic ring.

    Round 2: inc in each st around (12 st).

    Round 3: (sc in the next st, inc) around (18 st).

    Round 4: (sc in the next 2 st, inc) around (24 st).

    Continue working until the body measures 6 inches.

    Note: Stuff the body before closing.

    Ears (Make 2)

    Round 1: 4 sc in a magic ring.

    Round 2: inc in each st around (8 st).

    Round 3: (sc in the next st, inc) around (12 st).

    Finish off, leaving a long tail for sewing.

    Arms (Make 2)

    Crochet similar to ears but 5 rounds long and thinner.

    Legs (Make 2)

    Crochet similar to the arms but longer, 7 rounds.

    Tail

    Round 1: 4 sc in a magic ring. Work straight for 5 inches.

    Assembly

    1. Attach the head to the body using the yarn needle.
    2. Position the ears on top of the head; sew securely.
    3. Attach arms to the sides and legs to the bottom.
    4. Align the tail to the back and sew.
    5. Stuff as needed during assembly for shape.

    Facial Features and Finishing Details

    Attach safety eyes and sew the mouth using embroidery thread to create the iconic Scooby-Doo expression. Use black felt to craft the nose and attach it just below the eyes. Finalize by sewing on details like eyebrows and a collar with a charm.

    Tips for a Better Result

    Choose the right yarn weight for a plush look, and consider using a smaller hook to create firmer stitches. Keep your tension consistent for an even appearance. Experiment with stuffing gradually to avoid overstuffing and create the desired shape.

    Customization Ideas

    Consider using different colors for a variety of designs, such as creating Scooby in costumes or accessories like a detective hat or scarf. Alternatively, varying the yarn texture can enhance the overall appearance.

    Common Problems and Troubleshooting

    • Uneven Stuffing: Add or remove stuffing until you achieve the desired firmness.
    • Loose Stitches: Tighten your tension, or consider using a smaller hook.
    • Incorrect Stitch Counts: Double-check your counts every few rounds and frog back if necessary.
    • Parts Looking Uneven: Adjust stuffing and stitch tension for symmetry.

    Care and Safety

    To clean your crochet Scooby-Doo, hand wash only and lay flat to dry. If using safety eyes, ensure they are securely attached, especially if the toy is for a child. Always supervise young children when playing with crocheted toys to avoid any choking hazards.

    Frequently Asked Questions

    • Is this crochet Scooby-Doo pattern beginner-friendly?
      No, it is recommended for intermediate crocheters.

    • What yarn is best for this crochet Scooby-Doo?
      Worsted weight yarn is ideal for the best results.

    • How long does it take to crochet this animal?
      It takes approximately 6 to 8 hours, depending on your skill level.

    • Can I make this crochet animal larger or smaller?
      Yes, by using thicker yarn and a larger hook, or thinner yarn and a smaller hook, you can adjust the size.

    • Can I use different yarn colors?
      Absolutely! Feel free to customize Scooby-Doo with any colors you like.

    • How do I keep the finished animal in shape?
      Ensure even stuffing and use a firm tension while crocheting.

    Conclusion

    Creating the Scooby-Doo Amigurumi is an exciting project that brings joy and creativity into your crafting

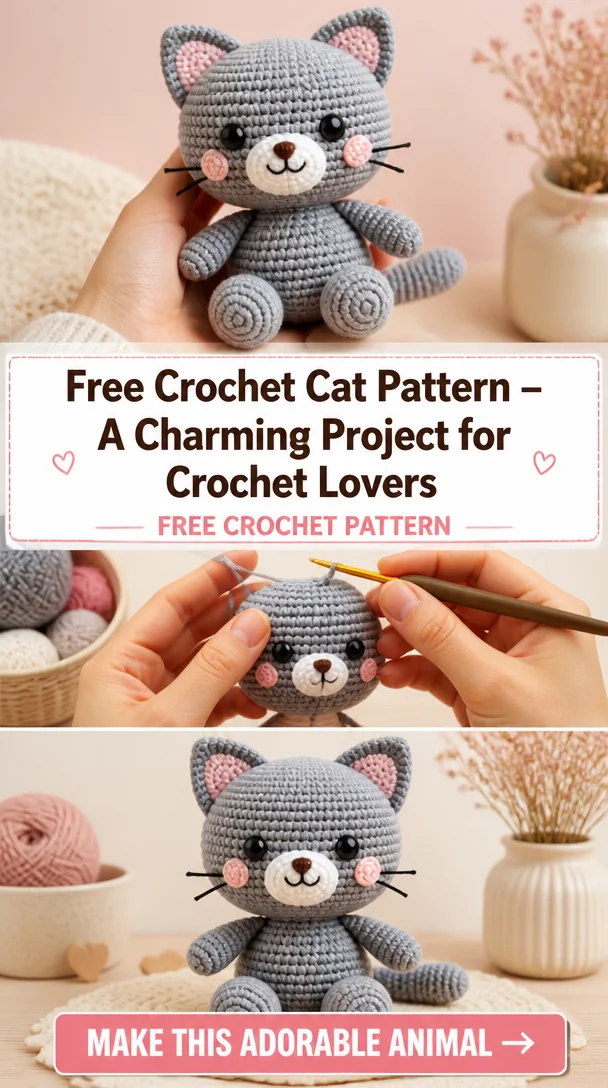
  • Free Crochet Cat Pattern – A Charming Project for Crochet Lovers

    Free Crochet Cat Pattern – A Charming Project for Crochet Lovers

    25+ Amazing FREE Amigurumi Animal Crochet Patterns!

    Crocheting amigurumi animals is a delightful way to express creativity while crafting lovable, huggable toys. These tiny creations can bring joy to children and adults alike, making them perfect gifts or decorative pieces for your home. With a variety of free crochet patterns available, such as those inspired by adorable farm animals, there’s something for everyone—no matter your skill level! Whether you’re a beginner looking for a fun project or an experienced crocheter wanting to try something new, these patterns provide various options to suit your style. Let’s dive into the world of amigurumi and discover how you can bring your own crochet animals to life!

    Crochet Animal Pattern Overview

    • Skill Level: Beginner to Intermediate
    • Finished Size: Approximately 5-10 inches (varies by pattern)
    • Crochet Hook: G (4mm) or H (5mm), depending on yarn choice
    • Yarn Type: Acrylic or cotton, in various colors
    • Main Colors: Colorful combinations based on specific animal
    • Construction Method: Worked in continuous rounds
    • Approximate Time: 4-8 hours, depending on complexity
    • Beginner-Friendly: Yes, with some patterns suitable for beginners

    Materials You’ll Need

    • Yarn (acrylic or cotton)
    • Crochet hook (G or H size)
    • Stuffing (polyester fiberfill)
    • Safety eyes (size varies by animal)
    • Yarn needle
    • Stitch marker
    • Scissors
    • Embroidery thread (for facial features)
    • Animal-specific materials (e.g., felt for accessories)

    Crochet Abbreviations

    • ch = chain
    • sc = single crochet
    • inc = increase
    • dec = decrease
    • st = stitch
    • rnd = round

    Before You Start

    • Work in Continuous Rounds: To avoid a seam, do not join each round with a slip stitch; instead, continue in a spiral.
    • Use a Stitch Marker: Place a stitch marker in the first stitch of each round to keep track of rounds.
    • Check Your Stitch Counts: Count your stitches at the end of each round to ensure accuracy.
    • Stuff Gradually: Stuff the limbs and body as you go to maintain the desired shape.
    • Keep Track of Rounds: Use a notebook or app to note your progress, especially for larger projects.

    Free Crochet Animal Pattern

    Head

    Round 1: sc 6 in a magic ring.
    Round 2: inc in each st around (12).
    Round 3: (sc 1, inc) around (18).
    Round 4-6: sc in each st around (18).
    Round 7: (sc 1, dec) around (12).
    Round 8: dec around (6).

    Body

    Round 1: sc 6 in a magic ring.
    Round 2: inc in each st around (12).
    Round 3: (sc 1, inc) around (18).
    Round 4-8: sc in each st around (18).
    Round 9: (sc 1, dec) around (12).
    Round 10: dec around (6).

    Ears (make 2)

    Round 1: sc 6 in a magic ring.
    Round 2: inc around (12).
    Round 3: (sc 1, inc) around (18).
    Round 4: sc in each st around (18).

    Arms/Front Legs (make 2)

    Round 1: sc 6 in a magic ring.
    Round 2: inc around (12).
    Round 3-5: sc in each st around (12).

    Legs/Back Legs (make 2)

    Round 1: sc 6 in a magic ring.
    Round 2: inc around (12).
    Round 3-5: sc in each st around (12).

    Tail

    Round 1: sc 5 in a magic ring.
    Round 2-3: sc in each st around (5).

    Assembly

    • Attach Head to Body: Align the head with the body center and sew securely.
    • Position Ears: Attach to the top of the head, sewing two small stitches at the base to secure.
    • Add Arms: Place the arms on either side of the body and sew firmly.
    • Back Legs Placement: Position them at the back and sew securely.
    • Attach Tail: Position the tail at the back and stitch in place.
    • Facial Features: Secure the safety eyes and add a nose and mouth using embroidery thread.

    Facial Features and Finishing Details

    • Eyes: Position safety eyes between rounds 6 and 7 of the head.
    • Nose: Use black embroidery thread to stitch a simple nose shape.
    • Mouth: Stitch a small smile under the nose with a contrasting color.

    Tips for a Better Result

    • Use a tighter tension to avoid gaps between stitches.
    • Don’t skip checking your tension to ensure even consistency throughout.
    • Try using a smaller crochet hook for firmer stuffing.

    Customization Ideas

    • Use different yarn colors to create unique animal patterns.
    • Experiment with yarn types for varied textures (e.g., fluffy yarn for a softer look).
    • Add different sized eyes for character expressions.
    • Create accessories like hats or scarves for personalization.

    Common Problems and Troubleshooting

    • Uneven Stuffing: Check stuffing density; add more if necessary.
    • Loose Stitches: Ensure you’re using the correct tension and yarn weight.
    • Incorrect Stitch Counts: Use a stitch marker to avoid miscounts.
    • Shape Problems: Adjust stuffing and check assembly positioning for balance.

    Care and Safety

    To care for your handmade crochet animal, spot clean with a damp cloth. If it requires washing, hand wash gently and allow it to air dry. Ensure that any small parts, such as safety eyes, are secure before giving it to young children to avoid choking hazards.

    Frequently Asked Questions

    • Is this crochet animal pattern beginner-friendly?
      Yes, many of the patterns include step-by-step instructions suitable for beginners.

    • What yarn is best for this crochet animal?
      Acrylic or cotton yarns work well for durability and softness.

    • How long does it take to crochet this animal?
      It typically takes 4-8 hours, depending on the complexity of the pattern.

    • Can I make this crochet animal larger or smaller?
      Yes, adjusting your hook size or yarn weight can change the finished size.

    • Can I use different yarn colors?
      Absolutely! Feel free to mix and match colors for a unique design.

    • How do I keep the finished animal in shape?
      Use firm stuffing and maintain a consistent tension while working.

    Conclusion

    Creating your very own amigurumi animals can be a fun and rewarding experience. With so many patterns available, you’re sure to find the perfect one that sparks your creativity. Start stitching today and bring joy to those around you with your handmade creations!

  • 10 Supercute FREE Amigurumi Dolls Crochet Patterns! | Crochet character free pattern, Free crochet pattern stitch, Crochet dolls

    10 Supercute FREE Amigurumi Dolls Crochet Patterns! | Crochet character free pattern, Free crochet pattern stitch, Crochet dolls

    10 Supercute FREE Amigurumi Dolls Crochet Patterns! | Crochet character free pattern, Free crochet pattern stitch, Crochet dolls

    If you’re looking to create something adorable and special, crocheting amigurumi dolls is an amazing choice! These adorable little creatures can spark joy and bring a personal touch to any gift. Whether you’re crafting for yourself, a loved one, or a child’s birthday, these crochet dolls are sure to be cherished by both kids and adults alike. The 10 free amigurumi patterns you’ll find here are vibrant and full of personality, making them perfect projects for anyone with a little crochet experience. Whether you’re a beginner or a seasoned crocheter, you’ll find these patterns engaging and rewarding to make.

    Crochet Doll Pattern Overview

    • Skill Level: Beginner to Intermediate
    • Finished Size: Approximately 6-10 inches, depending on the pattern
    • Crochet Hook: Size G (4.0 mm) or as needed
    • Yarn Type: Worsted weight yarn
    • Main Colors: Varied, based on the chosen pattern
    • Construction Method: Worked in continuous rounds
    • Approximate Time: 3-6 hours, varying by complexity
    • Beginner-Friendly: Yes, suitable for adventurous beginners

    Materials You’ll Need

    • Worsted weight yarn in various colors
    • Crochet hook (size G/4.0 mm)
    • Fiberfill stuffing
    • Safety eyes (size to match doll proportion)
    • Yarn needle for assembly
    • Stitch marker
    • Scissors
    • Embroidery thread for facial features
    • Any other specific materials as indicated in the individual patterns

    Crochet Abbreviations

    • CH: Chain
    • SC: Single Crochet
    • INC: Increase
    • DEC: Decrease
    • Rnd: Round
    • SL ST: Slip Stitch
    • F/O: Fasten Off

    Before You Start

    • Make sure to read through the entire pattern before beginning.
    • Use a stitch marker to keep track of your rounds.
    • Work in continuous rounds unless otherwise noted.
    • Stuff each piece gradually to ensure even fullness.
    • Track your stitch counts diligently throughout the project.

    Free Crochet Doll Pattern

    Head

    1. Start with a magic ring.
    2. Round 1: 6 SC in magic ring.
    3. Round 2: INC in each stitch (12).
    4. Round 3: (1 SC, INC) repeat to end (18).
    5. Continue increasing until you reach the desired head size.

    Body

    1. Attach yarn to the base of the head.
    2. Round 1: SC around (number of stitches matching the head’s last round).
    3. Rounds 2-7: Work even (no increases).
    4. Begin decreasing to shape the body towards the bottom.

    Arms

    1. Start with a magic ring for each arm.
    2. Round 1: 5 SC in magic ring.
    3. Work in rounds until the desired length is achieved.
    4. Stuff lightly and leave a long tail for sewing.

    Legs

    1. Similar to arms, but start with 6 SC.
    2. Work in rounds until you reach the desired leg length.
    3. Lightly stuff and prepare for sewing.

    Tail

    1. Use the method for arms but shorter.
    2. Follow the desired shape and length.

    Assembly

    • Head to Body: Position the head securely on the body and sew using a yarn needle.
    • Limbs: Sew arms on each side of the body and legs at the base.
    • Tail: Attach at the back.
    • Position the limbs so the doll can sit or stand as desired.

    Facial Features and Finishing Details

    • Eyes: Insert safety eyes securely.
    • Nose and Mouth: Use embroidery thread to stitch features for personality.
    • Eyebrows and Cheeks: Add these with contrasting yarn or thread to enhance expression.

    Tips for a Better Result

    • Choose colors that contrast well for a standout effect.
    • Regularly check your stitches to avoid gaps or unevenness.
    • Stuff firmly but not overly tight to ensure comfort and softness.

    Customization Ideas

    • Mix and match yarn colors for unique looks.
    • Change the size of the doll by adjusting the yarn weight or hook size.
    • Experiment with different facial expressions by altering the stitching.
    • Create outfits or accessories like hats and scarves for added charm.

    Common Problems and Troubleshooting

    • Uneven Stuffing: Stuff evenly, taking care to fill all parts gradually.
    • Loose Stitches: Check your tension while crocheting to maintain uniformity.
    • Assembly Alignment: Double-check placement before sewing to avoid crooked limbs.

    Care and Safety

    Keep your crochet doll clean by hand washing only and allowing it to air dry. For those crafting with children in mind, ensure that safety eyes and small parts are securely attached to prevent choking hazards. Supervise young ones during playtime for safety.

    Frequently Asked Questions

    • Is this crochet doll pattern beginner-friendly?
      Yes, it’s suitable for adventurous beginners with basic crochet skills.

    • What yarn is best for this crochet doll?
      Worsted weight yarn works great; choose snug, soft varieties.

    • How long does it take to crochet this animal?
      Expect 3-6 hours depending on complexity and your crafting speed.

    • Can I make this crochet doll larger or smaller?
      Yes, adjust yarn weight and hook size for desired dimensions.

    • Can I use different yarn colors?
      Absolutely! Custom colors can personalize your project.

    • How do I keep the finished animal in shape?
      Proper stuffing and light handling will maintain its form.

    Conclusion

    Crocheting amigurumi dolls is a delightful way to express creativity while crafting something lovable and unique. With these free patterns and tips, you can make adorable crochet creations that will be treasured for years to come. Gather your materials, get cozy, and let your crochet journey begin!

  • Crochet Delights: Free Patterns for Irresistible Amigurumi Creations

    Crochet Delights: Free Patterns for Irresistible Amigurumi Creations

    Crochet Delights: Free Patterns for Irresistible Amigurumi Creations

    Crocheting an adorable amigurumi creature can be a delightful and satisfying craft project. Whether you’re seeking a unique gift or simply want to add a charming handmade item to your collection, making a crochet animal brings joy and creativity to your life. This project is perfect for both beginners and experienced crocheters who want to hone their skills while creating something utterly irresistible. With delightful patterns available, let’s dive into the captivating world of crocheting amigurumi animals!

    Crochet Animal Pattern Overview

    • Skill Level: Intermediate
    • Finished Size: Approximately 10 inches tall
    • Crochet Hook: Size G (4.0 mm)
    • Yarn Type: Worsted weight acrylic yarn
    • Main Colors: White, yellow, and brown
    • Construction Method: Worked in continuous rounds
    • Approximate Time: 4-6 hours
    • Beginner-Friendly: Yes, with some experience recommended

    Materials You’ll Need

    • Worsted weight acrylic yarn (in main colors)
    • Size G (4.0 mm) crochet hook
    • Polyester stuffing
    • Safety eyes (12mm)
    • Yarn needle
    • Stitch marker
    • Scissors
    • Embroidery thread (for detailing)
    • Felt (optional, for embellishments)

    Crochet Abbreviations

    • sc: single crochet
    • inc: increase (2 sc in the same stitch)
    • dec: decrease (2 sc together)
    • ch: chain
    • sl st: slip stitch
    • st: stitch
    • rnd: round

    Before You Start

    • Work in continuous rounds to avoid a seam.
    • Use a stitch marker to keep track of your rounds.
    • Check your stitch counts regularly to ensure accuracy.
    • Stuff your creation gradually to keep a uniform shape.
    • Keep track of your rounds for proper assembly later.
    • Prepare for assembly by organizing all crocheted parts.

    Free Crochet Animal Pattern

    Head

    Round 1: 6 sc in a magic ring
    Round 2: inc in each st (12)
    Round 3: (sc, inc) x 6 (18)
    Round 4: (2 sc, inc) x 6 (24)
    …

    Body

    Round 1: 24 sc in a magic ring
    Round 2: (sc, inc) x 12 (36)
    Round 3: sc in each st (36)
    …

    Arms / Front Legs

    Round 1: 6 sc in a magic ring
    Round 2: inc in each st (12)
    …

    Legs / Back Legs

    Round 1: 6 sc in a magic ring
    Round 2: (sc, inc) x 3 (9)
    …

    Tail

    Round 1: 6 sc in a magic ring
    Round 2: inc in each st (12)
    …

    Assembly

    1. Positioning: Attach the arms and legs evenly on either side of the body.
    2. Sewing: Use the yarn needle to sew the head onto the body securely, ensuring all layers are well-fastened.
    3. Facial Features: Position the safety eyes securely above the muzzle area before attaching the head.
    4. Tail: Sew the tail to the back of the body for proper alignment.

    Facial Features and Finishing Details

    • Eyes: Attach safety eyes firmly and place them evenly on the head.
    • Muzzle: Embroider a small nose and mouth using embroidery thread to complete the face.
    • Ears: Position ears symmetrically for an adorable look.

    Tips for a Better Result

    • Keep your tension consistent throughout the project to avoid uneven stitches.
    • Use a stitch marker to help keep track of rounds, especially in continuous rounds.
    • Stuff the body parts firmly to maintain shape while avoiding overstuffing.

    Customization Ideas

    • Experiment with different yarn colors for a unique look.
    • Add accessories like bows or scarves for personalization.
    • Change the size of the finished animal by using thicker or thinner yarn.

    Common Problems and Troubleshooting

    • Uneven Stuffing: Ensure you distribute stuffing evenly; add small amounts gradually.
    • Loose Stitches: Double-check your tension and consider using a smaller hook.
    • Incorrect Stitch Counts: Count stitches at the end of each round to prevent discrepancies.
    • Assembly Alignment: Step back and check overall alignment before sewing permanently.

    Care and Safety

    Handmade crochet animals are typically machine washable on a gentle cycle or hand-washable. Allow to air dry. Please ensure safety eyes are securely attached, especially when used as toys for young children. Always supervise play for safety.

    Frequently Asked Questions

    • Is this crochet animal pattern beginner-friendly?
      Yes, with some basic crochet skills, beginners can certainly tackle this pattern.

    • What yarn is best for this crochet animal?
      Worsted weight acrylic yarn is preferred for a soft and durable finish.

    • How long does it take to crochet this animal?
      The average time is around 4-6 hours, depending on your skill level.

    • Can I make this crochet animal larger or smaller?
      Yes, by using different yarn weights and adjusting the hook size, you can customize the size.

    • Can I use different yarn colors?
      Absolutely! Feel free to choose any color combination that inspires you.

    • How do I keep the finished animal in shape?
      Store it in a cool, dry place and check for stuffing regularly to maintain its form.

    Conclusion

    Embarking on this crochet animal project will not only ignite your creativity but also lead to a tangible, cuddly companion. With the steps outlined, you’ll create a charming addition to your home or a heartfelt gift for someone special. So gather your materials and start crocheting your irresistible amigurumi creation today!

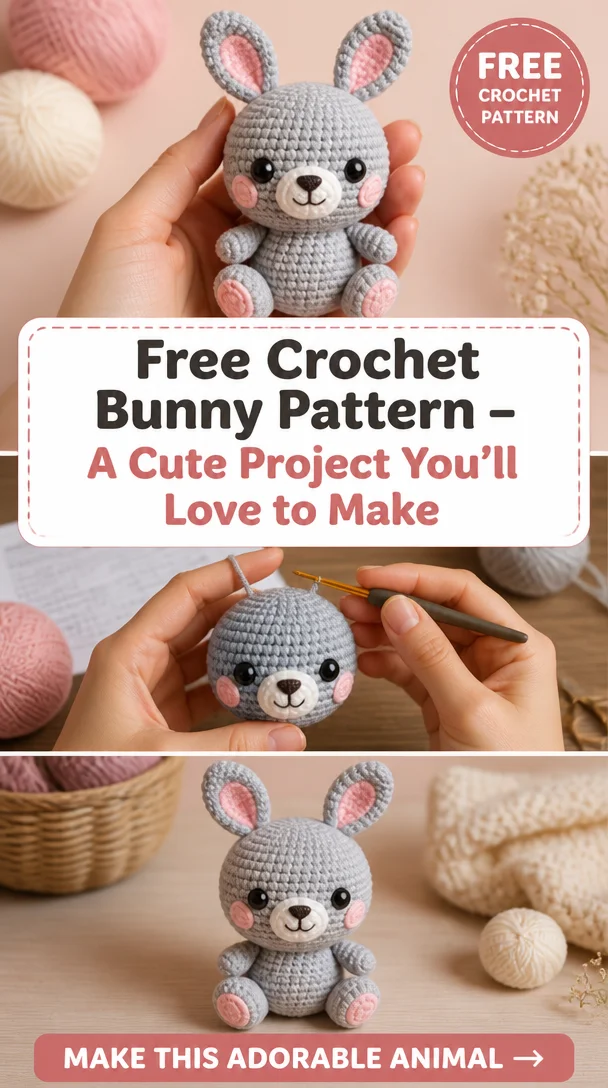
  • Free Crochet Bunny Pattern – A Cute Project You’ll Love to Make

    Free Crochet Bunny Pattern – A Cute Project You’ll Love to Make

    Free Crochet Amigurumi Patterns: 13 Cute Animals for Beginners!

    Are you ready to dive into the delightful world of crochet amigurumi? Making adorable crochet animals is not just a fulfilling hobby; it’s also a gateway to creating personalized gifts and charming home decor! With our collection of 13 cute animal patterns, you’ll find engaging projects that are perfect for beginners. Each pattern promises to unleash your creativity while providing joy through cuddly, handmade creations. Whether you’re crafting for loved ones or just for yourself, these projects are sure to bring smiles to anyone’s face!

    Crochet Animal Pattern Overview

    • Skill Level: Beginner
    • Finished Size: Varies by animal
    • Crochet Hook: Size appropriate for yarn choice
    • Yarn Type: Acrylic or cotton recommended
    • Main Colors: Your choice—be creative!
    • Construction Method: Amigurumi in continuous rounds
    • Approximate Time: 3-5 hours, depending on the animal
    • Beginner-Friendly: Yes!

    Materials You’ll Need

    • Yarn (in various colors)
    • Crochet hook
    • Stuffing (fiberfill)
    • Safety eyes (if applicable)
    • Yarn needle
    • Stitch marker
    • Scissors
    • Embroidery thread (for details)
    • Any animal-specific materials (e.g., felt for accessories)

    Crochet Abbreviations

    • ch: chain
    • sc: single crochet
    • inc: increase
    • dec: decrease
    • sl st: slip stitch
    • rnd: round

    Before You Start

    • Work in continuous rounds for a seamless finish.
    • Use a stitch marker to keep track of your rounds.
    • Check stitch counts as you go to ensure a well-formed piece.
    • Stuff gradually for even shapes and support.
    • Prepare all parts for assembly as you finish individual pieces.

    Free Crochet Animal Pattern

    Head

    1. Round 1: Start with a magic ring and make 6 sc.
    2. Round 2: Inc in each stitch around (12 sc).
    3. Round 3: Sc in next st, inc repeat around (18 sc).

    Body

    1. Round 1: Make 6 sc in the magic ring.
    2. Round 2: Inc in each stitch around (12 sc).
    3. Rounds 3-6: Sc around (12 sc in each round) to build body height.

    Ears

    1. Round 1: Make 6 sc in the magic ring.
    2. Round 2: Inc in each stitch around (12 sc).
    3. Round 3: Sc in next 2 sts, inc repeat around (16 sc).

    Arms

    1. Round 1: Make 6 sc in the magic ring.
    2. Rounds 2-4: Sc around (6 sc in each round).

    Legs

    1. Round 1: Make 6 sc in the magic ring.
    2. Rounds 2-5: Sc around (6 sc in each round).

    Tail

    1. Round 1: Make a chain of desired length and sl st to form a loop.
    2. Rounds: Sc around the chain for desired thickness.

    Assembly

    1. Attach the head to the body using a yarn needle and thread, positioning it centrally.
    2. Sew the arms to the body at chosen locations for a natural look.
    3. Position the legs underneath the body; secure them firmly.
    4. Sew the ears on top of the head, adjusting for desired floppiness.

    Facial Features and Finishing Details

    • Attach safety eyes securely and embroider a small nose.
    • Add a smiling mouth with embroidery thread for expression.
    • Customize cheeks or spots with contrasting yarn to enhance the look.

    Tips for a Better Result

    • Choose contrasting colors for different animal parts to create visual interest.
    • Stuff your pieces firmly but not too tightly to keep them shapely and cuddly.
    • Pay attention to gauge as it can affect the final size.

    Customization Ideas

    • Experiment with different color schemes to create unique animal friends.
    • Use variegated yarn for a patterned effect.
    • Create matching accessories like scarves or hats for your animals.

    Common Problems and Troubleshooting

    • Uneven Stuffing: Adjust stuffing in small amounts, focusing on areas prone to lumps.
    • Loose Stitches: Ensure your tension is consistent throughout.
    • Parts Looking Uneven: Use stitch counts to compare sections and adjust accordingly.
    • Assembly Alignment Issues: Before sewing, lay pieces together to visualize position and adjust as needed.

    Care and Safety

    To keep your crochet animal looking great, hand wash gently with mild soap and lay flat to dry. If using safety eyes, ensure they are securely attached, especially for younger children’s toys.

    Frequently Asked Questions

    • Is this crochet animal pattern beginner-friendly?
      Yes! It’s designed for those new to crochet.

    • What yarn is best for this crochet animal?
      Acrylic or cotton yarn is recommended for durability and ease of use.

    • How long does it take to crochet this animal?
      Approximately 3-5 hours, depending on your skill level and the specific animal.

    • Can I make this crochet animal larger or smaller?
      Yes, by adjusting your yarn and hook size.

    • Can I use different yarn colors?
      Absolutely! Feel free to get creative with your color choices.

    • How do I keep the finished animal in shape?
      Use adequate stuffing and wash carefully to maintain form.

    Conclusion

    Taking the plunge into crochet amigurumi can be incredibly fulfilling and enjoyable. With these simple patterns, you can create cute animals that may just become cherished keepsakes. We encourage you to explore

  • Free Crochet Bunny Pattern – A Fun and Adorable Project to Try

    Free Crochet Bunny Pattern – A Fun and Adorable Project to Try

    17 Crochet Cuddly Toys Free Patterns

    Are you on the lookout for delightful crochet projects to bring joy to children and adults alike? Look no further! The 17 Crochet Cuddly Toys Free Patterns feature an array of adorable animal designs that are perfect for gifting, decorating, or simply snuggling. These patterns are not only charming but also provide a wonderful opportunity to practice your crochet skills. Each pattern is designed to be accessible, making them suitable for both beginners and experienced crocheters. Dive into this enchanting world of cuddly crochet animals and discover the joy they can bring!

    Crochet Animal Pattern Overview

    • Skill Level: Varies by pattern
    • Finished Size: Varies by animal
    • Crochet Hook: Recommended size varies by pattern
    • Yarn Type: Worsted weight, cotton, or acrylic
    • Main Colors: Customizable based on preference
    • Construction Method: Amigurumi techniques
    • Approximate Time: 2-4 hours per toy
    • Beginner-Friendly: Yes, many patterns are suitable for beginners

    Materials You’ll Need

    • Yarn (in desired colors)
    • Crochet hook (size varies)
    • Stuffing (polyester fiberfill)
    • Safety eyes
    • Yarn needle
    • Stitch marker
    • Scissors
    • Embroidery thread (for facial features)
    • Animal-specific materials (if required)

    Crochet Abbreviations

    • sc: single crochet
    • dc: double crochet
    • ch: chain
    • st: stitch
    • sl st: slip stitch
    • inc: increase
    • dec: decrease
    • rnd: round

    Before You Start

    Before beginning your crochet project, here are some practical tips to keep in mind:

    • Work in continuous rounds for a smooth finish.
    • Use a stitch marker to keep track of your rounds.
    • Stuff your toy gradually to maintain the desired firmness.
    • Pay close attention to stitch counts to ensure your toy retains its shape.
    • Prepare all pieces before assembly for a streamlined process.

    Free Crochet Animal Pattern

    Head

    Round 1: Make a magic ring and work 6 sc into the ring.
    Round 2: Inc in each stitch around (12 sts).
    Round 3: (Sc in next st, inc) repeat around (18 sts).

    Body

    Round 1: Work 6 sc in a magic ring.
    Round 2: Inc in each stitch around (12 sts).
    Round 3: (Sc in next 2 sts, inc) repeat around (16 sts).

    Ears

    Round 1: Make a magic ring and work 5 sc into the ring.
    Round 2: (Sc in next st, inc) repeat around (7 sts).

    Arms/Front Legs

    Round 1: Make a magic ring and work 5 sc into the ring.
    Round 2: Inc in each stitch around (10 sts).

    Legs/Back Legs

    Round 1: Work 6 sc in a magic ring.
    Round 2: Inc in each stitch around (12 sts).

    Tail

    Round 1: Make a magic ring and work 4 sc into the ring.

    Assembly

    Assembling your cuddly animal is where the magic happens! Here are the steps:

    • Position the head on top of the body and sew securely.
    • Attach the ears on either side of the head, ensuring they are evenly spaced.
    • Firmly sew the arms to the sides of the body, positioning them to give a cuddly look.
    • Sew the legs to the bottom, ensuring proper alignment.
    • Attach the tail at the back, ensuring it sits upright.

    Facial Features and Finishing Details

    Add the finishing touches to bring your animal to life:

    • Attach safety eyes securely between the eyes’ distance established by your pattern.
    • Embroider a smile using embroidery thread.
    • Customize any additional features such as whiskers or spots.

    Tips for a Better Result

    For optimal results, consider the following tips:

    • Use a consistent tension for even stitches.
    • Choose a soft yarn for maximum cuddle-ability.
    • Keep your workspace organized to find materials easily.

    Customization Ideas

    Make your crochet cuddly toys unique:

    • Experiment with different yarn colors and textures.
    • Change the size by using thicker or thinner yarn.
    • Add accessories like hats or scarves.
    • Create custom facial expressions using different embroidery techniques.

    Common Problems and Troubleshooting

    If you encounter issues while crocheting, here are some solutions:

    • Uneven stuffing: Start with small amounts and gradually add more until satisfied.
    • Loose stitches: Ensure that your tension is consistent and adjust your hook size if necessary.
    • Incorrect stitch counts: Always count your stitches after each round to avoid discrepancies.
    • Assembly alignment issues: Use a photo or diagram as a reference to align parts correctly.

    Care and Safety

    To keep your crochet animals looking their best:

    • Hand wash in cool water and lay flat to dry.
    • Ensure all parts are securely attached to avoid choking hazards, especially for young children.

    Frequently Asked Questions

    • Is this crochet animal pattern beginner-friendly?
      Yes, many of the patterns are designed with beginners in mind.

    • What yarn is best for this crochet animal?
      A soft worsted weight or cotton yarn is recommended for cuddly toys.

    • How long does it take to crochet this animal?
      It can take approximately 2 to 4 hours, depending on your skill level.

    • Can I make this crochet animal larger or smaller?
      Yes, by using a different yarn weight or adjusting your hook size.

    • Can I use different yarn colors?
      Absolutely! Feel free to express your creativity by choosing any colors you like.

    • How do I keep the finished animal in shape?
      Regularly fluff your toy and store it in a dry environment.

    Conclusion

    Dive into the delightful world of crochet cuddly toys with these enchanting free patterns! Each toy you create can become a cherished companion, perfect for cuddling or gifting. Enjoy the process of crafting these adorable creatures and watch as joy spreads with each finished piece!

  • Free Crochet Bunny Pattern – A Cute Project You’ll Love to Make

    Free Crochet Bunny Pattern – A Cute Project You’ll Love to Make

    Brighten Your Day with 40 Adorable Crocheted Stuffed Animals Patterns!

    Crocheted stuffed animals, or amigurumi, are not just delightful gifts; they also bring warmth and charm into any home. Each unique creation showcases your creativity and skill, making these charming creatures perfect for children and adults alike. Imagine crafting an adorable bunny or a playful panda to give as a gift or to brighten your own living space! This collection of 40 cuddly patterns features a range of designs suitable for all skill levels, from beginners looking to pick up a new hobby to experienced crocheters wanting to expand their repertoire. Get inspired and start your next project today!

    Crochet Animal Pattern Overview

    • Skill Level: Beginner to intermediate
    • Finished Size: Varies by pattern; typically ranges from 8 to 12 inches
    • Crochet Hook: Size H (5.0 mm)
    • Yarn Type: Worsted weight (medium)
    • Main Colors: Varies per project; recommendations may include pastel or bright shades
    • Construction Method: Worked in round, with some pieces sewn together
    • Approximate Time: 4 to 8 hours, depending on the pattern
    • Beginner-Friendly: Yes, many patterns include detailed instructions

    Materials You’ll Need

    • Worsted weight yarn
    • Crochet hook (size H, 5.0 mm)
    • Polyester stuffing
    • Safety eyes (size depending on pattern)
    • Yarn needle
    • Stitch marker
    • Scissors
    • Embroidery thread (for facial features)
    • Color-specific materials (as needed per animal)

    Crochet Abbreviations

    • ch: chain
    • sc: single crochet
    • dc: double crochet
    • inc: increase
    • dec: decrease
    • sl st: slip stitch
    • st: stitch

    Before You Start

    • Work in Continuous Rounds: To avoid seams, work your rounds continuously unless instructed otherwise.
    • Use a Stitch Marker: Place a stitch marker at the beginning of each round to track your progress.
    • Check Stitch Counts Regularly: This ensures accuracy in your design.
    • Stuff Gradually: Stuff your project little by little, checking the firmness.
    • Keep Track of Rounds: Note which round you are on, especially in larger projects.
    • Prepare for Assembly: Complete all necessary parts before starting the assembly process.

    Free Crochet Animal Pattern

    Head

    Round 1: ch 2, 6 sc in 2nd ch from the hook.
    Round 2: inc in each st around (12).
    Round 3: sc in next st, inc around (18).

    Body

    Round 1: ch 2, 6 sc in 2nd ch from the hook.
    Round 2: inc in each st around (12).
    Round 3: sc in next st, inc around (18).

    Arms / Front Legs

    Round 1: ch 2, 6 sc in 2nd ch from the hook.
    Round 2: inc in each st around (12).
    Continue for desired length, then fasten off.

    Legs / Back Legs

    Work similar to front legs but increase to achieve stability as needed.

    Tail

    Round 1: ch 2, 6 sc in 2nd ch from the hook.
    Round 2: inc in each st around (12).
    Fasten off, leaving a long tail for attaching.

    Assembly

    1. Attach the Head: Align and sew the head to the body using a yarn needle.
    2. Position the Arms: Sew the arms to the body at the shoulder area.
    3. Add the Legs: Attach the legs symmetrically at the bottom of the body.
    4. Sew on the Tail: Position at the back and secure with a few stitches.
    5. Stuff Gradually: Ensure your animal is shaped as desired.
    6. Place Safety Eyes: Before finishing the head, insert and secure safety eyes appropriately.
    7. Check final assembly: Ensure all parts are securely attached and positioned.

    Facial Features and Finishing Details

    • Eyes: Position safety eyes as specified in the pattern, typically between rows 4-6 of the head.
    • Nose and Mouth: Use embroidery thread to create a simple smile and the nose shape.
    • Additional Details: Consider adding blush or other features with embroidery.

    Tips for a Better Result

    • Ensure your tension is consistent throughout to avoid uneven stitches.
    • Check for any loose ends as you complete the assembly.
    • Take breaks to avoid fatigue during intricate work.

    Customization Ideas

    • Change yarn colors to reflect a specific theme (e.g., birthday, holidays).
    • Add accessories like hats or scarves for additional charm.
    • Adjust the size by using different yarn weights or crochet hooks.
    • Experiment with facial expressions to give your animal character.

    Common Problems and Troubleshooting

    • Uneven Stuffing: Add more stuffing in areas that feel flat to maintain shape.
    • Loose Stitches: Retrace a round and tighten stitches as needed.
    • Incorrect Stitch Counts: Double-check rounds and counting to avoid mistakes.
    • Parts Looking Uneven: Lay out all parts before assembly to make adjustments.

    Care and Safety

    Handmade crochet animals should be handled gently. Machine washing is not recommended; instead, spot clean as needed. If the animal has small parts (like safety eyes), supervise younger children to prevent choking.

    Frequently Asked Questions

    • Is this crochet animal pattern beginner-friendly?
      Yes, many of the patterns are suitable for beginners with clear instructions.

    • What yarn is best for this crochet animal?
      Worsted weight yarn is recommended for thickness and durability.

    • How long does it take to crochet this animal?
      Approximately 4 to 8 hours, depending on the design complexity.

    • Can I make this crochet animal larger or smaller?
      Yes, adjust your hook size or yarn weight for desired dimensions.

    • Can I use different yarn colors?
      Absolutely! Feel free to customize with any color of your choice.

    • How do I keep the finished animal in shape?
      Gradually stuff the animal to ensure it maintains the desired shape.

    Conclusion

    Creating your own crocheted stuffed animal is a rewarding project that allows for endless creativity. Whether you’re crafting for a loved one or adding to your own collection, these patterns are sure to brighten anyone’s day. Gather your materials, follow the patterns, and enjoy the delightful journey of making adorable handcrafted toys!

  • Free Crochet Bunny Pattern – A Cute Project You’ll Love to Make

    Free Crochet Bunny Pattern – A Cute Project You’ll Love to Make

    12 Crochet Amigurumi Animals Ideas

    Crocheting amigurumi animals is a joyful way to blend creativity and comfort into one adorable stitch at a time. These delightful little creatures can bring happiness to both the maker and the recipient. Whether you’re looking to create a heartfelt gift for a loved one or a charming piece for your home, amigurumi animals are a fantastic choice. The projects can be varied, making them engaging for both beginners and experienced crocheters. Plus, the satisfaction of finishing each cute animal will surely leave you wanting to make more!

    Crochet Amigurumi Animal Pattern Overview

    • Skill level: Beginner to Intermediate
    • Finished size: Varies with each animal
    • Crochet hook: Size appropriate for chosen yarn
    • Yarn type: Medium weight acrylic or cotton
    • Main colors: Customizable based on chosen animal
    • Construction method: Worked in the round
    • Approximate time: 2-5 hours depending on complexity
    • Beginner-friendly: Yes, with simple stitches and techniques

    Materials You’ll Need

    • Yarn (in desired colors)
    • Crochet hook
    • Stuffing (polyester fiberfill)
    • Safety eyes (optional, for realism)
    • Yarn needle
    • Stitch marker
    • Scissors
    • Embroidery thread (for facial features)
    • Animal-specific materials (e.g., felt for accessories)

    Crochet Abbreviations

    • ch: chain
    • sc: single crochet
    • inc: increase
    • dec: decrease
    • st: stitch
    • rnd: round

    Before You Start

    • Work in continuous rounds to avoid seams.
    • Use a stitch marker to mark the start of each round.
    • Keep track of your stitch counts to ensure proper shape.
    • Stuff your creations gradually to achieve the desired firmness.
    • Prepare all the pieces before assembling to streamline the process.

    Free Crochet Amigurumi Animal Pattern

    Head

    Round 1: Begin with a magic ring, crochet 6 sc.
    Round 2: Inc in each st around (12).
    Round 3: Sc in the next st, inc repeat around (18).

    Body

    Round 1: Attach to the head, inc 18.
    Round 2: Sc in the next 2 st, inc repeat around (24).
    Round 3: Sc in each st around (24). Continue for several rounds.

    Arms / Front Legs

    Round 1: Start with a magic ring, crochet 5 sc.
    Round 2-4: Sc in each st around (5).

    Legs / Back Legs

    Round 1: Start with a magic ring, crochet 6 sc.
    Round 2-5: Sc in each st around (6).

    Tail

    Round 1: Start with a magic ring, crochet 4 sc.
    Round 2: Inc in each st around (8).

    Facial Features

    Using embroidery thread, sew on the eyes, nose, and mouth as desired.

    Assembly

    • Placement: Position arms and legs symmetrically.
    • Sewing: Use the yarn needle to securely attach each piece.
    • Attaching limbs: Ensure a proper adjustment for mobility; limbs should not be too tightly secured.
    • Facial features: Position eyes and embroidery thoughtfully for character.

    Tips for a Better Result

    • Ensure consistent tension throughout your stitches for an even appearance.
    • Consider using a smaller hook for tighter stitches to hold stuffing securely.
    • Take your time with the facial features to enhance expression.

    Customization Ideas

    • Change the primary colors to match personal favorites.
    • Use variegated yarn for a unique texture.
    • Add accessories like scarves or hats for a personalized touch.
    • Adjust the size by using different yarn weights or hook sizes.

    Common Problems and Troubleshooting

    • If stuffing is uneven, gently redistribute or add more stuffing where needed.
    • For loose stitches, consider tightening your tension or switching to a smaller hook.
    • If parts seem uneven, assess your stitch count regularly throughout the project.

    Care and Safety

    To keep your crochet animal looking its best, spot clean with a damp cloth. If it serves as a toy, ensure safety features, like securely sewn eyes, are childproof.

    Frequently Asked Questions

    • Is this crochet animal pattern beginner-friendly?
      Yes, it’s designed for beginners and includes simple stitches.

    • What yarn is best for this crochet animal?
      Medium weight acrylic or cotton yarn is an excellent choice.

    • How long does it take to crochet this animal?
      Expect it to take anywhere from 2 to 5 hours based on your familiarity with the stitches.

    • Can I make this crochet animal larger or smaller?
      Absolutely, by adjusting your yarn weight and hook size.

    • Can I use different yarn colors?
      Yes, feel free to explore variations in colors for each animal.

    • How do I keep the finished animal in shape?
      Store it in a cool, dry place and reshape if needed after washing.

    Conclusion

    Creating your own amigurumi animals can be an incredibly rewarding experience that allows for creativity and personal expression. Dive into your next crochet project, and enjoy the delightful process of bringing your adorable animal to life!

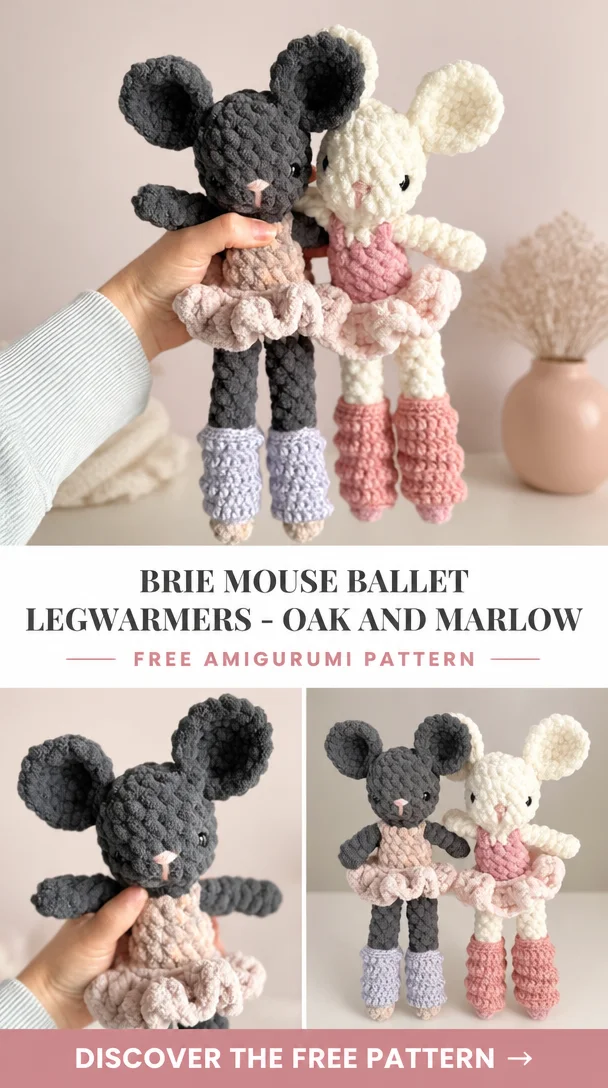
  • Free Crochet Mouse in Ballet Legwarmers Pattern

    Free Crochet Mouse in Ballet Legwarmers Pattern

    This sweet little mouse adds a touch of whimsy to any crochet collection, dressed in tiny ballet-style legwarmers for an extra bit of charm.

    Quick Pattern Overview

    Skill level Easy
    Finished size About 9 cm (3.5 in) tall
    Yarn DK or 8-ply cotton yarn, grey or cream, plus pink for the legwarmers
    Hook size 2.5 mm
    Estimated time 3 hours

    Materials You’ll Need

    • DK cotton yarn in grey or cream
    • A small amount of pink yarn for the legwarmers and ears
    • 2.5 mm crochet hook
    • 6 mm safety eyes, or thread to embroider the eyes
    • Polyester stuffing
    • Tapestry needle, stitch marker and scissors

    Crochet Abbreviations

    MR magic ring
    ch chain
    sc single crochet
    inc increase (2 sc in same st)
    dec decrease (sc 2 sts together)
    st(s) stitch(es)
    FO fasten off

    Before You Start

    • Work in continuous rounds; do not join or turn.
    • Use a stitch marker in the first stitch of each round.
    • The number in brackets at the end of a round is your stitch count.
    • Stuff firmly but stop before the stitches start to gap.

    Free Crochet Mouse in Ballet Legwarmers Pattern

    Head

    1. Round 1: 6 sc in MR (6)
    2. Round 2: inc in each st (12)
    3. Round 3: (1 sc, inc) x 6 (18)
    4. Rounds 4 to 6: sc in each st (18). Add safety eyes between rounds 4 and 5, about 6 sts apart.
    5. Round 7: (1 sc, dec) x 6 (12). Stuff firmly.
    6. Round 8: dec x 6 (6). FO and close the hole.

    Ears (make 2, round, pink inner)

    1. Round 1: 6 sc in MR (6)
    2. Round 2: inc in each st (12)

    FO and leave a long tail. Do not stuff. Flatten before sewing.

    Body

    1. Round 1: 6 sc in MR (6)
    2. Round 2: inc in each st (12)
    3. Round 3: (1 sc, inc) x 6 (18)
    4. Rounds 4 to 6: sc in each st (18)
    5. Round 7: (1 sc, dec) x 6 (12). Stuff firmly.
    6. Round 8: dec x 6 (6). FO and close the hole.

    Legs (make 2)

    1. Round 1: 6 sc in MR (6)
    2. Round 2: inc in each st (12)
    3. Rounds 3 to 5: sc in each st (12)
    4. Round 6: dec x 6 (6)

    FO, stuff firmly and close.

    Ballet Legwarmers (make 2, pink, worked directly over the legs)

    Chain enough to loop around the leg, sc in the 2nd chain from the hook and across, then sl st to join into a ring. Work 4 to 5 rounds of sc, then FO and slip over each finished leg like a tiny sock, tacking lightly in place.

    Tail (long and thin)

    1. Round 1: 6 sc in MR (6)
    2. Rounds 2 to 12: sc in each st (6)

    FO and leave a long tail. Do not stuff, or stuff very lightly.

    Assembly

    1. Sew the two ears to the top of the head.
    2. Sew the closed end of the head to the closed end of the body.
    3. Sew the two legs, now wearing their legwarmers, to the bottom of the body.
    4. Sew the long thin tail to the back.

    Facial Features & Finishing

    Embroider a small pink nose at the front of the face and a couple of whisker stitches on each side for a sweet mouse expression.

    Tips for a Better Result

    • Use a hook one size smaller than the yarn label suggests, so no stuffing shows.
    • Work rounds a little tighter than usual for a firm, well-shaped body.
    • Count your stitches after every round to catch mistakes early.

    Care & Safety

    If this toy is for a baby or small child, embroider the eyes instead of using safety eyes. Spot clean with a damp cloth and let it air dry.

    Frequently Asked Questions

    0

    Can I skip the legwarmers?

    1

    Yes, the mouse is just as sweet without them, worked as a simple plain amigurumi mouse.

    What other colours work for the legwarmers?

    Any pastel colour works beautifully; soft lavender or mint both give the same delicate, dance-inspired look.

    Love small, sweet amigurumi? Browse all our free crochet patterns.