Category: Free Patterns

Free animal crochet patterns for cute amigurumi friends. Easy step by step patterns for pandas, bunnies, foxes and more.

  • Free Crochet Pig Pattern

    Free Crochet Pig Pattern

    If you’re looking for a delightful and unique handmade project, this classic pink pig amigurumi is your perfect choice, with soft floppy ears and a signature curly tail.

    Quick Pattern Overview

    Skill level Easy
    Finished size About 11 cm (4.5 in) tall
    Yarn DK or 8-ply cotton yarn, pink
    Hook size 2.5 mm
    Estimated time 3 to 4 hours

    Materials You’ll Need

    • DK cotton yarn in pink
    • 2.5 mm crochet hook
    • 6 mm safety eyes, or thread to embroider the eyes
    • Polyester stuffing
    • Tapestry needle, stitch marker and scissors

    Crochet Abbreviations

    MR magic ring
    ch chain
    sc single crochet
    inc increase (2 sc in same st)
    dec decrease (sc 2 sts together)
    st(s) stitch(es)
    FO fasten off

    Before You Start

    • Work in continuous rounds; do not join or turn.
    • Use a stitch marker in the first stitch of each round.
    • The number in brackets at the end of a round is your stitch count.
    • Stuff firmly but stop before the stitches start to gap.

    Free Crochet Pig Pattern

    Head

    1. Round 1: 6 sc in MR (6)
    2. Round 2: inc in each st (12)
    3. Round 3: (1 sc, inc) x 6 (18)
    4. Round 4: (2 sc, inc) x 6 (24)
    5. Rounds 5 to 9: sc in each st (24). Add safety eyes between rounds 6 and 7, about 7 sts apart.
    6. Round 10: (2 sc, dec) x 6 (18)
    7. Round 11: (1 sc, dec) x 6 (12). Stuff firmly.
    8. Round 12: dec x 6 (6). FO and close the hole.

    Snout

    1. Round 1: 6 sc in MR (6)
    2. Round 2: inc in each st (12)
    3. Round 3: sc in each st (12)

    FO and leave a long tail. Stuff lightly.

    Ears (make 2, floppy)

    1. Round 1: 6 sc in MR (6)
    2. Round 2: (1 sc, inc) x 3 (9)
    3. Round 3: sc in each st (9)

    FO and leave a long tail. Do not stuff. Flatten before sewing so the ear folds forward.

    Body

    1. Round 1: 6 sc in MR (6)
    2. Round 2: inc in each st (12)
    3. Round 3: (1 sc, inc) x 6 (18)
    4. Round 4: (2 sc, inc) x 6 (24)
    5. Rounds 5 to 8: sc in each st (24)
    6. Round 9: (2 sc, dec) x 6 (18)
    7. Round 10: (1 sc, dec) x 6 (12). Stuff firmly.
    8. Round 11: dec x 6 (6). FO and close the hole.

    Legs (make 4)

    1. Round 1: 6 sc in MR (6)
    2. Rounds 2 to 5: sc in each st (6)

    FO and leave a short tail. Stuff lightly.

    Tail (curly)

    1. Round 1: 6 sc in MR (6)
    2. Rounds 2 to 7: sc in each st (6)

    FO and leave a long tail. Stuff very lightly and coil it into a tight curl, tacking it to itself to hold the spiral shape.

    Assembly

    1. Sew the snout to the centre of the face, just below the eyes.
    2. Sew the two floppy ears to the top of the head.
    3. Sew the closed end of the head to the closed end of the body.
    4. Sew the four legs to the underside of the body and the curly tail to the back.

    Facial Features & Finishing

    Embroider two small nostril dots on the snout and a simple curved mouth below it for a cheerful pig expression.

    Tips for a Better Result

    • Use a hook one size smaller than the yarn label suggests, so no stuffing shows.
    • Work rounds a little tighter than usual for a firm, well-shaped body.
    • Count your stitches after every round to catch mistakes early.

    Care & Safety

    If this toy is for a baby or small child, embroider the eyes instead of using safety eyes. Spot clean with a damp cloth and let it air dry.

    Frequently Asked Questions

    0

    How do I get the tail to curl tightly?

    1

    Coil the lightly stuffed tail around a pencil or your finger as you sew, tacking the coils to each other so the spiral holds permanently.

    Can I make a different colour pig?

    Yes, black, spotted or brown versions all work well with the exact same shaping.

    Love classic farmyard amigurumi? Try our crochet goat pattern, or browse all our free crochet patterns.
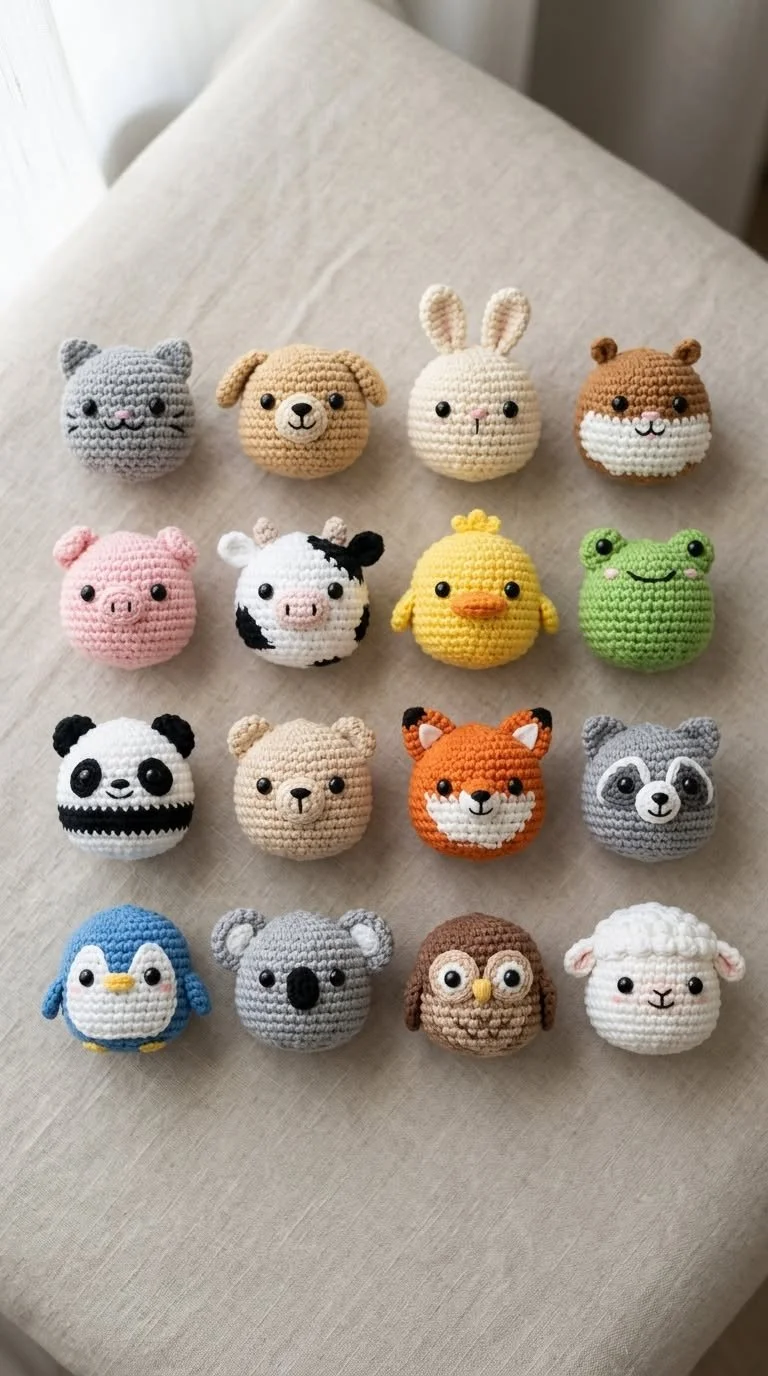
  • Free Crochet Dumpling Pet Pattern

    Free Crochet Dumpling Pet Pattern

    Crocheting can be a delightful and relaxing hobby, and this playful dumpling pet pattern brings a fun, offbeat twist to your projects, a soft round creature shaped just like a cozy dumpling.

    Quick Pattern Overview

    Skill level Easy
    Finished size About 9 cm (3.5 in) across
    Yarn DK or 8-ply cotton yarn, cream or light brown
    Hook size 2.5 mm
    Estimated time 2 hours

    Materials You’ll Need

    • DK cotton yarn in cream or light brown
    • 2.5 mm crochet hook
    • 6 mm safety eyes, or thread to embroider the eyes
    • Polyester stuffing
    • Tapestry needle, stitch marker and scissors

    Crochet Abbreviations

    MR magic ring
    ch chain
    sc single crochet
    inc increase (2 sc in same st)
    dec decrease (sc 2 sts together)
    st(s) stitch(es)
    FO fasten off

    Before You Start

    • Work in continuous rounds; do not join or turn.
    • Use a stitch marker in the first stitch of each round.
    • The number in brackets at the end of a round is your stitch count.
    • Stuff firmly but stop before the stitches start to gap.

    Free Crochet Dumpling Pet Pattern

    Body (rounded with a pleated top)

    1. Round 1: 6 sc in MR (6)
    2. Round 2: inc in each st (12)
    3. Round 3: (1 sc, inc) x 6 (18)
    4. Round 4: (2 sc, inc) x 6 (24)
    5. Rounds 5 to 8: sc in each st (24). Add safety eyes between rounds 5 and 6, about 7 sts apart.
    6. Round 9: (2 sc, dec) x 6 (18)

    Round 10: work a pinched, pleated top by single crocheting 2 sts together repeatedly all the way around, pulling each pair snug to create a ruffled, folded edge (aim for about 8 to 9 sts remaining). Stuff firmly before closing. FO and weave the tail through the remaining stitches to close the pleated top snugly.

    Tiny Feet (make 2, optional)

    1. Round 1: 6 sc in MR (6)

    FO and leave a short tail for each. Do not stuff; flatten before sewing to the underside.

    Assembly

    If adding feet, sew them to the underside of the body so the dumpling pet can sit upright. No other assembly is needed; this is a simple one-piece project.

    Facial Features & Finishing

    Embroider a small simple mouth below the eyes, keeping the expression soft and sleepy for the coziest dumpling charm.

    Tips for a Better Result

    • Use a hook one size smaller than the yarn label suggests, so no stuffing shows.
    • Work rounds a little tighter than usual for a firm, well-shaped body.
    • Count your stitches after every round to catch mistakes early.

    Care & Safety

    If this toy is for a baby or small child, embroider the eyes instead of using safety eyes. Spot clean with a damp cloth and let it air dry.

    Frequently Asked Questions

    0

    How do I get a neat pleated top?

    1

    Work the decrease stitches slowly and pull each one snug before moving to the next, checking every few stitches that the folds are forming evenly around the circle.

    2

    Can I skip the feet?

    3

    Yes, the dumpling pet works perfectly well as a simple round plush without feet, perfect for cuddling or display.

    Love quick, quirky projects? Browse all our free crochet patterns.

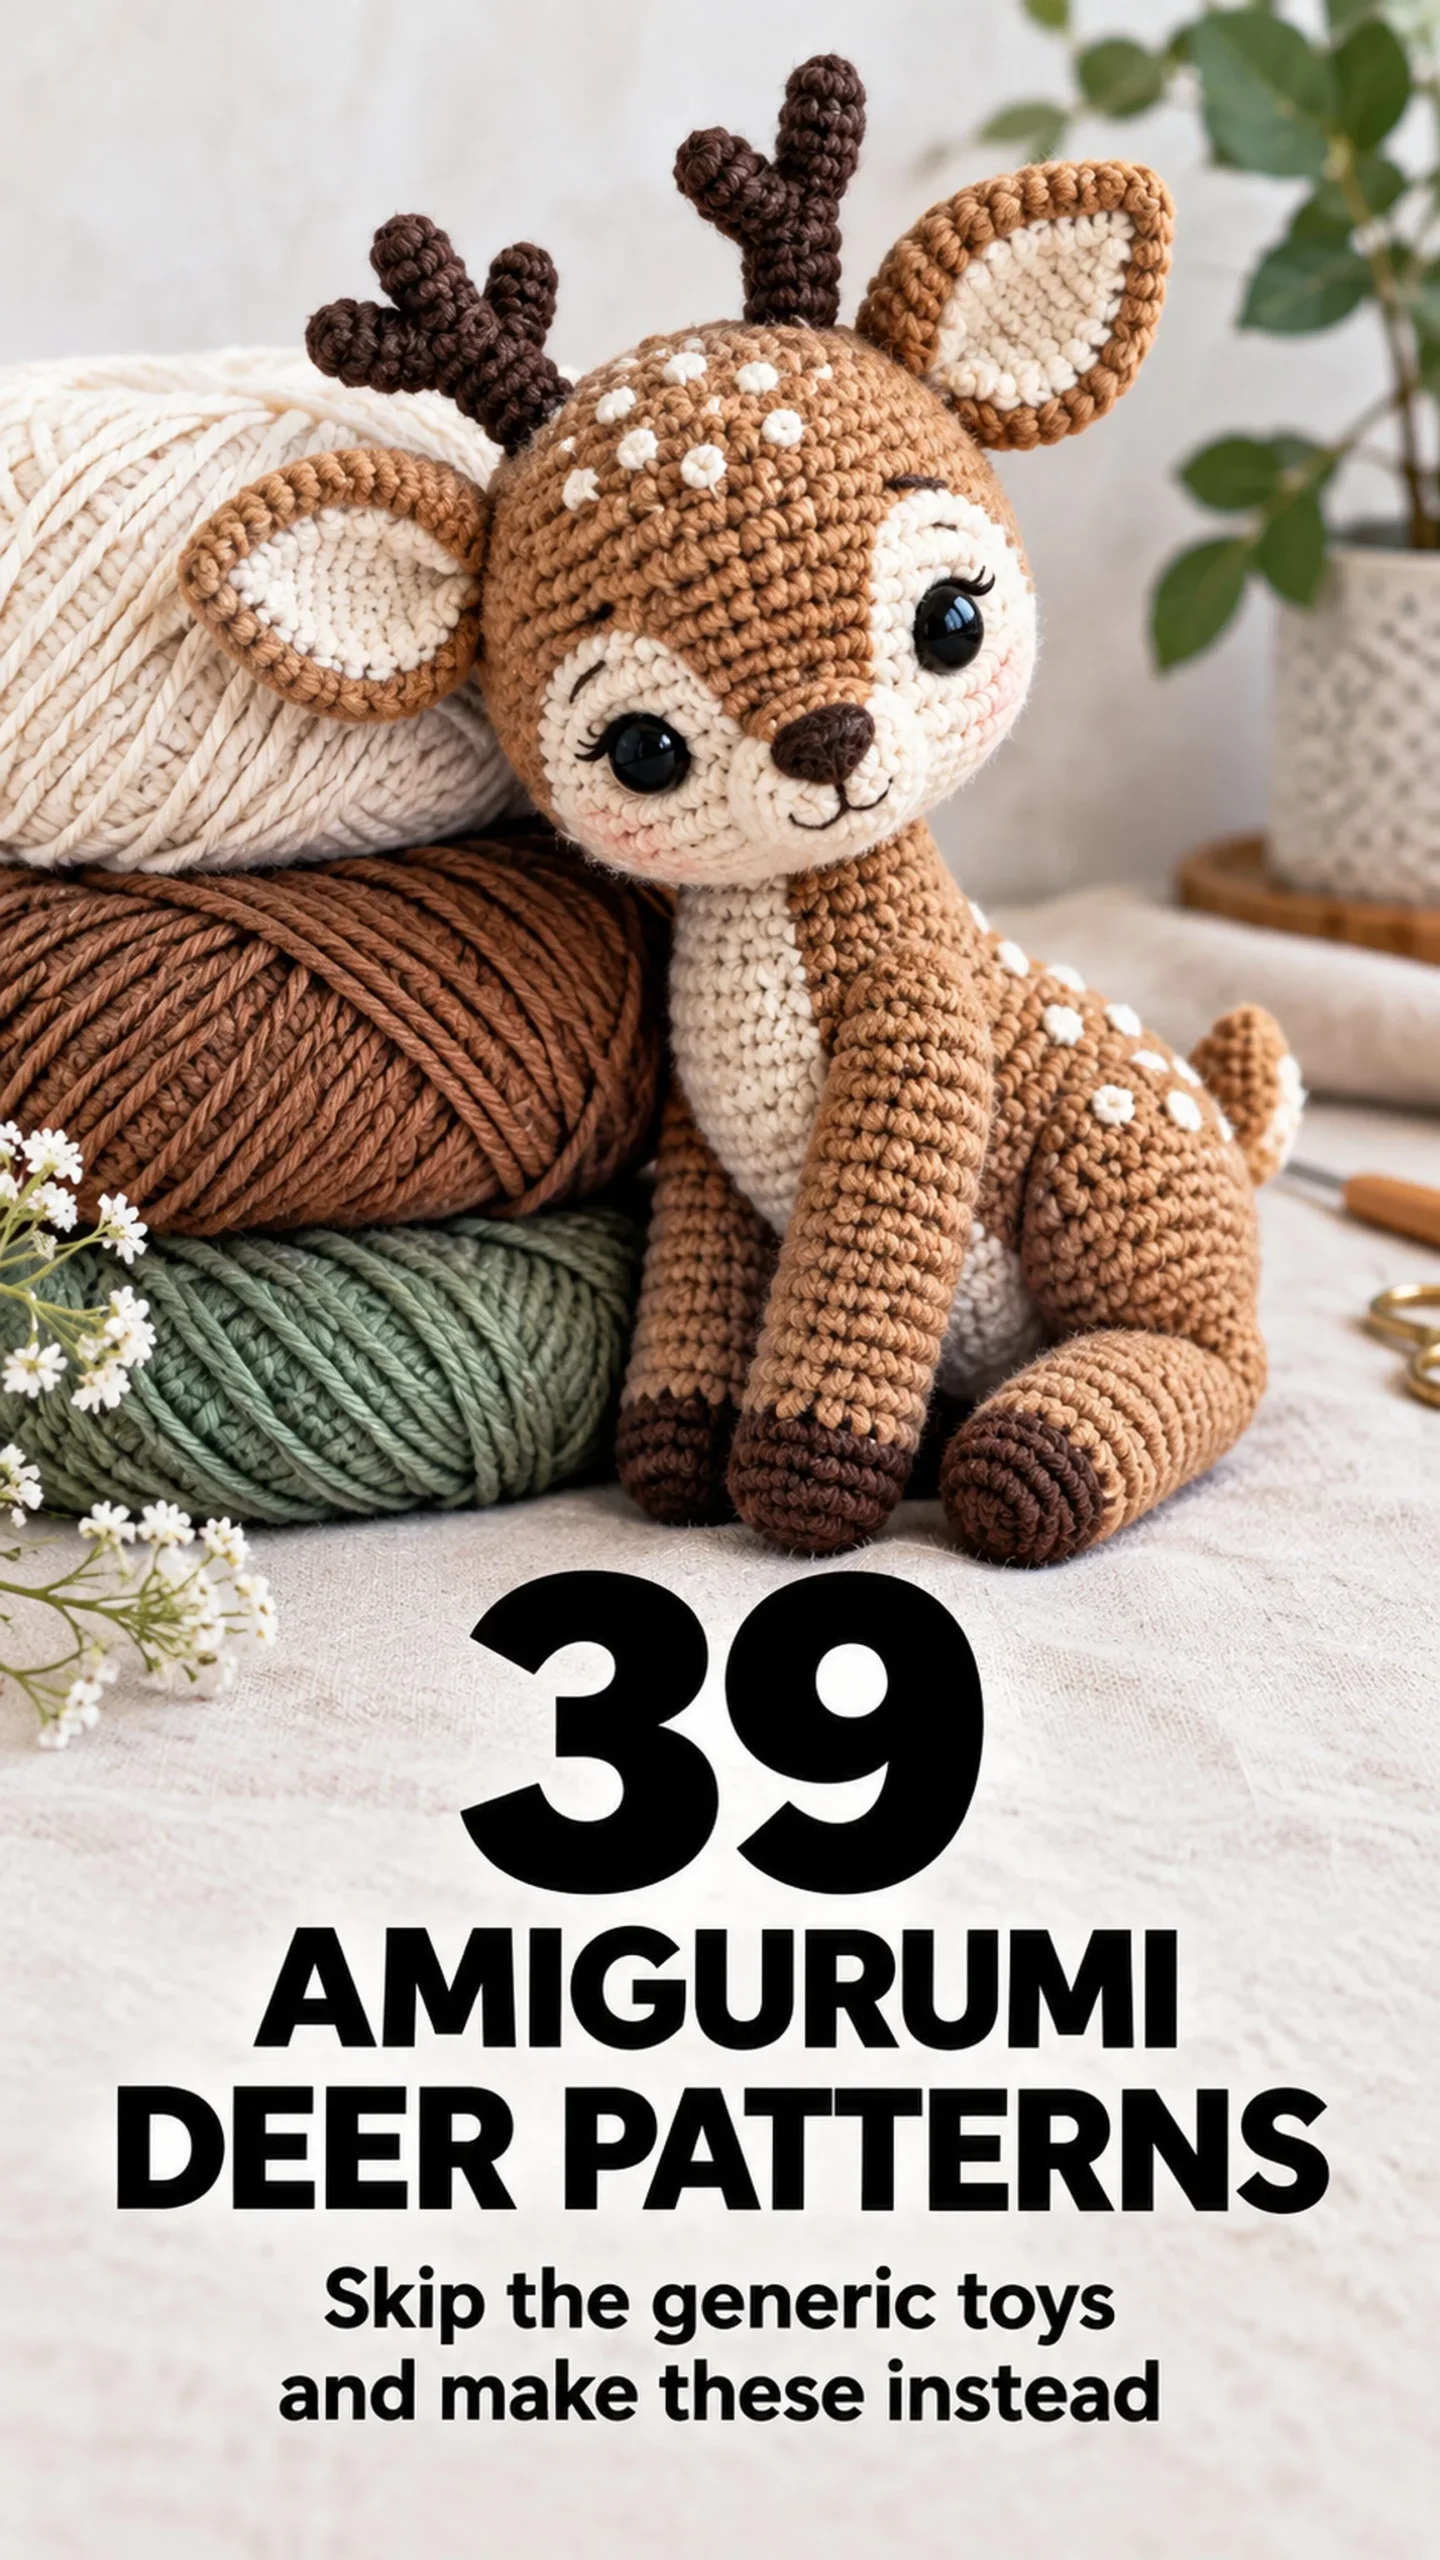
  • Free Crochet Fawn Pattern

    Free Crochet Fawn Pattern

    If you’re ready to move beyond typical teddy bear crochet projects, this sweet spotted fawn amigurumi might be the perfect choice, with slender legs and gentle white spots.

    Quick Pattern Overview

    Skill level Easy to intermediate
    Finished size About 14 cm (5.5 in) tall
    Yarn DK or 8-ply cotton yarn, tan or brown, plus white
    Hook size 2.5 mm
    Estimated time 4 to 5 hours

    Materials You’ll Need

    • DK cotton yarn in tan or brown, plus white for the spots, belly and tail
    • 2.5 mm crochet hook
    • 6 mm safety eyes, or thread to embroider the eyes
    • Polyester stuffing
    • Tapestry needle, stitch marker and scissors

    Crochet Abbreviations

    MR magic ring
    ch chain
    sc single crochet
    inc increase (2 sc in same st)
    dec decrease (sc 2 sts together)
    st(s) stitch(es)
    FO fasten off

    Before You Start

    • Work in continuous rounds; do not join or turn.
    • Use a stitch marker in the first stitch of each round.
    • The number in brackets at the end of a round is your stitch count.
    • Stuff firmly but stop before the stitches start to gap.

    Free Crochet Fawn Pattern

    Head

    1. Round 1: 6 sc in MR (6)
    2. Round 2: inc in each st (12)
    3. Round 3: (1 sc, inc) x 6 (18)
    4. Rounds 4 to 7: sc in each st (18). Add safety eyes between rounds 4 and 5, about 6 sts apart.
    5. Round 8: (1 sc, dec) x 6 (12). Stuff firmly.
    6. Round 9: dec x 6 (6). FO and close the hole.

    Ears (make 2, large)

    1. Round 1: 6 sc in MR (6)
    2. Round 2: (1 sc, inc) x 3 (9)
    3. Round 3: sc in each st (9)

    FO and leave a long tail. Do not stuff. Flatten before sewing.

    Body (with white spots and belly)

    1. Round 1: 6 sc in MR (6)
    2. Round 2: inc in each st (12)
    3. Round 3: (1 sc, inc) x 6 (18)
    4. Rounds 4 to 8: sc in each st (18), adding a few small white dot spots scattered on the back and a white belly patch underneath
    5. Round 9: (1 sc, dec) x 6 (12). Stuff firmly.
    6. Round 10: dec x 6 (6). FO and close the hole.

    Legs (make 4, slender and long)

    1. Round 1: 6 sc in MR (6)
    2. Rounds 2 to 8: sc in each st (6)

    FO and leave a short tail. Stuff lightly, keeping the legs slender rather than firmly packed.

    Tail (tiny, white)

    1. Round 1: 6 sc in MR (6)

    FO and leave a short tail. Do not stuff; flatten before sewing.

    Assembly

    1. Sew the two large ears to the top of the head.
    2. Sew the head to the front of the body.
    3. Sew the four slender legs to the underside of the body.
    4. Sew the tiny white tail to the back.

    Facial Features & Finishing

    Embroider a small dark nose and keep the eyes large and gentle for a classic sweet fawn expression.

    Tips for a Better Result

    • Use a hook one size smaller than the yarn label suggests, so no stuffing shows.
    • Work rounds a little tighter than usual for a firm, well-shaped body.
    • Count your stitches after every round to catch mistakes early.

    Care & Safety

    If this toy is for a baby or small child, embroider the eyes instead of using safety eyes. Spot clean with a damp cloth and let it air dry.

    Frequently Asked Questions

    0

    How do I add realistic looking spots?

    1

    Work small clusters of white stitches scattered irregularly over the back, rather than in a neat pattern, for a natural fawn marking.

    2

    Why are the legs worked longer than usual?

    3

    Deer have notably long, slender legs, and extending the plain rounds while keeping the stuffing light captures that delicate look.

    Love woodland animals? Try our crochet fox pattern, or browse all our free crochet patterns.
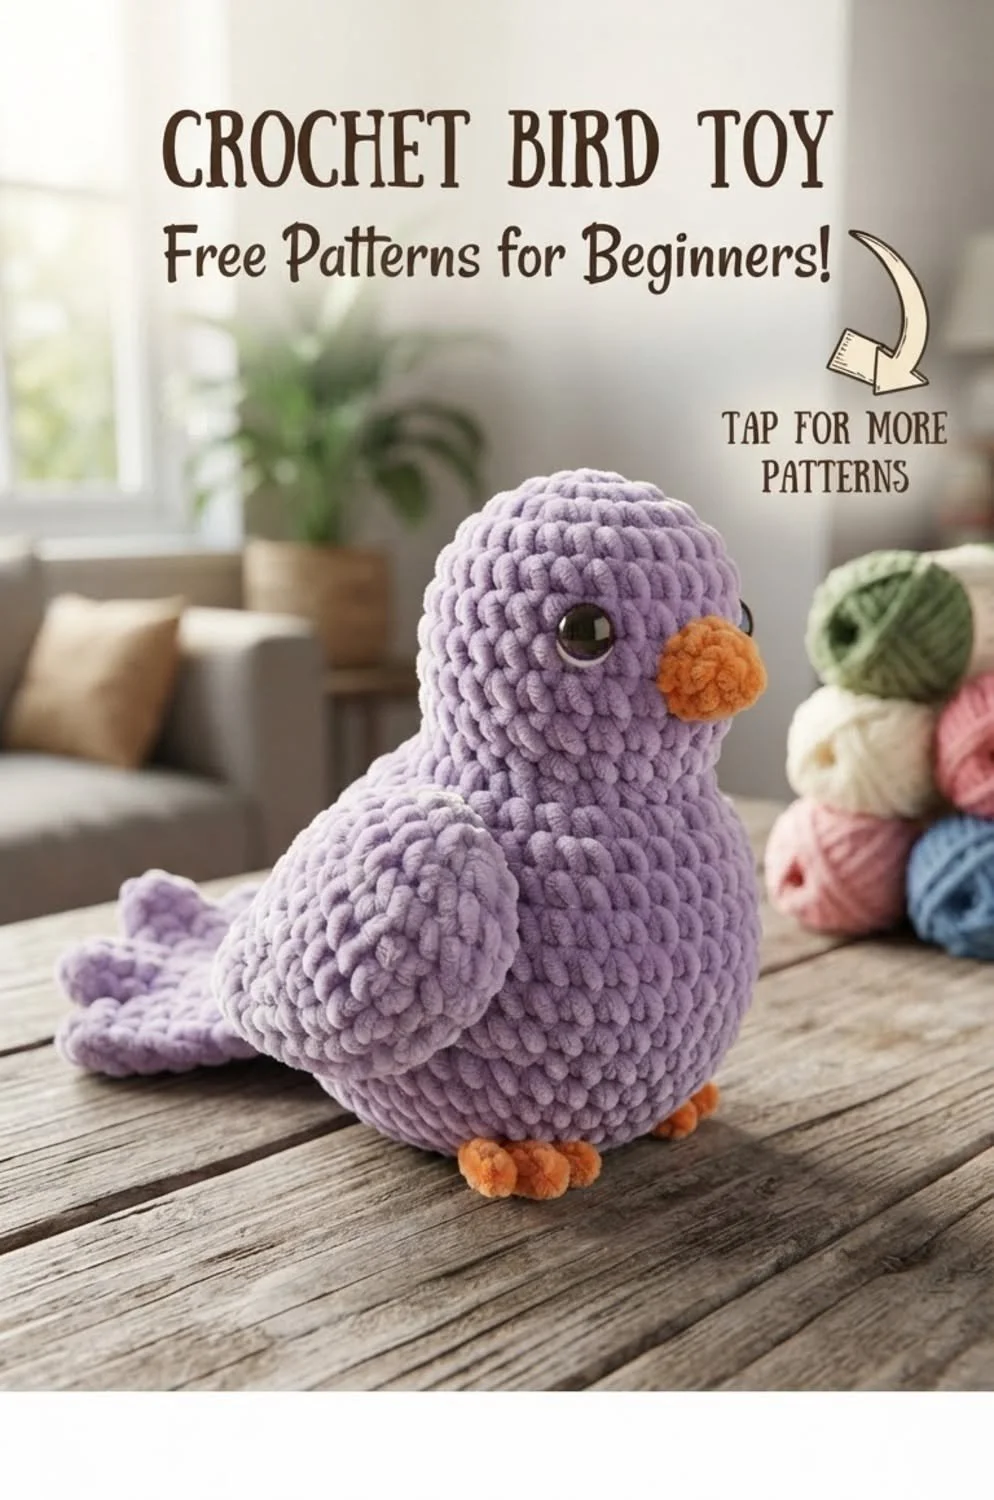
  • Free Crochet Robin Pattern

    Free Crochet Robin Pattern

    Crocheting bird toys is a fantastic way to express your creativity, and this cheerful little robin, with its round orange breast, is a classic favourite for any garden bird lover.

    Quick Pattern Overview

    Skill level Easy
    Finished size About 8 cm (3 in) tall
    Yarn DK or 8-ply cotton yarn, brown and orange, plus white
    Hook size 2.5 mm
    Estimated time 2 to 3 hours

    Materials You’ll Need

    • DK cotton yarn in brown and orange, plus a little white
    • 2.5 mm crochet hook
    • 6 mm safety eyes, or thread to embroider the eyes
    • Polyester stuffing
    • Tapestry needle, stitch marker and scissors

    Crochet Abbreviations

    MR magic ring
    ch chain
    sc single crochet
    inc increase (2 sc in same st)
    dec decrease (sc 2 sts together)
    st(s) stitch(es)
    FO fasten off

    Before You Start

    • Work in continuous rounds; do not join or turn.
    • Use a stitch marker in the first stitch of each round.
    • The number in brackets at the end of a round is your stitch count.
    • Stuff firmly but stop before the stitches start to gap.

    Free Crochet Robin Pattern

    Body (worked as one piece with the head)

    1. Round 1: 6 sc in MR (6, brown)
    2. Round 2: inc in each st (12)
    3. Round 3: (1 sc, inc) x 6 (18)
    4. Round 4: (2 sc, inc) x 6 (24). Change to orange for a round orange breast patch across the lower front.
    5. Rounds 5 to 9: sc in each st (24). Add safety eyes between rounds 5 and 6, about 7 sts apart.
    6. Round 10: (2 sc, dec) x 6 (18)
    7. Round 11: (1 sc, dec) x 6 (12). Stuff firmly.
    8. Round 12: dec x 6 (6). FO and close the hole.

    Wings (make 2)

    1. Round 1: 6 sc in MR (6)
    2. Round 2: (1 sc, inc) x 3 (9)

    FO and leave a long tail. Do not stuff. Flatten before sewing.

    Beak (flat, small)

    1. Round 1: 6 sc in MR (6)

    FO and leave a short tail. Do not stuff; pinch flat into a small triangle.

    Feet (make 2, tiny, flat)

    1. Round 1: 6 sc in MR (6)

    FO and leave a short tail. Do not stuff; flatten before sewing.

    Assembly

    1. Sew the two wings to the sides of the body.
    2. Sew the beak to the front of the head, just below the eyes.
    3. Sew the two tiny feet to the bottom of the body.

    Facial Features & Finishing

    The bright orange breast and small dark beak give the robin most of its charm; keep the overall face simple and round.

    Tips for a Better Result

    • Use a hook one size smaller than the yarn label suggests, so no stuffing shows.
    • Work rounds a little tighter than usual for a firm, well-shaped body.
    • Count your stitches after every round to catch mistakes early.

    Care & Safety

    If this toy is for a baby or small child, embroider the eyes instead of using safety eyes. Spot clean with a damp cloth and let it air dry.

    Frequently Asked Questions

    0

    How big should the orange breast patch be?

    1

    Covering roughly the lower half of the front of the body, from the beak down to where the legs attach, gives the most classic robin look.

    Can I make this pattern for a different small garden bird?

    Yes, changing the breast colour and pattern (blue for a bluebird, yellow for a finch) easily adapts this same simple shape.

    Love garden birds? Try our crochet chicken pattern, or browse all our free crochet patterns.
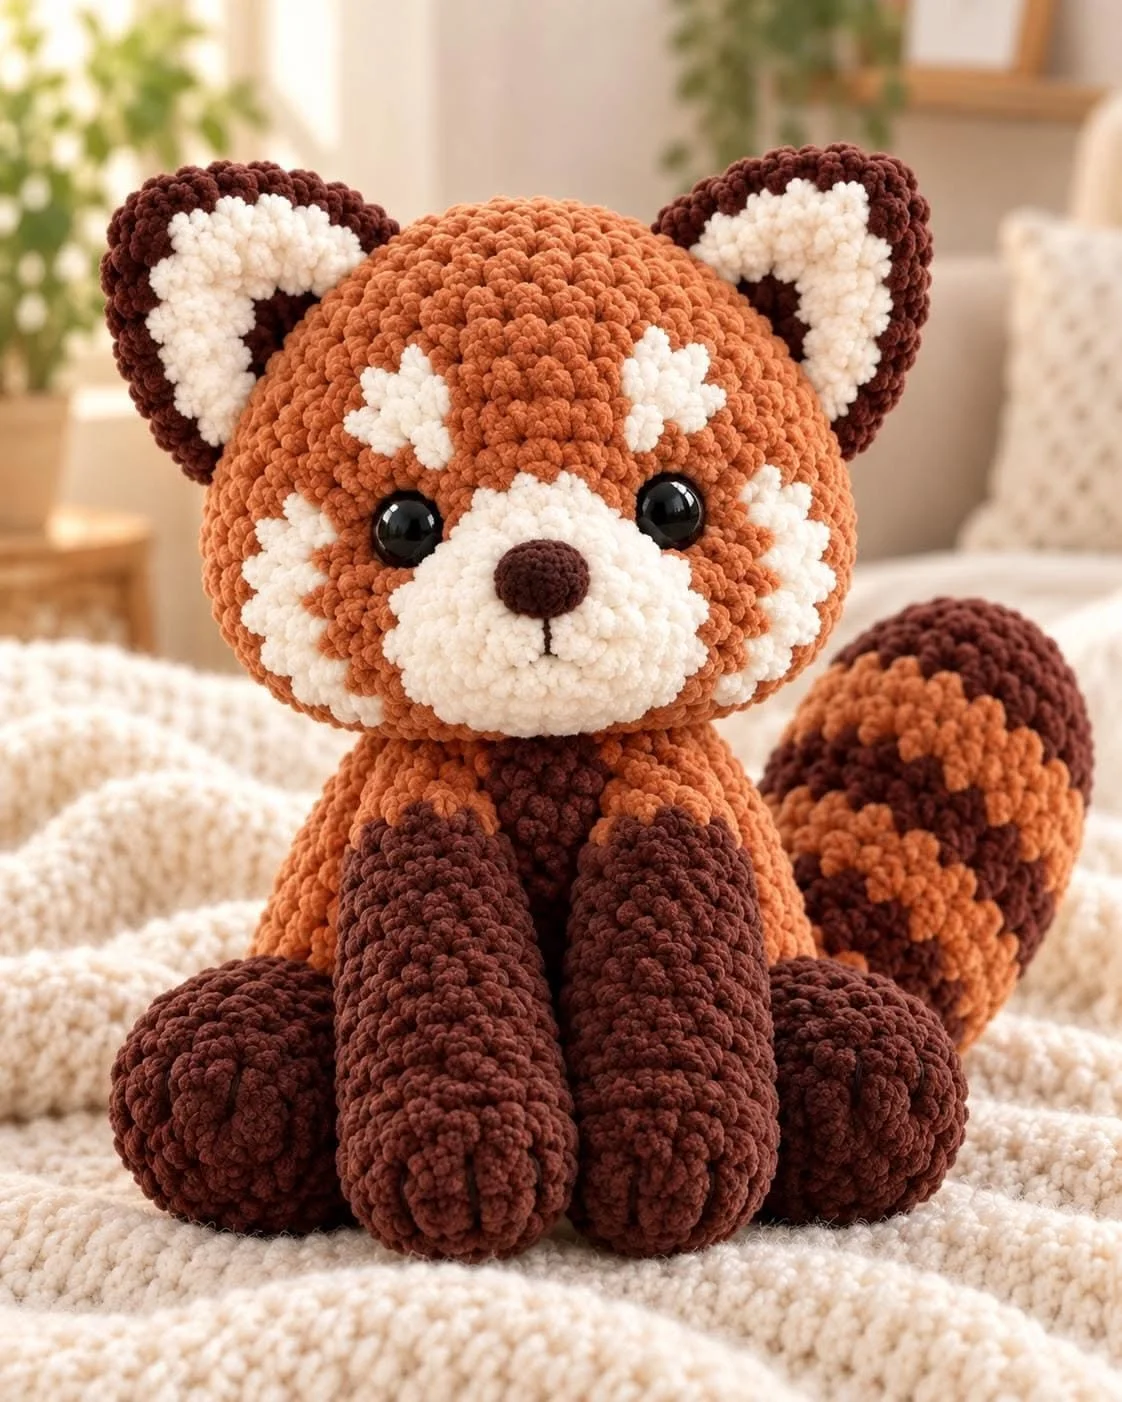
  • Free Crochet Red Panda Pattern

    Free Crochet Red Panda Pattern

    Create your own adorable plush red panda with this delightful pattern, featuring its signature rust-orange coat, white face markings and long ringed tail.

    Quick Pattern Overview

    Skill level Easy to intermediate
    Finished size About 13 cm (5 in) tall
    Yarn DK or 8-ply cotton yarn, rust orange, plus white and black
    Hook size 2.5 mm
    Estimated time 4 to 5 hours

    Materials You’ll Need

    • DK cotton yarn in rust orange, white and black
    • 2.5 mm crochet hook
    • 6 mm safety eyes, or thread to embroider the eyes
    • Polyester stuffing
    • Tapestry needle, stitch marker and scissors

    Crochet Abbreviations

    MR magic ring
    ch chain
    sc single crochet
    inc increase (2 sc in same st)
    dec decrease (sc 2 sts together)
    st(s) stitch(es)
    FO fasten off

    Before You Start

    • Work in continuous rounds; do not join or turn.
    • Use a stitch marker in the first stitch of each round.
    • The number in brackets at the end of a round is your stitch count.
    • Stuff firmly but stop before the stitches start to gap.

    Free Crochet Red Panda Pattern

    Head

    1. Round 1: 6 sc in MR (6, rust)
    2. Round 2: inc in each st (12)
    3. Round 3: (1 sc, inc) x 6 (18)
    4. Round 4: (2 sc, inc) x 6 (24). Work a white face patch across rounds 4 to 7, with small rust streaks below each eye.
    5. Rounds 5 to 9: sc in each st (24). Add safety eyes between rounds 6 and 7, about 7 sts apart.
    6. Round 10: (2 sc, dec) x 6 (18)
    7. Round 11: (1 sc, dec) x 6 (12). Stuff firmly.
    8. Round 12: dec x 6 (6). FO and close the hole.

    Ears (make 2, rounded, rust with cream tips)

    1. Round 1: 6 sc in MR (6)
    2. Round 2: inc in each st (12)

    FO and leave a long tail. Do not stuff. Flatten before sewing.

    Body

    1. Round 1: 6 sc in MR (6, rust)
    2. Round 2: inc in each st (12)
    3. Round 3: (1 sc, inc) x 6 (18)
    4. Round 4: (2 sc, inc) x 6 (24)
    5. Rounds 5 to 8: sc in each st (24)
    6. Round 9: (2 sc, dec) x 6 (18)
    7. Round 10: (1 sc, dec) x 6 (12). Stuff firmly.
    8. Round 11: dec x 6 (6). FO and close the hole.

    Legs (make 4, dark brown or black)

    1. Round 1: 6 sc in MR (6)
    2. Rounds 2 to 6: sc in each st (6)

    FO and leave a short tail. Stuff lightly.

    Tail (long, ringed)

    1. Round 1: 6 sc in MR (6, rust)
    2. Round 2: inc in each st (12)
    3. Rounds 3 to 12: sc in each st (12), alternating 2 rounds rust and 2 rounds cream for a ringed look
    4. Round 13: dec x 6 (6)

    Stuff firmly and evenly. FO and close.

    Assembly

    1. Sew the two ears to the top of the head.
    2. Sew the closed end of the head to the closed end of the body.
    3. Sew the four dark legs to the sides of the body.
    4. Curve the long ringed tail and sew it securely to the back.

    Facial Features & Finishing

    Embroider a small black nose and two rust-coloured tear streak markings running from the inner eyes down toward the nose for the signature red panda face.

    Tips for a Better Result

    • Use a hook one size smaller than the yarn label suggests, so no stuffing shows.
    • Work rounds a little tighter than usual for a firm, well-shaped body.
    • Count your stitches after every round to catch mistakes early.

    Care & Safety

    If this toy is for a baby or small child, embroider the eyes instead of using safety eyes. Spot clean with a damp cloth and let it air dry.

    Frequently Asked Questions

    0

    How do I get neat ringed stripes on the tail?

    1

    Switch colours cleanly every 2 rounds, carrying the unused yarn loosely along the inside of the tail so the stripes stay crisp.

    2

    Why are the legs a different colour from the body?

    3

    Red pandas have distinctively dark legs that contrast with their rust-coloured body, which is one of their most recognisable features.

    Love unique woodland creatures? Try our crochet hedgehog pattern, or browse all our free crochet patterns.

  • Free Crochet Easter Chick Pattern

    Free Crochet Easter Chick Pattern

    Bring a touch of whimsy to spring celebrations with this delightful fluffy yellow chick, perfect for filling an Easter basket or brightening up a shelf all season long.

    Quick Pattern Overview

    Skill level Easy
    Finished size About 8 cm (3 in) tall
    Yarn DK or 8-ply cotton yarn, yellow, plus orange
    Hook size 2.5 mm
    Estimated time 2 hours

    Materials You’ll Need

    • DK cotton yarn in yellow, plus a small amount of orange for the beak and feet
    • 2.5 mm crochet hook
    • 6 mm safety eyes, or thread to embroider the eyes
    • Polyester stuffing
    • Tapestry needle, stitch marker and scissors

    Crochet Abbreviations

    MR magic ring
    ch chain
    sc single crochet
    inc increase (2 sc in same st)
    dec decrease (sc 2 sts together)
    st(s) stitch(es)
    FO fasten off

    Before You Start

    • Work in continuous rounds; do not join or turn.
    • Use a stitch marker in the first stitch of each round.
    • The number in brackets at the end of a round is your stitch count.
    • Stuff firmly but stop before the stitches start to gap.

    Free Crochet Easter Chick Pattern

    Body (worked as one piece with the head)

    1. Round 1: 6 sc in MR (6)
    2. Round 2: inc in each st (12)
    3. Round 3: (1 sc, inc) x 6 (18)
    4. Round 4: (2 sc, inc) x 6 (24)
    5. Rounds 5 to 10: sc in each st (24). Add safety eyes between rounds 6 and 7, about 7 sts apart.
    6. Round 11: (2 sc, dec) x 6 (18)
    7. Round 12: (1 sc, dec) x 6 (12). Stuff firmly.
    8. Round 13: dec x 6 (6). FO and close the hole.

    Wings (make 2, tiny)

    1. Round 1: 6 sc in MR (6)

    FO and leave a short tail. Do not stuff; flatten before sewing.

    Beak (flat, orange)

    1. Round 1: 6 sc in MR (6)

    FO and leave a short tail. Do not stuff; pinch flat into a small triangle.

    Feet (make 2, flat, orange)

    1. Round 1: 6 sc in MR (6)
    2. Round 2: (1 sc, inc) x 3 (9)

    FO and leave a short tail. Do not stuff; flatten into a webbed shape.

    Assembly

    1. Sew the two tiny wings to the sides of the body.
    2. Sew the beak to the front, just below the eyes.
    3. Sew the two feet to the bottom of the body so the chick can stand.

    Facial Features & Finishing

    The orange beak and safety eyes give the chick most of its sweet expression; add two tiny pink cheek dots for extra charm.

    Tips for a Better Result

    • Use a hook one size smaller than the yarn label suggests, so no stuffing shows.
    • Work rounds a little tighter than usual for a firm, well-shaped body.
    • Count your stitches after every round to catch mistakes early.

    Care & Safety

    If this toy is for a baby or small child, embroider the eyes instead of using safety eyes. Spot clean with a damp cloth and let it air dry.

    Frequently Asked Questions

    0

    Is this a good first amigurumi project?

    1

    Yes, its small size and simple shape make it one of the quickest and easiest patterns in our collection, great for beginners.

    Can I make a whole basket of chicks?

    Yes, the quick construction makes this an easy pattern to repeat several times for a cute Easter display.

    Love quick spring projects? Browse all our free crochet patterns.
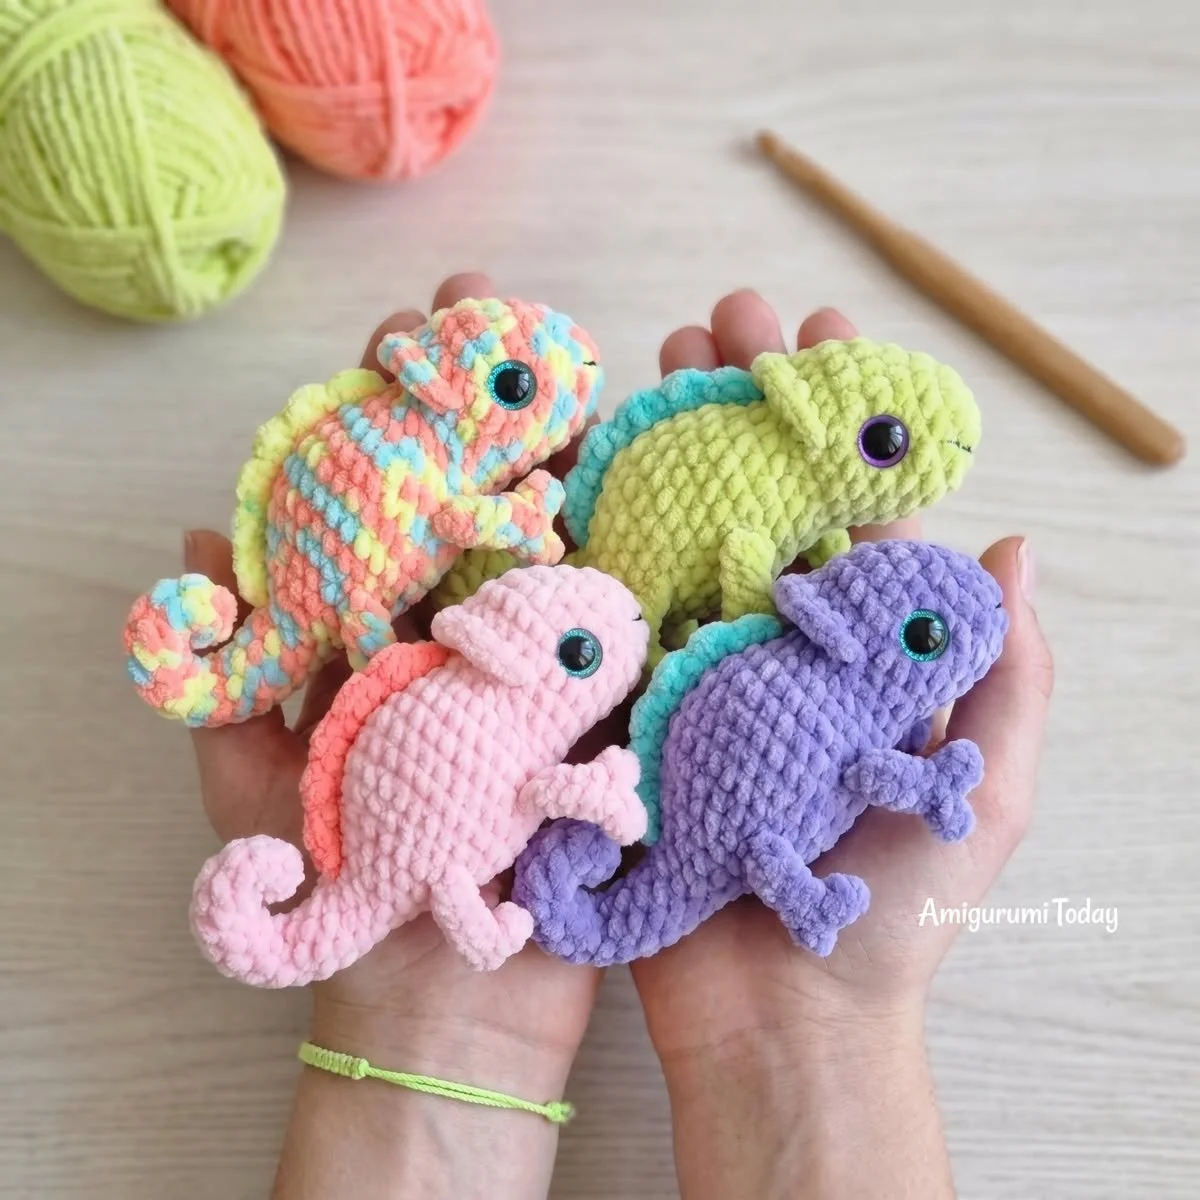
  • Free Crochet Chameleon Pattern

    Free Crochet Chameleon Pattern

    Crocheting your very own amigurumi chameleon is a delightful project, with a curling tail, a textured ridged back and the chance to use as many bright colours as you like.

    Quick Pattern Overview

    Skill level Easy to intermediate
    Finished size About 18 cm (7 in) long
    Yarn DK or 8-ply cotton yarn, green or any bright colour
    Hook size 2.5 mm
    Estimated time 4 to 5 hours

    Materials You’ll Need

    • DK cotton yarn in green or your chosen bright colour
    • 2.5 mm crochet hook
    • 9 mm safety eyes, or thread to embroider the eyes
    • Polyester stuffing
    • Tapestry needle, stitch marker and scissors

    Crochet Abbreviations

    MR magic ring
    ch chain
    sc single crochet
    inc increase (2 sc in same st)
    dec decrease (sc 2 sts together)
    st(s) stitch(es)
    FO fasten off

    Before You Start

    • Work in continuous rounds; do not join or turn.
    • Use a stitch marker in the first stitch of each round.
    • The number in brackets at the end of a round is your stitch count.
    • Stuff firmly but stop before the stitches start to gap.

    Free Crochet Chameleon Pattern

    Head and Body (worked as one long piece)

    1. Round 1: 6 sc in MR (6)
    2. Round 2: inc in each st (12)
    3. Round 3: (1 sc, inc) x 6 (18)
    4. Rounds 4 to 15: sc in each st (18), working through the back loop only every third round for a subtle ridged texture along the spine. Add safety eyes between rounds 4 and 5, set well apart and slightly raised for a chameleon’s bulging eye look.
    5. Round 16: (1 sc, dec) x 6 (12)
    6. Round 17: dec x 6 (6). Stuff firmly throughout. FO and close the hole.

    Legs (make 4)

    1. Round 1: 6 sc in MR (6)
    2. Rounds 2 to 5: sc in each st (6)

    FO and leave a short tail. Stuff lightly.

    Tail (long, curling)

    1. Round 1: 6 sc in MR (6)
    2. Rounds 2 to 16: sc in each st (6)

    FO and leave a long tail. Stuff very lightly so it can be curled into a spiral.

    Assembly

    1. Sew the four legs evenly along the underside of the body.
    2. Curl the long tail into a tight spiral and sew it securely to the back end of the body.

    Facial Features & Finishing

    Keep the eyes raised and prominent, since bulging, independently rotating eyes are one of a chameleon’s most recognisable features.

    Tips for a Better Result

    • Use a hook one size smaller than the yarn label suggests, so no stuffing shows.
    • Work rounds a little tighter than usual for a firm, well-shaped body.
    • Count your stitches after every round to catch mistakes early.

    Care & Safety

    If this toy is for a baby or small child, embroider the eyes instead of using safety eyes. Spot clean with a damp cloth and let it air dry.

    Frequently Asked Questions

    0

    How do I curl the tail into a spiral?

    1

    Coil the lightly stuffed tail around itself as you sew, tacking it to itself every few centimetres so it holds the spiral shape permanently.

    Can I make a multicoloured chameleon?

    Yes, chameleons are known for colour-changing skin, so feel free to switch yarn colours every few rounds for a fun rainbow effect.

    Love colourful reptiles? Browse all our free crochet patterns for more unique creatures.

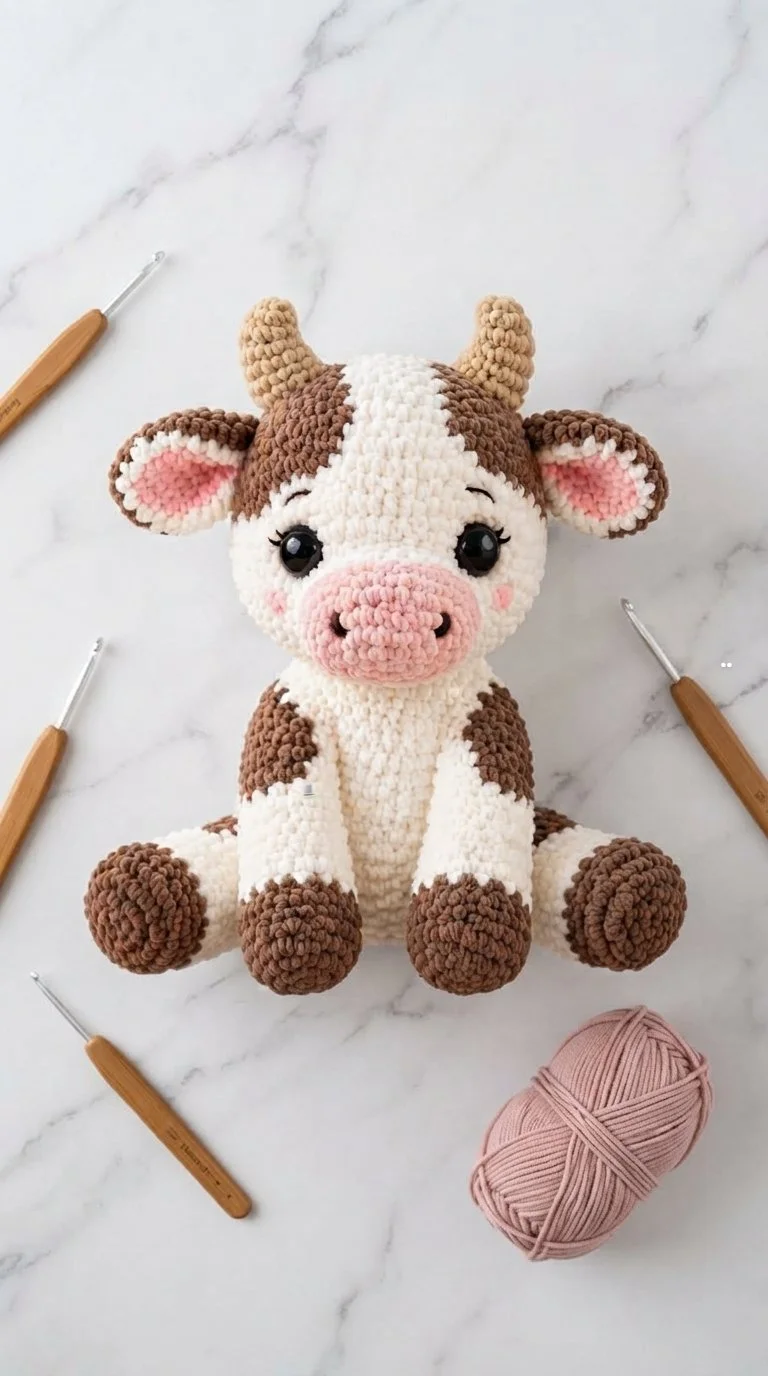
  • Free Crochet Dairy Cow Pattern

    Free Crochet Dairy Cow Pattern

    Welcome to the delightful world of crochet! This charming dairy cow amigurumi, with its classic black and white spots, is perfect for crocheters seeking a simple yet adorable farmyard project.

    Quick Pattern Overview

    Skill level Easy
    Finished size About 12 cm (4.75 in) tall
    Yarn DK or 8-ply cotton yarn, white and black, plus pink for the nose
    Hook size 2.5 mm
    Estimated time 3 to 4 hours

    Materials You’ll Need

    • DK cotton yarn in white and black, plus pink for the nose
    • 2.5 mm crochet hook
    • 6 mm safety eyes, or thread to embroider the eyes
    • Polyester stuffing
    • Tapestry needle, stitch marker and scissors

    Crochet Abbreviations

    MR magic ring
    ch chain
    sc single crochet
    inc increase (2 sc in same st)
    dec decrease (sc 2 sts together)
    st(s) stitch(es)
    FO fasten off

    Before You Start

    • Work in continuous rounds; do not join or turn.
    • Use a stitch marker in the first stitch of each round.
    • The number in brackets at the end of a round is your stitch count.
    • Stuff firmly but stop before the stitches start to gap.

    Free Crochet Dairy Cow Pattern

    Head (white, with black patches)

    1. Round 1: 6 sc in MR (6)
    2. Round 2: inc in each st (12)
    3. Round 3: (1 sc, inc) x 6 (18)
    4. Round 4: (2 sc, inc) x 6 (24)
    5. Rounds 5 to 9: sc in each st (24), adding a few irregular black patches. Add safety eyes between rounds 6 and 7, about 7 sts apart.
    6. Round 10: (2 sc, dec) x 6 (18)
    7. Round 11: (1 sc, dec) x 6 (12). Stuff firmly.
    8. Round 12: dec x 6 (6). FO and close the hole.

    Muzzle (pink)

    1. Round 1: 6 sc in MR (6)
    2. Round 2: inc in each st (12)
    3. Rounds 3 to 4: sc in each st (12)

    FO and leave a long tail. Stuff lightly.

    Ears (make 2, white)

    1. Round 1: 6 sc in MR (6)
    2. Round 2: (1 sc, inc) x 3 (9)

    FO and leave a long tail. Do not stuff. Flatten before sewing.

    Horns (make 2, tiny, optional)

    1. Round 1: 6 sc in MR (6)
    2. Rounds 2 to 3: sc in each st (6)

    FO and leave a short tail. Do not stuff.

    Body (white, with black patches)

    1. Round 1: 6 sc in MR (6)
    2. Round 2: inc in each st (12)
    3. Round 3: (1 sc, inc) x 6 (18)
    4. Round 4: (2 sc, inc) x 6 (24)
    5. Rounds 5 to 9: sc in each st (24), adding a few more black patches
    6. Round 10: (2 sc, dec) x 6 (18)
    7. Round 11: (1 sc, dec) x 6 (12). Stuff firmly.
    8. Round 12: dec x 6 (6). FO and close the hole.

    Legs (make 4)

    1. Round 1: 6 sc in MR (6)
    2. Rounds 2 to 6: sc in each st (6)

    FO and leave a short tail. Stuff lightly.

    Tail (with tuft)

    1. Round 1: 6 sc in MR (6)
    2. Rounds 2 to 7: sc in each st (6)

    FO, stuff lightly, and add a small black yarn tassel to the tip.

    Assembly

    1. Sew the muzzle to the centre of the face, just below the eyes.
    2. Sew the two ears to the top of the head, and the two horns just above them if using.
    3. Sew the closed end of the head to the closed end of the body.
    4. Sew the four legs to the underside of the body and the tail to the back.

    Facial Features & Finishing

    Embroider two small nostril dots on the pink muzzle and a simple mouth below it for a gentle, friendly cow expression.

    Tips for a Better Result

    • Use a hook one size smaller than the yarn label suggests, so no stuffing shows.
    • Work rounds a little tighter than usual for a firm, well-shaped body.
    • Count your stitches after every round to catch mistakes early.

    Care & Safety

    If this toy is for a baby or small child, embroider the eyes instead of using safety eyes. Spot clean with a damp cloth and let it air dry.

    Frequently Asked Questions

    0

    How do I add realistic looking patches?

    1

    Switch to black yarn for a few stitches at a time in irregular shapes rather than neat rounds, which mimics a natural dairy cow’s markings.

    Can I skip the horns?

    Yes, many dairy cows do not have visible horns, so leaving them off is just as accurate.

    Love farmyard favourites? Try our crochet Highland cow pattern, or browse all our free crochet patterns.

  • Free Crochet Chinchilla Pattern

    Free Crochet Chinchilla Pattern

    Bring the heartwarming charm and chunky, round shape of a beloved pocket pet into your home with this soft chinchilla amigurumi, featuring big round ears and a fluffy tail.

    Quick Pattern Overview

    Skill level Easy
    Finished size About 10 cm (4 in) long
    Yarn DK or 8-ply cotton yarn, grey, plus white for the belly
    Hook size 2.5 mm
    Estimated time 3 to 4 hours

    Materials You’ll Need

    • DK cotton yarn in grey and white
    • 2.5 mm crochet hook
    • 6 mm safety eyes, or thread to embroider the eyes
    • Polyester stuffing
    • Tapestry needle, stitch marker and scissors

    Crochet Abbreviations

    MR magic ring
    ch chain
    sc single crochet
    inc increase (2 sc in same st)
    dec decrease (sc 2 sts together)
    st(s) stitch(es)
    FO fasten off

    Before You Start

    • Work in continuous rounds; do not join or turn.
    • Use a stitch marker in the first stitch of each round.
    • The number in brackets at the end of a round is your stitch count.
    • Stuff firmly but stop before the stitches start to gap.

    Free Crochet Chinchilla Pattern

    Body (worked as one round oval piece with the head)

    1. Round 1: 6 sc in MR (6, grey)
    2. Round 2: inc in each st (12)
    3. Round 3: (1 sc, inc) x 6 (18)
    4. Round 4: (2 sc, inc) x 6 (24)
    5. Rounds 5 to 11: sc in each st (24), working a white belly patch along the underside. Add safety eyes between rounds 6 and 7, about 7 sts apart.
    6. Round 12: (2 sc, dec) x 6 (18)
    7. Round 13: (1 sc, dec) x 6 (12). Stuff firmly.
    8. Round 14: dec x 6 (6). FO and close the hole.

    Ears (make 2, large and round)

    1. Round 1: 6 sc in MR (6)
    2. Round 2: inc in each st (12)

    FO and leave a long tail. Do not stuff. Flatten before sewing.

    Feet (make 4, tiny)

    1. Round 1: 6 sc in MR (6)
    2. Round 2: sc in each st (6)

    FO and leave a short tail. Stuff very lightly.

    Tail (fluffy)

    1. Round 1: 6 sc in MR (6)
    2. Round 2: inc in each st (12)
    3. Round 3: (1 sc, inc) x 6 (18)
    4. Rounds 4 to 6: sc in each st (18)
    5. Round 7: (1 sc, dec) x 6 (12)
    6. Round 8: dec x 6 (6). Stuff firmly. FO and close.

    Assembly

    1. Sew the two large ears to the top of the head.
    2. Sew the four tiny feet evenly along the underside of the body.
    3. Sew the fluffy tail to the back end of the body.

    Facial Features & Finishing

    Embroider a small pink or dark nose and a few short whisker stitches below the eyes for a bright, alert chinchilla expression.

    Tips for a Better Result

    • Use a hook one size smaller than the yarn label suggests, so no stuffing shows.
    • Work rounds a little tighter than usual for a firm, well-shaped body.
    • Count your stitches after every round to catch mistakes early.

    Care & Safety

    If this toy is for a baby or small child, embroider the eyes instead of using safety eyes. Spot clean with a damp cloth and let it air dry.

    Frequently Asked Questions

    0

    Why are the ears so large?

    1

    Chinchillas have distinctively big, round ears relative to their body size, and keeping them generously sized gives the most recognisable look.

    Can I make this pattern for a different pocket pet?

    Yes, this same rounded body shape works well as a starting point for other small pets with minor tweaks to the ears and tail.

    Have other small pets too? Try our crochet guinea pig pattern, or browse all our free crochet patterns.

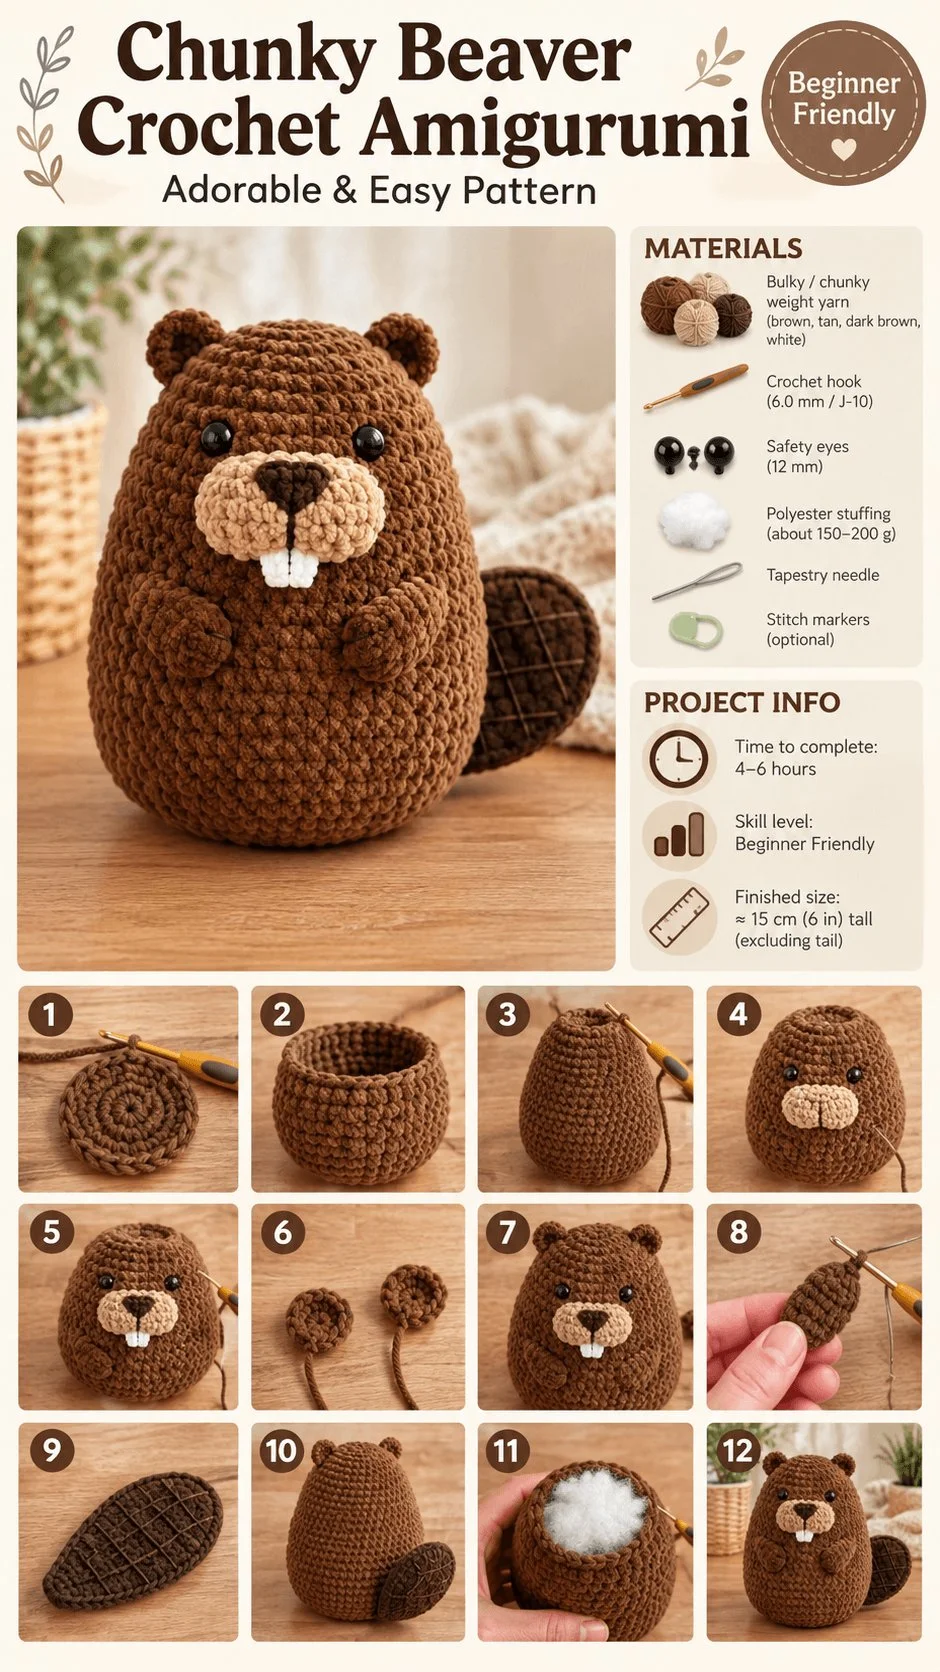
  • Free Crochet Beaver Pattern

    Free Crochet Beaver Pattern

    Are you ready to dive into the world of crochet with an adorable project? This chunky beaver amigurumi features a signature flat paddle tail and sweet round face, perfect for beginners.

    Quick Pattern Overview

    Skill level Easy
    Finished size About 12 cm (4.75 in) long
    Yarn DK or 8-ply cotton yarn, brown, plus a lighter tan for the tail and feet
    Hook size 2.5 mm
    Estimated time 3 to 4 hours

    Materials You’ll Need

    • DK cotton yarn in brown and tan
    • 2.5 mm crochet hook
    • 6 mm safety eyes, or thread to embroider the eyes
    • Polyester stuffing
    • Tapestry needle, stitch marker and scissors

    Crochet Abbreviations

    MR magic ring
    ch chain
    sc single crochet
    inc increase (2 sc in same st)
    dec decrease (sc 2 sts together)
    st(s) stitch(es)
    FO fasten off

    Before You Start

    • Work in continuous rounds; do not join or turn.
    • Use a stitch marker in the first stitch of each round.
    • The number in brackets at the end of a round is your stitch count.
    • Stuff firmly but stop before the stitches start to gap.

    Free Crochet Beaver Pattern

    Head

    1. Round 1: 6 sc in MR (6)
    2. Round 2: inc in each st (12)
    3. Round 3: (1 sc, inc) x 6 (18)
    4. Rounds 4 to 7: sc in each st (18). Add safety eyes between rounds 4 and 5, about 6 sts apart.
    5. Round 8: (1 sc, dec) x 6 (12). Stuff firmly.
    6. Round 9: dec x 6 (6). FO and close the hole.

    Teeth (tiny, white, optional)

    Cut two tiny rectangles of white felt, or embroider two short wide stitches, and attach just below the nose area.

    Ears (make 2, small and round)

    1. Round 1: 6 sc in MR (6)

    FO and leave a short tail. Do not stuff; flatten before sewing.

    Body (chunky and round)

    1. Round 1: 6 sc in MR (6)
    2. Round 2: inc in each st (12)
    3. Round 3: (1 sc, inc) x 6 (18)
    4. Round 4: (2 sc, inc) x 6 (24)
    5. Round 5: (3 sc, inc) x 6 (30)
    6. Rounds 6 to 9: sc in each st (30)
    7. Round 10: (3 sc, dec) x 6 (24)
    8. Round 11: (2 sc, dec) x 6 (18). Stuff firmly.
    9. Round 12: (1 sc, dec) x 6 (12)
    10. Round 13: dec x 6 (6). FO and close the hole.

    Legs (make 4, short)

    1. Round 1: 6 sc in MR (6)
    2. Rounds 2 to 3: sc in each st (6)

    FO and leave a short tail. Stuff lightly.

    Tail (flat, paddle shaped, tan)

    Chain 8, sc in the 2nd chain from the hook and across (7 sts). Work 5 more rows of sc, 7 sts each, then work 1 row decreasing to a rounded point. FO, leaving a long tail.

    Assembly

    1. Sew the two ears to the top of the head.
    2. Sew the head to the front of the body.
    3. Sew the four short legs to the underside of the body.
    4. Sew the flat paddle tail to the back end of the body, angled slightly downward like a real beaver’s tail.

    Facial Features & Finishing

    Embroider a small nose above the teeth, if adding them, for a cheerful, buck-toothed beaver expression.

    Tips for a Better Result

    • Use a hook one size smaller than the yarn label suggests, so no stuffing shows.
    • Work rounds a little tighter than usual for a firm, well-shaped body.
    • Count your stitches after every round to catch mistakes early.

    Care & Safety

    If this toy is for a baby or small child, embroider the eyes instead of using safety eyes. Spot clean with a damp cloth and let it air dry.

    Frequently Asked Questions

    0

    Is the paddle tail hard to make?

    1

    No, it is worked as a simple flat rectangle in rows, shaped at the end, making it one of the easiest parts of the whole pattern.

    Can I leave off the teeth detail?

    Yes, the beaver still looks great without them, though the little teeth add a lot of charm and personality.

    Love chunky, easy amigurumi? Browse all our free crochet patterns.