Category: Free Patterns

Free animal crochet patterns for cute amigurumi friends. Easy step by step patterns for pandas, bunnies, foxes and more.

  • Crochet Mini Toys Free Patterns – Cute Amigurumi Ideas

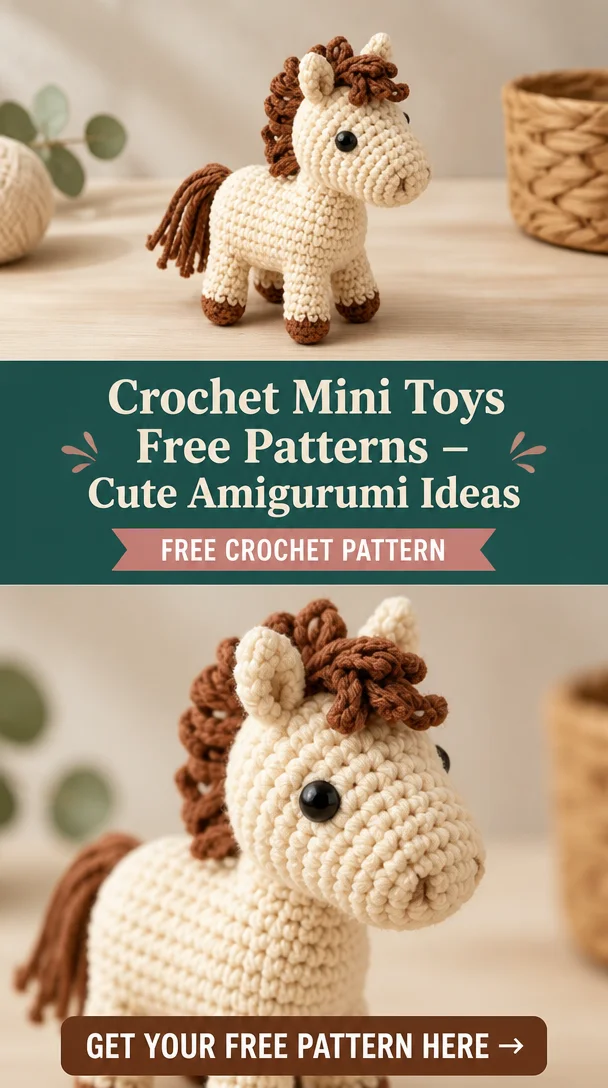
    Crochet Mini Toys Free Patterns – Cute Amigurumi Ideas

    Crochet Mini Toys Free Patterns – Cute Amigurumi Ideas

    Discover adorable crochet mini toys with free patterns perfect for quick and creative yarn projects! đŸ§¶đŸ§ž Today, we’ll explore the world of tiny amigurumi animals, miniature crochet toys, and cute handmade characters. These charming little creations make delightful gifts for loved ones or fun keychains and desk dĂ©cor for yourself. Plus, they’re an excellent way to use up that leftover yarn you have lying around! This project is suitable for all skill levels, making it a fantastic choice for both beginners and experienced crocheters alike.

    Crochet Mini Toy Pattern Overview

    • Skill Level: Beginner-friendly
    • Finished Size: Approximately 4 inches tall
    • Crochet Hook: 3.5 mm (E)
    • Yarn Type: Medium-weight yarn (such as worsted)
    • Main Colors: Your choice!
    • Construction Method: Worked in continuous rounds
    • Approximate Time: 2-3 hours

    Materials You’ll Need

    • Medium-weight yarn
    • Crochet hook (3.5 mm / E)
    • Stuffing (polyester fiberfill)
    • Safety eyes (6mm)
    • Yarn needle
    • Stitch marker
    • Scissors
    • Embroidery thread (for detailing)

    Crochet Abbreviations

    • Ch: Chain
    • Sc: Single crochet
    • Sl st: Slip stitch
    • Inc: Increase (2 sc in one stitch)
    • Dec: Decrease (sc 2 together)

    Before You Start

    • Work in continuous rounds to avoid visible seam lines.
    • Use a stitch marker to keep track of your rounds.
    • Always check your stitch counts after each round.
    • Stuff your toy gradually to ensure even distribution.
    • Keep track of your rounds for accurate sizing.

    Free Crochet Mini Animal Pattern

    Head

    Round 1: Ch 2, 6 sc in 2nd ch from hook.
    Round 2: Inc in each stitch around (12 sc).
    Round 3: (Sc in next stitch, inc) around (18 sc).
    Round 4: (Sc in next 2 stitches, inc) around (24 sc).
    Round 5-7: Sc around (24 sc).

    Body

    Round 1: Change to body color, sc around (24 sc).
    Round 2: (Sc in next 3 stitches, inc) around (30 sc).
    Round 3-5: Sc around (30 sc).

    Arms

    Make 2
    Round 1: Ch 2, 5 sc in 2nd ch from hook.
    Round 2: Sc around (5 sc).
    Round 3-5: Sc around (5 sc).

    Legs

    Make 2
    Round 1: Ch 2, 6 sc in 2nd ch from hook.
    Round 2: Sc around (6 sc).
    Round 3: (Sc in next stitch, inc) around (9 sc).
    Round 4-6: Sc around (9 sc).

    Tail

    Round 1: Ch 2, 4 sc in 2nd ch from hook.
    Round 2: Sc around (4 sc).

    Assembly

    1. Sew the head to the top of the body, using matching yarn.
    2. Attach the arms to the sides of the body at the desired position.
    3. Attach the legs to the bottom of the body, ensuring they’re positioned evenly.
    4. Sew the tail to the back of the body.
    5. Stuff the head and body, adjusting firmness to preference.

    Facial Features and Finishing Details

    Attach safety eyes at the appropriate height on the head. Use embroidery thread to create a nose and mouth by stitching small lines or shapes. Add any additional details like blush using pink embroidery thread.

    Tips for a Better Result

    • Keep your tension consistent for neat and even stitches.
    • Use multiple colors for a more vibrant mini animal.
    • Practice patience when assembling different parts for a polished finish.

    Customization Ideas

    • Experiment with different yarn colors for unique looks.
    • Create a larger animal by using thicker yarn and a larger hook.
    • Try different facial expressions by using varying placements of stitches.
    • Add accessories like hats or scarves for a fun touch.

    Common Problems and Troubleshooting

    • Uneven stuffing: Add or remove stuffing as necessary while keeping the shape.
    • Loose stitches: Check tension; consider using a smaller hook size if necessary.
    • Parts looking uneven: Ensure stitch counts are followed, and check for missed rounds.
    • Assembly alignment: Position pieces before sewing and adjust as needed.

    Care and Safety

    Handmade crochet animals can be spot-cleaned with a damp cloth. If used as toys, ensure safety eyes are securely attached to prevent choking hazards. Regularly check for loose parts.

    Frequently Asked Questions

    • Is this crochet mini animal pattern beginner-friendly?
      Yes, it’s suitable for beginners and contains simple stitches.
    • What yarn is best for this crochet mini animal?
      Medium-weight yarn works best, but you can use any yarn that suits your design.
    • How long does it take to crochet this animal?
      Expect to spend about 2-3 hours depending on your skill level.
    • Can I make this crochet animal larger or smaller?
      Yes, adjust the yarn and hook size for a different finished size.
    • Can I use different yarn colors?
      Absolutely! Feel free to customize with your favorite colors.
    • How do I keep the finished animal in shape?
      Proper stuffing and consistent stitches help maintain shape.

    Conclusion

    Crocheting your own mini animal is a delightful project that brings joy and creativity to your crafting experience. These adorable little creations can be personalized and enjoyed as gifts or fun décor. Grab your hook, yarn, and get started on your next cute amigurumi today!
     

  • Free Crochet Bunny Pattern – A Cute Project You’ll Love to Make

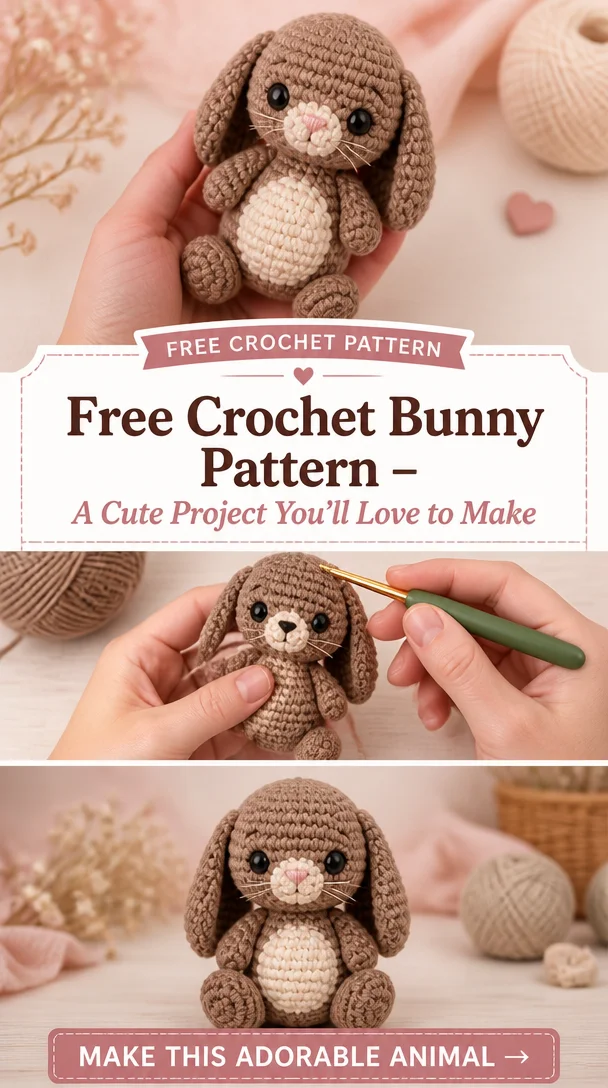
    Free Crochet Bunny Pattern – A Cute Project You’ll Love to Make

    30 Easy Crochet Patterns Free Beginners Animals For Your Next Project

    Are you keen to crochet adorable animals with ease? Whether you’re a seasoned crocheter or a beginner looking for a new project, these 30 easy crochet patterns can help you create delightful animal figures that are perfect for gifting, decorating your space, or even turning into playtime companions for little ones. The joy of crafting whimsical animals brings an unparalleled sense of accomplishment, making these patterns an exciting addition to your crochet journey. So grab your yarn and hook, and let’s dive into the charming world of crochet animals that might just become your next obsession!

    Crochet Animal Pattern Overview

    • Skill Level: Beginner-friendly
    • Finished Size: Varies by animal
    • Crochet Hook: Appropriate size for yarn
    • Yarn Type: Standard acrylic/ cotton yarn
    • Main Colors: Your choice; patterns allow for customization
    • Construction Method: Amigurumi style (working in rounds)
    • Approximate Time: Varies depending on the animal
    • Project Category: Easy crochet patterns for beginners

    Materials You’ll Need

    • Yarn (various colors)
    • Crochet hook (size varies by yarn)
    • Stuffing (polyester fiberfill or similar)
    • Safety eyes (if using)
    • Yarn needle
    • Stitch marker
    • Scissors
    • Embroidery thread (for facial features)
    • Any specific materials based on the animal (e.g., felt for accessories)

    Crochet Abbreviations

    • Ch: Chain
    • Sc: Single crochet
    • Sl st: Slip stitch
    • Inc: Increase
    • Dec: Decrease
    • Rnd: Round

    Before You Start

    • When working on these animal patterns, remember to work in continuous rounds to avoid visible seams.
    • Using a stitch marker can help you keep track of your rounds.
    • Check your stitch counts regularly to ensure accuracy.
    • Stuff your animal gradually to give it the desired shape and firmness.
    • Keep track of your rounds to maintain consistency in size and shape.

    Free Crochet Animal Pattern

    [Insert Animal Name Here]

    Head

    • Rnd 1: Start with a magic ring, 6 sc.
    • Rnd 2: Inc around (12 sc).
    • Rnd 3: Sc 1, inc around (18 sc).
    • Continue until you reach the desired head size.

    Body

    • Rnd 1: Start with a magic ring, 8 sc.
    • Rnd 2: Inc around (16 sc).
    • Rnd 3: Sc 1, inc around.
    • Continue working in rounds until reaching the desired body length.

    Ears (x2)

    • Rnd 1: Ch 4, in second ch from hook, 3 sc, turn.
    • Rnd 2: Ch 1, dec, sc in last stitch.
    • Fasten off.

    Arms (x2)

    • Follow similar steps as ears for arms, adjusting to make them longer or shorter as needed.

    Assembly

    • Position the head on top of the body and sew securely.
    • Attach the ears to the top sides of the head.
    • Position and sew the arms to the sides of the body.
    • Attach legs similarly to how you attached the arms.
    • Ensure the tail is securely fastened at the back.

    Facial Features and Finishing Details

    • Use safety eyes or embroider eyes with yarn or thread.
    • Create a simple nose with embroidery thread and add a small mouth for expression.
    • Consider adding blush spots with a bit of pink thread to give your animal character.

    Tips for a Better Result

    • Maintain even tension when crocheting to avoid uneven stitches.
    • Revisit your stitch counts regularly for accuracy throughout the project.
    • Experiment with different color combinations for a unique look.

    Customization Ideas

    • Change the main colors to create different breeds or characters.
    • Use variegated yarn for a fun twist in the pattern.
    • Add embellishments like bows or hats for added personality.
    • Adjust the size by using thicker yarn or a larger hook for a bigger animal.

    Common Problems and Troubleshooting

    • Uneven Stuffing: Distribute stuffing evenly and add more as needed.
    • Loose Stitches: Maintain consistent tension when crocheting.
    • Incorrect Stitch Counts: Double-check your work after each round completion.
    • Shape Problems: Analyze your stitch consistency and adjust as necessary during assembly.

    Care and Safety

    To care for your crocheted animal, spot clean or hand wash to preserve its shape and colors. If your creation is a toy for children, be cautious with small parts, such as safety eyes, ensuring everything is securely fastened to prevent choking hazards.

    Frequently Asked Questions

    • Is this crochet animal pattern beginner-friendly?
      Yes, these patterns are designed with beginners in mind, making them easy to follow.

    • What yarn is best for this crochet animal?
      Standard acrylic or cotton yarn works best for these projects.

    • How long does it take to crochet this animal?
      The time commitment varies by animal and your crochet speed but can range from a few hours to a couple of days.

    • Can I make this crochet animal larger or smaller?
      Yes, by adjusting the yarn weight and hook size, you can easily modify the finished size.

    • Can I use different yarn colors?
      Absolutely! Feel free to customize with any color you desire.

    • How do I keep the finished animal in shape?
      Avoid excessive handling and store in a cool, dry place to maintain shape.

    Conclusion

    Creating your own crochet animals opens the door to endless creativity and satisfaction. Whether for decoration, gifts, or personal keepsakes, these free crochet patterns are sure to inspire you. Start your next crochet project today and relish the joy of bringing adorable creatures to life with your own hands!

  • 8 Puppy Free Crochet Patterns for Beginners

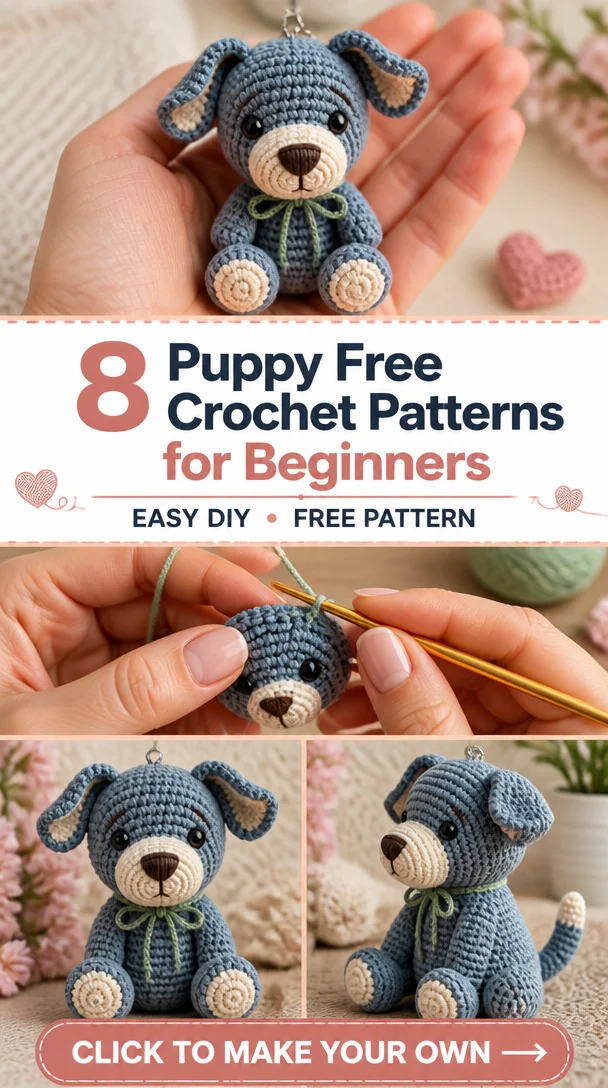
    8 Puppy Free Crochet Patterns for Beginners

    8 Puppy Free Crochet Patterns for Beginners

    Crocheting adorable puppy patterns is a delightful way to express creativity while making charming gifts or toys. These handmade crochet puppies are perfect for adorning a child’s room, gifting to a friend, or simply enjoying your craft. With a variety of designs, each one offers a chance to explore different stitches and techniques, making them suitable for beginners and experienced crocheters alike. Whether you’re looking to create a cute companion or a colorful keepsake, these eight free puppy crochet patterns promise fun and learning as you bring these endearing creatures to life! Start with the Free Crochet Puppy Pattern for a classic amigurumi first project.

    Crochet Puppy Pattern Overview

    • Skill Level: Beginner-friendly
    • Finished Size: Varies by pattern
    • Crochet Hook: 3.5mm or 4.0mm (US E or G)
    • Yarn Type: Worsted weight yarn
    • Main Colors: Various (depending on the pattern)
    • Construction Method: Worked in rounds
    • Approximate Time: 4-6 hours per puppy
    • Project Suitability: Ideal for beginners

    Materials You’ll Need

    • Worsted weight yarn
    • 3.5mm or 4.0mm crochet hook
    • Stuffing (fiberfill)
    • Safety eyes (optional)
    • Yarn needle
    • Stitch marker
    • Scissors
    • Embroidery thread (for facial features)
    • Any animal-specific materials (e.g., fabric for accessories)

    Crochet Abbreviations

    • ch: chain
    • sc: single crochet
    • dc: double crochet
    • hdc: half double crochet
    • inc: increase
    • dec: decrease
    • sl st: slip stitch
    • rnd: round

    Before You Start

    • Work in continuous rounds to minimize visible seams.
    • Use a stitch marker to keep track of your rounds.
    • Check your stitch counts regularly to ensure consistency.
    • Stuff your puppy gradually to achieve a firm shape.
    • Keep track of rounds for easy assembly later.

    Free Crochet Puppy Pattern

    Head

    Round 1: 6 sc in a magic ring.
    Round 2: Inc in each stitch around (12 sc).
    Round 3: 1 sc, inc repeat around (18 sc).
    Round 4-6: Sc in each stitch around (18 sc).

    Body

    Round 1: 6 sc in a magic ring.
    Round 2: Inc in each stitch around (12 sc).
    Round 3: 1 sc, inc repeat around (18 sc).
    Round 4-7: Sc in each stitch around (18 sc).

    Ears

    Round 1: 6 sc in a magic ring.
    Round 2: Inc in each stitch around (12 sc).
    Round 3: Sc around (12 sc).
    Fasten off, leaving a tail for sewing.

    Legs

    Round 1: 6 sc in a magic ring.
    Round 2: Inc in each stitch around (12 sc).
    Round 3-4: Sc around (12 sc).
    Fasten off, leaving a tail for sewing.

    Tail

    Ch 10. Sc back down the chain (9 sc). Fasten off.

    Assembly

    1. Position the head on the body and sew securely.
    2. Attach the ears on either side of the head.
    3. Sew the legs to the bottom of the body, ensuring they are evenly spaced.
    4. Attach the tail at the back.
    5. Make sure all pieces are securely sewn and shaped well.

    Facial Features and Finishing Details

    1. Attach safety eyes or embroider eyes using thread.
    2. Use embroidery thread to create a nose and mouth.
    3. Make any necessary adjustments to ensure facial features are symmetrical.

    Tips for a Better Result

    • Use a stitch marker to help keep track of rounds easily.
    • Check your tension regularly to avoid unevenness.
    • Experiment with different yarn textures for varied looks.

    Customization Ideas

    • Change the main color or add a second color for stripes.
    • Use different yarn types, such as cotton or acrylic.
    • Alter the size by adjusting your hook size and tension.
    • Add accessories like a collar or a bow for personalization.

    Common Problems and Troubleshooting

    • Uneven Stuffing: Stuff evenly, adjusting as you go along.
    • Loose Stitches: Tighten your tension if you notice gaps.
    • Incorrect Stitch Counts: Double-check rounds frequently to stay on track.
    • Parts Looking Uneven: Ensure all pieces are consistent in size before assembly.

    Care and Safety

    To care for your crochet puppy, hand wash in cold water and lay flat to dry. For safety, ensure all small parts like safety eyes are securely attached, especially if the puppy will be used as a toy for children. If you love soft, chunky makes, the Chunky Yarn Puppy Snuggler makes a wonderfully cuddly companion.

    Frequently Asked Questions

    • Is this crochet puppy pattern beginner-friendly?
      Yes, this pattern is designed for beginners.

    • What yarn is best for this crochet puppy?
      Worsted weight yarn works best for this pattern.

    • How long does it take to crochet this animal?
      Expect to spend about 4-6 hours depending on your speed.

    • Can I make this crochet animal larger or smaller?
      Yes, adjusting your hook size or yarn weight can change the size of the finished puppy.

    • Can I use different yarn colors?
      Absolutely! Feel free to customize your yarn choices.

    • How do I keep the finished animal in shape?
      Ensure it’s stuffed evenly and avoid over-stuffing.

    Conclusion

    Creating a crochet puppy is a rewarding project that combines creativity with craftsmanship. Whether you’re a new crocheter or confident in your skills, these eight free patterns offer a delightful way to engage with your craft. Grab your yarn and hooks, and start making your cute crochet companions today! When you’re ready for a different animal, try the Free Crochet Bunny Pattern next.

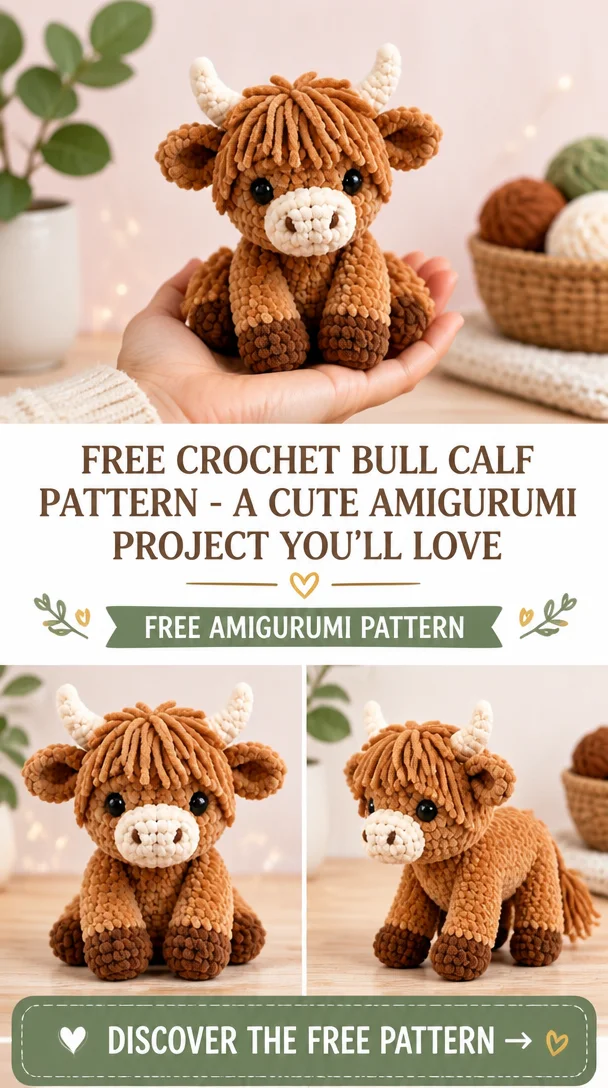
  • Free Crochet Bull Calf Pattern – A Cute Amigurumi Project You’ll Love

    Free Crochet Bull Calf Pattern – A Cute Amigurumi Project You’ll Love

    Cute Crochet Animal Patterns: Amigurumi Bull Calf Toy Tutorial

    Unleash your creativity with this adorable Amigurumi Bull Calf Toy tutorial! Crocheting a bull calf not only brings a whimsical touch to your toy collection but also offers a rewarding crafting experience. This charming amigurumi character is perfect for gifting to friends, decorating your nursery, or even as a cozy companion for your little ones. Whether you’re a beginner eager to explore amigurumi techniques or an experienced crocheter searching for a fun project, this pattern provides straightforward instructions and delightful results. Let’s dive into this enjoyable crafting journey!

    Crochet Bull Calf Pattern Overview

    • Skill Level: Beginner
    • Finished Size: Approximately 8 inches tall
    • Crochet Hook: Size G (4.0mm)
    • Yarn Type: Medium weight (4)
    • Main Colors: Cream, light brown, dark brown
    • Construction Method: Worked in continuous rounds
    • Approximate Time: 4-6 hours
    • Beginner-Friendly: Yes!

    Materials You’ll Need

    • Medium weight yarn (cream, light brown, dark brown)
    • Crochet hook (size G)
    • Polyester stuffing
    • Safety eyes (12mm)
    • Yarn needle
    • Stitch marker
    • Scissors
    • Embroidery thread (black for details)
    • Optional: fabric for accessories (like a scarf)

    Crochet Abbreviations

    • Ch: Chain
    • Sc: Single Crochet
    • Inc: Increase (2 sc in same stitch)
    • Dec: Decrease (2 sc together)
    • Rnd: Round

    Before You Start

    • Work in continuous rounds: This helps maintain a seamless look for your bull calf.
    • Use a stitch marker: This is essential to track your rounds easily.
    • Check your stitch counts regularly: Ensures your piece stays on track.
    • Stuff gradually: As you crochet, add stuffing to help shape the limbs and body.
    • Keep track of rounds: Refer back to stitch counts for accuracy during assembly.

    Free Crochet Bull Calf Pattern

    Head

    Round 1: 6 sc in a magic ring (6)
    Round 2: Inc in each stitch (12)
    Round 3: (Sc in next stitch, inc) repeat around (18)
    Round 4-6: Sc in each stitch (18)
    Round 7: (Sc in next stitch, dec) repeat around (12)
    Stuff the head lightly.
    Round 8: Dec to close (6)

    Body

    Round 1: 6 sc in a magic ring (6)
    Round 2: Inc in each stitch (12)
    Round 3: (Sc in next stitch, inc) repeat around (18)
    Round 4-8: Sc in each stitch (18)
    Round 9: (Sc in next stitch, dec) repeat around (12)
    Stuff the body lightly.
    Round 10: Dec to close (6)

    Ears (Make 2)

    Round 1: 5 sc in a magic ring (5)
    Round 2: (Sc in next stitch, inc) repeat around (7)
    Round 3: Sc in each stitch (7)
    Finish off, leaving a long tail for sewing.

    Legs (Make 4)

    Round 1: 6 sc in a magic ring (6)
    Round 2: Inc in each stitch (12)
    Round 3-5: Sc in each stitch (12)
    Stuff lightly, finish off, and leave long tails for assembly.

    Tail

    Ch 10, sl st back to the first ch to form a loop. Finish and leave a tail for attaching.

    Assembly

    1. Sew the head to the body: Position it centered and secure with a yarn needle and thread.
    2. Attach the ears: Position them on the top sides of the head.
    3. Affix the legs: Sew two legs to the front bottom and two to the back.
    4. Add the tail: Securely stitch at the rear of the body.

    Facial Features and Finishing Details

    • Attach safety eyes to the head, ensuring they are placed evenly.
    • Use black embroidery thread to create a simple nose and a small mouth.
    • Optional: Add accents or embellishments, like a scarf or a bell.

    Tips for a Better Result

    • Tighten your stitches for a neat finish, especially around the head and body.
    • Use contrasting colors to enhance features and details, like the eyes or horns.

    Customization Ideas

    • Change color patterns for the calf’s coat, creating spots or stripes.
    • Use different yarn textures for a unique feel.
    • Experiment with accessories, such as a cute bow tie or a hat.

    Common Problems and Troubleshooting

    • Uneven stuffing: Utilize smaller amounts of stuffing gradually, ensuring a uniform shape.
    • Loose stitches: Check your tension; tighter stitches will hold better.
    • Mismatched parts: Verify stitch counts before assembly to avoid misshapen limbs.

    Care and Safety

    Handmade crochet toys should be washed gently by hand and dried flat to maintain their shape. For safety, ensure that all small parts, like safety eyes, are securely attached to avoid choking hazards in children.

    Frequently Asked Questions

    • Is this crochet bull calf pattern beginner-friendly? Yes, it is ideal for beginners learning amigurumi techniques.
    • What yarn is best for this crochet bull calf? A medium weight (4) yarn works best for durability and softness.
    • How long does it take to crochet this animal? Expect to spend around 4-6 hours from start to finish.
    • Can I make this crochet animal larger or smaller? Adjust the yarn weight and hook size to create various sizes.
    • Can I use different yarn colors? Absolutely! Feel free to mix and match colors to create your unique calf.
    • How do I keep the finished animal in shape? Regularly check for loose stuffing and reshape as necessary.

    Conclusion

    Creating your very own Amigurumi Bull Calf is not only an enjoyable project but also a chance to craft an adorable friend for yourself or someone special. So gather your materials and get started on this delightful crochet journey!

  • Chunky Yarn Puppy Snuggler | Crochet Baby Stuffed Animals DIY

    Chunky Yarn Puppy Snuggler | Crochet Baby Stuffed Animals DIY

    Chunky Yarn Puppy Snuggler | Crochet Baby Stuffed Animals DIY

    Welcome a new addition with this adorable chunky yarn puppy snuggler! This project is perfect for crafting a plush friend that your little one can snuggle with during nap time or playtime. Handmade crochet animals make memorable gifts, especially for baby showers and birthdays, as they carry a personal touch that store-bought options simply can’t match. Plus, with its squishy charms and warm texture, this snuggler is designed to be soft and safe for babies, making it a perfect fit for nurseries. Gather your materials and let’s start crafting memories that last forever! đŸŸđŸ‘¶đŸŽ

    Crochet Puppy Pattern Overview

    • Skill Level: Beginner
    • Finished Size: Varies based on yarn and hook used
    • Crochet Hook: Appropriate size for chunky yarn
    • Yarn Type: Chunky yarn
    • Main Colors: Customizable
    • Construction Method: In-the-round
    • Approximate Time: Several hours, depending on individual speed
    • Beginner-Friendly: Yes

    Materials You’ll Need

    • Chunky yarn
    • Crochet hook
    • Stuffing (e.g., polyester fiberfill)
    • Safety eyes
    • Yarn needle
    • Stitch marker
    • Scissors
    • Embroidery thread (for facial features)
    • Optional: Buttons or personalized accessories

    Crochet Abbreviations

    • ch: chain
    • st: stitch
    • sc: single crochet
    • inc: increase
    • dec: decrease
    • rnd: round
    • sl st: slip stitch

    Before You Start

    • Work in continuous rounds for a seamless look.
    • Use a stitch marker to keep track of your rounds.
    • Check stitch counts after every round to avoid mistakes.
    • Stuff your puppy gradually to ensure a nicely shaped body.
    • Keep track of your rounds to maintain consistent height.

    Free Crochet Puppy Pattern

    Head

    Round 1: Make a magic ring and sc 6 into the ring.
    Round 2: Inc in each st around (12).
    Round 3: (Sc in next st, inc in next st) around (18).
    Round 4: (Sc in next 2 st, inc in next st) around (24).
    Round 5-8: Sc in each st around (24).
    Round 9: (Sc in next 2 st, dec) around (18).
    Round 10: (Sc in next st, dec) around (12).
    Round 11: Dec around (6). Finish off and leave a long tail for sewing.

    Body

    Round 1: Make a magic ring and sc 6 into the ring.
    Round 2: Inc in each st around (12).
    Round 3: (Sc in next st, inc) around (18).
    Round 4-10: Sc in each st around (18).
    Round 11: (Sc in next st, dec) around (12).
    Round 12: Dec around (6). Finish off, stuff and leave a long tail for sewing.

    Ears (Make 2)

    Ch 6, sc in 2nd ch from hook and across (5).
    Row 2: Ch 1, turn, dec, sc in next 2 st, dec (3).
    Row 3: Ch 1, turn, dec, sc in next st (2).
    Row 4: Ch 1, turn, sc in each st (2).
    Row 5: Sl st to finish. Leave a tail for sewing.

    Legs (Make 4)

    Round 1: Make a magic ring and sc 6 into the ring.
    Rounds 2-4: Sc in each st around (6).
    Finish off, leaving a long tail for sewing.

    Tail

    Ch 10, sc in second ch from hook and across (9). Finish off and leave a long tail for sewing.

    Assembly

    1. Sew the head to the body securely, ensuring it is well-centered.
    2. Position the ears on the top of the head, pinning before sewing to ensure even placement.
    3. Attach the legs to the bottom of the body evenly spaced for balance.
    4. Sew the tail to the back of the body.
    5. Gently stuff the body and head as you go to maintain shape.

    Facial Features and Finishing Details

    1. Attach safety eyes securely in place.
    2. Using embroidery thread, stitch a small triangle for the nose and a simple line for the mouth beneath the eyes.
    3. Add any additional features or patterns you desire on the puppy’s face or body, such as blushing cheeks.

    Tips for a Better Result

    • Always use the same tension throughout your project to ensure uniformity.
    • Choose contrasting colors for more visual interest and depth.
    • Stay organized with your materials to maintain flow during your project.

    Customization Ideas

    • Experiment with different color combinations to match a nursery palette.
    • Use fuzzy yarn for a unique texture.
    • Add accessories like a bow or a scarf for a personal touch.
    • Alter facial expressions by changing the positioning of the eyes and mouth.

    Common Problems and Troubleshooting

    • Uneven Stuffing: Gradually fill each part before finishing.
    • Loose Stitches: Maintain consistent tension while crocheting.
    • Incorrect Stitch Counts: Always count after each round to catch errors early.
    • Parts Looking Uneven: Adjust tightness of rounds during assembly as needed.

    Care and Safety

    To ensure your cuddly puppy remains in great condition, gently spot clean as needed. Always supervise young children, especially with toys that contain small parts like safety eyes.

    Frequently Asked Questions

    • Is this crochet puppy pattern beginner-friendly?
      Yes, it’s designed with simple stitches and techniques.
    • What yarn is best for this crochet puppy?
      Chunky yarn for a soft, cuddly texture.
    • How long does it take to crochet this animal?
      Several hours, depending on your crochet speed.
    • Can I make this crochet animal larger or smaller?
      Yes, adjust yarn weight and hook size accordingly.
    • Can I use different yarn colors?
      Absolutely, the pattern is customizable!
    • How do I keep the finished animal in shape?
      Use appropriate stuffing and check for seam security after each assembly step.

    Conclusion

    Embrace the joy of crafting with this chunky yarn puppy snuggler! Not only will you create a cherished keepsake, but you’ll also add a personal touch to any nursery or gift. Start your crochet journey today, and watch as your plush creation comes to life!

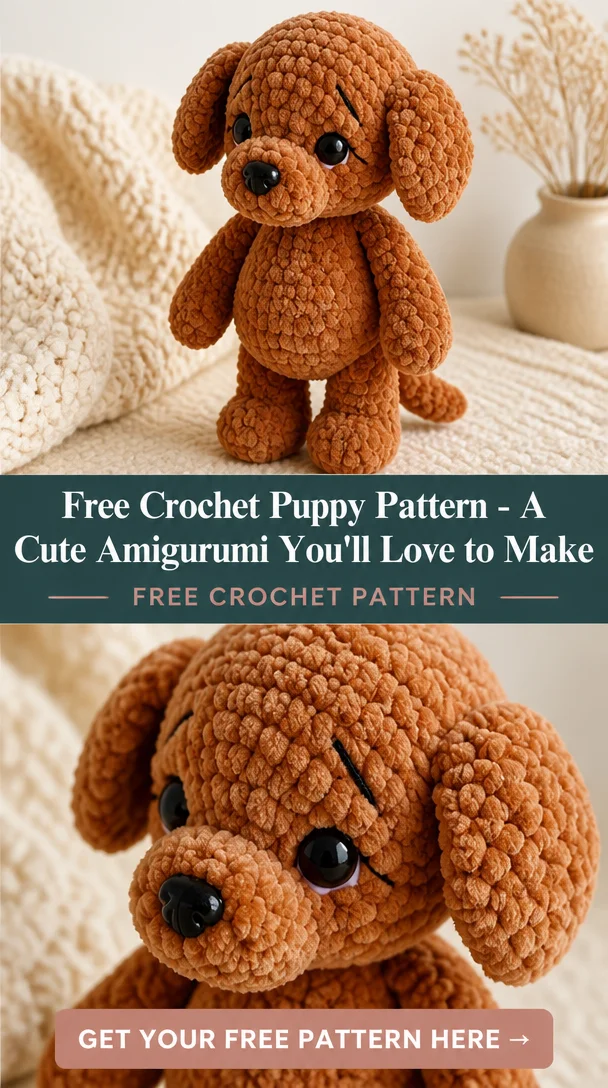
  • Free Crochet Puppy Pattern – A Cute Amigurumi You’ll Love to Make

    Free Crochet Puppy Pattern – A Cute Amigurumi You’ll Love to Make

    Free Pattern: Crochet Your Own Adorable Puppy! | Small crocheted teddy bear dogs free, Crochet small puppy pattern free, Small crocheted stuffed dog pattern

    If you’re looking to create a special handmade gift or a delightful toy, this crochet puppy pattern is perfect for you! This adorable small crocheted puppy captures the playful essence of our furry friends in a compact and cuddly design. Whether you’re a beginner wanting to dive into amigurumi or an experienced crocheter seeking a quick project, this pattern offers a fun and rewarding challenge. The end result—a charming stuffed puppy—is a lovely addition to any toy collection, making it an ideal project for children and adults alike. Let’s get started on bringing this cute companion to life!

    Crochet Puppy Pattern Overview

    • Skill Level: Beginner to Intermediate
    • Finished Size: Approximately 8 inches tall
    • Crochet Hook: 3.5 mm (E)
    • Yarn Type: Worsted weight (medium)
    • Main Colors: Brown, white, and black (customizable)
    • Construction Method: Worked in continuous rounds
    • Approximate Time: 4-6 hours
    • Project Suitability: Beginner-friendly with some basic skills

    Materials You’ll Need

    • Worsted weight yarn in desired colors
    • 3.5 mm crochet hook
    • Polyfill stuffing
    • Safety eyes (optional)
    • Yarn needle
    • Stitch marker
    • Scissors
    • Embroidery thread (for facial features)

    Crochet Abbreviations

    • ch – chain
    • sc – single crochet
    • inc – increase (2 sc in one stitch)
    • dec – decrease (2 sc together)
    • sl st – slip stitch
    • rnd – round

    Before You Start

    • Begin by working in continuous rounds to avoid spiral seams.
    • Use a stitch marker to mark the beginning of each round.
    • Check your stitch counts regularly to ensure consistency.
    • Stuff your puppy gradually as you work through the pattern to achieve the right shape.
    • Keep track of your rounds to maintain the desired proportions.

    Free Crochet Puppy Pattern

    Head

    Round 1: Start with a magic loop and make 6 sc into the loop.
    Round 2: Inc in each stitch around (12 sts).
    Round 3: Sc in the next stitch, inc in the next stitch; repeat around (18 sts).
    Round 4: Sc in the next 2 stitches, inc in the next stitch; repeat around (24 sts).
    Round 5-10: Sc in each stitch around (24 sts).
    Round 11: Sc in the next 2 stitches, dec; repeat around (18 sts).
    Round 12: Sc in the next stitch, dec; repeat around (12 sts).
    Stuff the head and close off.

    Body

    Round 1: Magic loop and make 6 sc into the loop.
    Round 2: Inc in each stitch around (12 sts).
    Round 3: Sc in the next stitch, inc; repeat around (18 sts).
    Round 4-8: Sc in each stitch around (18 sts).
    Round 9: Sc in the next stitch, dec; repeat around (12 sts).
    Stuff the body and close off.

    Ears (Make 2)

    Round 1: Magic loop and make 6 sc into the loop.
    Round 2: Inc in each stitch around (12 sts).
    Round 3-4: Sc in each stitch around (12 sts).
    Fasten off, leaving a long tail for sewing.

    Legs (Make 4)

    Round 1: Magic loop and make 6 sc into the loop.
    Round 2: Inc in each stitch around (12 sts).
    Round 3-5: Sc in each stitch around (12 sts).
    Fasten off, leaving a long tail for sewing.

    Tail

    Round 1: Magic loop and make 4 sc into the loop.
    Round 2: Sc in each stitch around (4 sts) for several rounds.
    Fasten off, leaving a long tail for sewing.

    Assembly

    • Position the head on top of the body and sew them together securely.
    • Attach the ears on either side of the head, ensuring they are symmetrical.
    • Sew the legs to the bottom of the body, spaced evenly apart.
    • Attach the tail at the back of the body, securing it well.
    • Ensure all pieces are aligned and securely fastened.

    Facial Features and Finishing Details

    • Position safety eyes on the head and sew or glue them in place.
    • Use embroidery thread to stitch a small nose and mouth. Feel free to customize these features to add character to your puppy!

    Tips for a Better Result

    • Use a fluffy yarn for a softer finish that enhances the puppy’s cuddly appearance.
    • Pay attention to the stuffing; too much can make your puppy look lumpy, while too little can lead to sagging.

    Customization Ideas

    • Change the main colors for a different breed look—white and black for a panda dog or grey for a mellow hound.
    • Add a tiny scarf or collar for added charm.
    • Experiment with different yarn types for unique textures.

    Common Problems and Troubleshooting

    • If your puppy’s head is uneven, check for consistent stitch tension.
    • To fix lumpy stuffing, remove some filling and redistribute it.
    • Ensure legs are attached straight—lay it flat to check alignment before securing.

    Care and Safety

    Handmade crochet items should be surface cleaned to maintain their shape and integrity, especially if used as children’s toys. Safety eyes should be securely attached, as they are small parts.

    Frequently Asked Questions

    • Is this crochet puppy pattern beginner-friendly?
      Yes, it’s suitable for beginners with some basic crochet skills.

    • What yarn is best for this crochet puppy?
      Worsted weight yarn works best to achieve the desired size and structure.

    • How long does it take to crochet this animal?
      It typically takes around 4-6 hours depending on your skill level.

    • Can I make this crochet animal larger or smaller?
      Absolutely! Adjust the yarn weight and hook size for a different scale.

    • Can I use different yarn colors?
      Yes, feel free to personalize your puppy with any colors you like.

    • How do I keep the finished animal in shape?
      To maintain shape, avoid overstuffing and regularly fluff the finished animal.

    Conclusion

    Creating your own adorable crochet puppy is a delightful and fulfilling project that results in a lovable companion. Whether you gift it or keep it for yourself, you’ll enjoy every stitch of this charming pattern. Happy crocheting!

  • Free Crochet Bear Pattern – A Handmade Friend You’ll Love to Make

    Free Crochet Bear Pattern – A Handmade Friend You’ll Love to Make

    6 Cute Crochet Stuffed Animal Patterns

    Creating adorable crochet stuffed animals is a rewarding way to express your creativity and provide charm to any space, including children’s rooms or cozy corners in your home. Whether you’re a novice looking to try your hand at amigurumi or a seasoned crafter seeking new projects, these crochet patterns offer a delightful combination of fun and skill-building. Not only do they allow for endless customization options, but they also make for perfect gifts or toys for loved ones. With clear instructions and helpful tips, this article will guide you in crafting six different lovable crochet stuffed animals that you can treasure or gift.

    Crochet Animal Pattern Overview

    • Skill Level: Beginner to Intermediate
    • Finished Size: Varies by animal
    • Crochet Hook: Size suitable for chosen yarn
    • Yarn Type: Worsted-weight or DK (depending on your selection)
    • Main Colors: Your choice based on animal theme
    • Construction Method: Amigurumi, primarily worked in continuous rounds
    • Approximate Time: 3-5 hours per animal
    • Beginner-Friendly: Yes, with detailed steps provided

    Materials You’ll Need

    • Yarn (worsted or DK weight)
    • Crochet hook
    • Stuffing (polyester fiberfill)
    • Safety eyes (if applicable)
    • Yarn needle
    • Stitch marker
    • Scissors
    • Embroidery thread (for facial features)
    • Animal-specific materials (e.g., felt for ears)

    Crochet Abbreviations

    • Ch: Chain
    • Sc: Single Crochet
    • Inc: Increase
    • Dec: Decrease
    • Rnd: Round

    Before You Start

    • Always work in continuous rounds unless stated otherwise and use a stitch marker to keep track of your rounds.
    • Check your stitch counts regularly to ensure the right size.
    • Stuff your animal gradually as you crochet to maintain shape.
    • Prepare all individual parts beforehand for smoother assembly.

    Free Crochet Animal Pattern

    Head

    Round 1: Start with a magic circle, 6 sc into the circle.
    Round 2: Inc in each stitch around (12).
    Round 3: [Sc in next stitch, inc] repeat around (18).
    Round 4: [Sc in next 2 stitches, inc] repeat around (24).

    Body

    Round 1: Start with a new magic circle, 6 sc into the circle.
    Round 2: Inc in each stitch around (12).
    Round 3: [Sc in next stitch, inc] repeat around (18).
    Round 4: [Sc in next 2 stitches, inc] repeat around (24).

    Arms / Front Legs

    Round 1: Create a magic circle, 6 sc into the circle.
    Round 2: Inc in each stitch around (12).
    Round 3: [Sc in next stitch, inc] repeat around (18).

    Legs / Back Legs

    Follow the same pattern as the arms, adjusting length as desired.

    Tail

    Round 1: Magic circle, 4 sc into the circle. Work evenly for desired tail length.

    Assemble the Body Parts

    • Sew the head to the body firmly but avoid pulling the stitches too tight to leave the neck flexible.
    • Position and sew on the arms and legs, ensuring they are evenly spaced.
    • Attach the tail securely at the back.

    Assembly

    Position each crocheted piece according to your vision for the animal. When sewing, use matching yarn and take care to keep the stitches even. Attach the limbs and head firmly, stuffing as you go to maintain shape. Carefully place safety eyes before sealing the head entirely, ensuring a safe and secure fit.

    Facial Features and Finishing Details

    Using embroidery thread, stitch on a nose and mouth to give your animal character. Consider adding details like whiskers or eyebrows for extra charm. Use contrasting yarn for an attractive look.

    Tips for a Better Result

    • Use a tighter stitch if your stuffing is peeking through.
    • Vary yarn color for distinctive patterns or textures.
    • Experiment with different eye styles or other accessories.

    Customization Ideas

    • Change color schemes or patterns for different animals.
    • Use alternative yarn types like cotton for a different texture.
    • Adjust the size by using a larger hook or thicker yarn.
    • Add accessories like scarves or hats for added character.

    Common Problems and Troubleshooting

    • If stuffing is uneven, shake or redistribute it gently.
    • A loose stitch can be tightened by pulling the linked yarn.
    • Ensure consistent stitch counts throughout the rounds for uniformity.
    • Parts may look uneven due to inconsistent stuffing or tension; check your work regularly.

    Care and Safety

    These crochet animals, especially if used as toys, need to be cared for properly. Hand wash gently and lay flat to dry. Pay special attention to the safety of small parts like eyes—ensure everything is securely attached, especially for young children.

    Frequently Asked Questions

    • Is this crochet animal pattern beginner-friendly?
      Yes, it includes clear instructions suitable for all levels.

    • What yarn is best for this crochet animal?
      Worsted weight or DK yarn works best to maintain the shape.

    • How long does it take to crochet this animal?
      Approximately 3-5 hours, depending on your skill and the design chosen.

    • Can I make this crochet animal larger or smaller?
      Yes, by using thicker yarn or different hook sizes.

    • Can I use different yarn colors?
      Absolutely! Colors can be customized to match personal tastes.

    • How do I keep the finished animal in shape?
      Regular gentle handling and proper stuffing help maintain form.

    Conclusion

    Exploring the world of crochet stuffed animals can be a delightful journey into creativity. Use these patterns to make something truly special. Whether for gifting or personal enjoyment, making these vibrant characters will add warmth and joy to your life. Grab your hook and yarn today, and start creating!

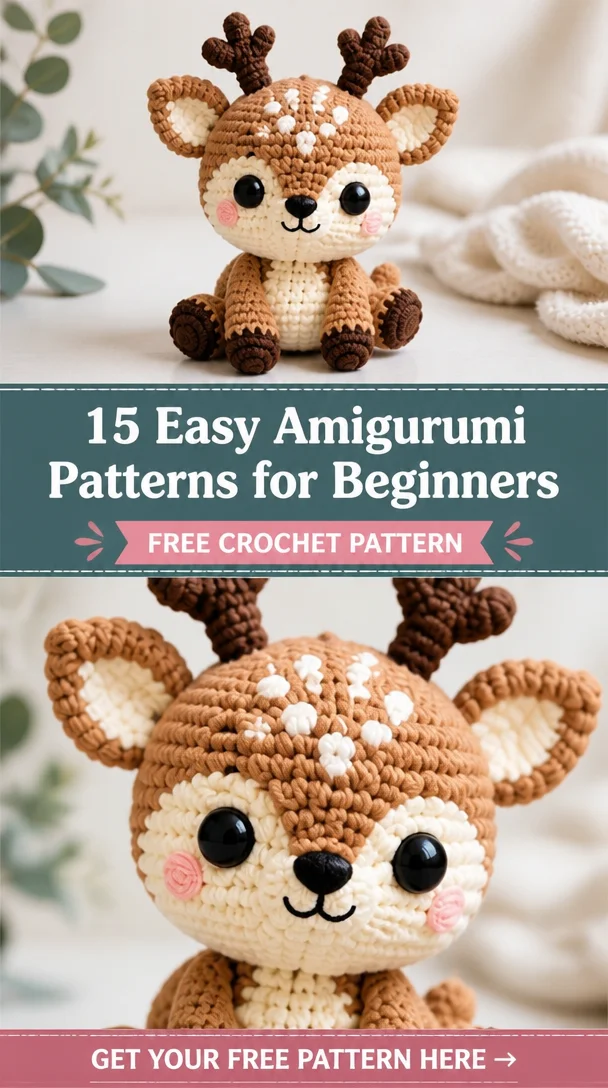
  • 15 Easy Amigurumi Patterns for Beginners

    15 Easy Amigurumi Patterns for Beginners

    15 Easy Amigurumi Patterns for Beginners

    If you love cute crochet animals, then amigurumi is the perfect craft for you! Amigurumi, the Japanese art of crocheting small stuffed creatures, offers endless opportunities for creativity. In this guide, we present you with 15 easy amigurumi patterns, featuring adorable animals like bees, koalas, penguins, cows, bunnies, puppies, and turtles. These beginner-friendly projects not only introduce you to the fundamentals of amigurumi but also make fantastic handmade gifts. Each pattern is designed to inspire your creativity, and with our straightforward instructions, even novice crocheters will find joy in creating these charming critters!

    Crochet Animal Pattern Overview

    • Skill Level: Beginner-Friendly
    • Finished Size: Varies by pattern
    • Crochet Hook: Depends on yarn choice
    • Yarn Type: Acrylic or cotton yarn
    • Main Colors: Various based on the animal chosen
    • Construction Method: Rounds
    • Approximate Time: 1-2 hours per animal
    • Beginner-Friendly: Yes, perfect for learning amigurumi techniques

    Materials You’ll Need

    • Worsted weight yarn in desired colors
    • Appropriate crochet hook
    • Stuffing (polyester fiberfill)
    • Safety eyes (if applicable)
    • Yarn needle
    • Stitch marker
    • Scissors
    • Embroidery thread (for facial features)
    • Animal-specific accessories (e.g., for hats or outfits)

    Crochet Abbreviations

    • ch – chain
    • sc – single crochet
    • st – stitch
    • rnd – round
    • dec – decrease
    • inc – increase
    • sl st – slip stitch

    Before You Start

    • Work in continuous rounds to avoid visible seams.
    • Use a stitch marker to keep track of your rounds.
    • Check your stitch counts regularly to avoid mistakes.
    • Stuff your animal gradually to shape it nicely.
    • Prepare all pieces before assembly for a smoother process.

    Free Crochet Animal Patterns

    Head

    Round 1: Start with a magic ring, sc 6 into ring.
    Round 2: Inc in each stitch around (12).
    Round 3: sc 1, inc around (18).
    … (continue with specific rounds until head is completed).

    Body

    Round 1: Start with a magic ring, sc 6 into ring.
    … (follow with rounds to create body shape).

    Ears

    For each ear:
    Round 1: Start with a magic ring, sc 4 into ring.
    Round 2: Inc in each stitch around (8).
    … (complete ears before attaching).

    Legs

    Make 4 legs using the following pattern:
    Round 1: Start with a magic ring, sc 6 into ring.
    Round 2: sc 1, inc around (9).
    … (continue rounds according to your pattern).

    Tail

    Round 1: Start with a magic ring, sc 4 into ring.
    Round 2: Inc in each stitch (8).
    … (complete tail).

    (… Continue with any additional animal-specific parts as needed, such as beak, wings, etc.)

    Assembly

    • Start by securely attaching the head to the body.
    • Position the ears on the head and sew them in place.
    • Attach the legs to the body at even intervals for balanced support.
    • Add the tail to the back for added cuteness.

    Facial Features and Finishing Details

    • Sew safety eyes securely into the head.
    • Use embroidery thread to create a small nose and mouth.
    • Add any additional details such as whiskers or eyebrows to enhance facial expression.

    Tips for a Better Result

    • Take your time when sewing pieces together to avoid any visible seams.
    • Experiment with different stuffing densities to achieve desired animal shapes.
    • Use contrasting colors to make features pop (like eyes or accessories).

    Customization Ideas

    • Change the main colors to represent different animals or seasons.
    • Use varying yarn types for texture (such as a fluffy yarn).
    • Adjust the size by changing your hook size or using lighter weight yarn.
    • Add toys or hats to personalize your animal.

    Common Problems and Troubleshooting

    • Uneven Stuffing: Adjust by adding or removing stuffing gradually to find balance.
    • Loose Stitches: Tighten your tension if stitches seem loose; practice makes perfect.
    • Assembly Alignment: Use pins to position parts before sewing for precise placement.

    Care and Safety

    To care for your handmade crochet animal, hand wash with mild soap and air dry. If used as a toy, ensure that all components (like safety eyes) are securely attached to avoid choking hazards for small children.

    Frequently Asked Questions

    • Is this crochet animal pattern beginner-friendly?
      Yes, these patterns are designed specifically for beginners with clear instructions.

    • What yarn is best for this crochet animal?
      Worsted weight acrylic or cotton yarn works well for amigurumi projects.

    • How long does it take to crochet this animal?
      Each project typically takes 1-2 hours, depending on your skill level.

    • Can I make this crochet animal larger or smaller?
      Yes, you can adjust the size by using different yarn weights or hook sizes.

    • Can I use different yarn colors?
      Absolutely! Feel free to pick any colors that inspire you.

    • How do I keep the finished animal in shape?
      Be mindful of stuffing and shaping during assembly to maintain form.

    Conclusion

    Creating your own crochet animals through these easy amigurumi patterns is a wonderful way to explore your creativity and make heartfelt gifts. So grab your hooks and yarn, and let your imagination run wild as you start crafting these adorable creatures!

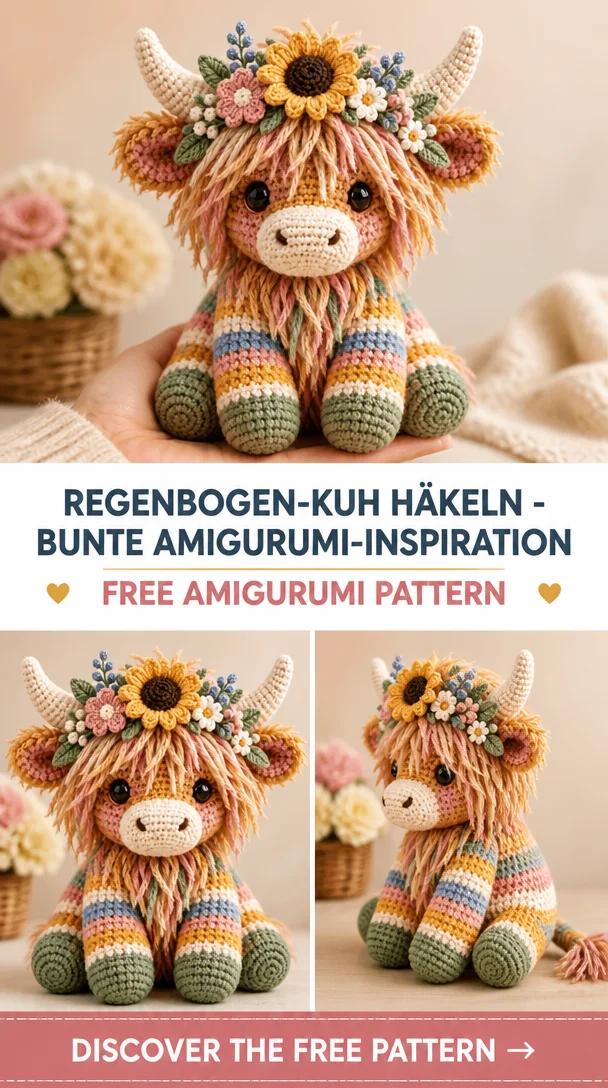
  • Regenbogen-Kuh hĂ€keln – bunte Amigurumi-Inspiration

    Regenbogen-Kuh hĂ€keln – bunte Amigurumi-Inspiration

    Crochet Rainbow Cow – Colorful Amigurumi Inspiration

    Crocheting a Rainbow Cow is an exciting and joyful project that adds a splash of color to any space. With its vibrant stripes, floral accents, and friendly cow shape, this adorable amigurumi creation is perfect for anyone looking to brighten their dĂ©cor or gift someone special. Beginners and experienced crocheters alike can enjoy making this charming animal, as it combines straightforward techniques with delightful results. Plus, who wouldn’t love a colorful cow as a companion? Dive into this fun project and watch your crochet skills blossom!

    Crochet Rainbow Cow Pattern Overview

    • Skill Level: Beginner to intermediate
    • Finished Size: Approximately 10 inches tall
    • Crochet Hook: 3.5 mm (E) or suitable for your yarn
    • Yarn Type: Medium-weight yarn (worsted)
    • Main Colors: Various vibrant colors for stripes, plus white for the body
    • Construction Method: Worked in continuous rounds
    • Approximate Time: 4-6 hours
    • Beginner-Friendly: Yes

    Materials You’ll Need

    • Medium-weight yarn in assorted colors
    • Crochet hook (3.5 mm / E)
    • Polyester stuffing
    • Safety eyes (9 mm)
    • Yarn needle
    • Stitch marker
    • Scissors
    • Embroidery thread for adding details (optional)

    Crochet Abbreviations

    • CH: Chain
    • SC: Single crochet
    • INC: Increase
    • DEC: Decrease
    • ST: Stitch
    • RND: Round
    • FO: Finish off

    Before You Start

    • Work in Continuous Rounds: This helps avoid seam lines in your work.
    • Use a Stitch Marker: To keep track of your rounds, place a stitch marker in the first stitch of each round.
    • Check Stitch Counts: Regularly check your stitch counts to ensure your piece remains even.
    • Stuff Gradually: As you crochet, add stuffing to maintain desired shape.
    • Track Your Rounds: Keep note of which round you’re on to avoid confusion later.
    • Prepare for Assembly: Organize each piece as you finish to make assembly smoother.

    Free Crochet Rainbow Cow Pattern

    Body

    Round 1: CH 2, 6 SC in the second CH from the hook.
    Round 2: INC in each ST around (12).
    Round 3: (1 SC, INC) around (18).
    Round 4–11: SC in each ST around (18).
    Round 12: (1 SC, DEC) around (12).
    Round 13: DEC around (6). FO, leaving a long tail for sewing.

    Head

    Round 1: CH 2, 6 SC in the second CH from the hook.
    Round 2: INC in each ST around (12).
    Round 3: (1 SC, INC) around (18).
    Round 4–9: SC in each ST around (18).
    Round 10: (1 SC, DEC) around (12).
    Round 11: DEC around (6). FO, leaving a long tail for sewing.

    Ears (Make 2)

    Round 1: CH 2, 6 SC in the second CH from the hook.
    Round 2: (1 SC, INC) around (9).
    Round 3: SC in each ST around. FO, leaving a tail for sewing.

    Legs (Make 4)

    Round 1: CH 2, 6 SC in the second CH from the hook.
    Round 2: INC in each ST around (12).
    Round 3–5: SC in each ST around (12). FO, leaving a tail for sewing.

    Tail

    CH 15. FO and leave long tails for sewing.

    Assembly

    1. Sew the Head: Attach the head to the body using the long tail left.
    2. Position the Ears: Place the ears on the top of the head and sew securely.
    3. Attach the Legs: Sew the legs into position on the bottom of the body, ensuring they are evenly spaced.
    4. Add the Tail: Position the tail at the back of the cow and sew it in place.
    5. Stuff: Make sure to stuff as you assemble, to maintain shape.

    Facial Features and Finishing Details

    • Safety Eyes: Position and attach safety eyes on the head.
    • Embroider the Mouth and Nose: Use embroidery thread to create a smiling mouth and two nostrils.
    • Add Flowers: Optionally, sew on small flowers to the body for extra decoration.

    Tips for a Better Result

    • Use a consistent tension throughout your work for a more uniform look.
    • Experiment with different colors for a unique appearance.
    • Detail your cow with additional accessories like a scarf or bow.

    Customization Ideas

    • Experiment with a variety of colors for stripes beyond the usual rainbow palette.
    • Play with yarn textures, like using soft cotton or fuzzy yarn for a different feel.
    • Change the size by using different yarn weights and hooks.
    • Add unique facial expressions by adjusting the mouth and eye placements.

    Common Problems and Troubleshooting

    • Uneven Stuffing: Add stuffing gradually and check for firmness.
    • Loose Stitches: Check your tension and consider using a smaller hook.
    • Incorrect Stitch Counts: Recount regularly and adjust if needed.
    • Assembly Alignment: Lay pieces out before sewing to find the best placement.

    Care and Safety

    To ensure the longevity of your Crochet Rainbow Cow, hand wash gently and lay flat to dry. If using safety eyes, monitor for any loose pieces, especially if given to small children.

    Frequently Asked Questions

    • Is this crochet Rainbow Cow pattern beginner-friendly?
      Yes, this pattern is suitable for beginners with some experience.

    • What yarn is best for this crochet animal?
      A medium-weight yarn works best, allowing for vibrant colors and good structure.

    • How long does it take to crochet this animal?
      You can expect to spend around 4-6 hours completing this project.

    • Can I make this crochet animal larger or smaller?
      Yes, by adjusting your yarn weight and hook size, you can customize the size.

    • Can I use different yarn colors?
      Absolutely! Feel free to unleash your creativity with different color combinations.

    • How do I keep the finished animal in shape?
      Proper stuffing and gentle handling will keep your cow looking great.

    Conclusion

    Making your very own Crochet Rainbow Cow is not only a delightful challenge but also a rewarding experience. With its cheerful design and vibrant colors, this amigurumi will surely bring joy to any space. Gather your materials and start your crochet journey today!

  • Free Crochet Capybara Pattern – A Cute Amigurumi You’ll Love to Make

    Free Crochet Capybara Pattern – A Cute Amigurumi You’ll Love to Make

    Unique Capybara Free Crochet Patterns for Adorable Amigurumi

    Capybaras, known for their friendly demeanor and laid-back charm, have become internet sensations and beloved companions for animal lovers everywhere. With their adorable, rounded faces and soft features, they’re perfect subjects for crochet amigurumi. Making your own capybara can bring a smile to your face and joy to others, whether you plan to add it to your decoration, gift it to a friend, or simply enjoy the crocheting process itself. This article will introduce you to unique capybara crochet patterns designed to spark your creativity. Perfect for both beginners and experienced crocheters, these patterns will help you craft the cutest capybara to brighten your day!

    Crochet Capybara Pattern Overview

    • Skill Level: Intermediate
    • Finished Size: Approximately 10 inches long
    • Crochet Hook: G/4.0 mm
    • Yarn Type: Acrylic or cotton yarn
    • Main Colors: Tan, brown, and cream
    • Construction Method: Worked in continuous rounds
    • Approximate Time: 5-8 hours
    • Beginner-Friendly: Some experience recommended

    Materials You’ll Need

    • Yarn (tan, brown, and cream colors)
    • G/4.0 mm crochet hook
    • Stuffing (polyester fiberfill)
    • Safety eyes (12 mm)
    • Yarn needle
    • Stitch marker
    • Scissors
    • Embroidery thread (for nose)
    • Other optional materials (like felt for additional features)

    Crochet Abbreviations

    • Ch – Chain
    • Sc – Single crochet
    • Inc – Increase
    • Dec – Decrease
    • Sl st – Slip stitch
    • St – Stitch
    • Rnd – Round

    Before You Start

    • Work in continuous rounds for a seamless finish.
    • Use a stitch marker to keep track of the beginning of each round.
    • Stuff gradually as you work; this helps maintain shape and avoid lumpiness.
    • Keep track of your stitch counts to ensure good shaping.
    • Pre-assemble pieces before final assembly for a smooth process.

    Free Crochet Capybara Pattern

    Head

    Round 1: Magic ring, 6 sc. (6)
    Round 2: Inc in each st around. (12)
    Round 3: (Sc, inc) around. (18)
    Round 4-6: Sc in each st around. (18)
    Round 7: (Sc, dec) around. (12)
    Round 8: Dec around. (6)

    Body

    Round 1: Magic ring, 8 sc. (8)
    Round 2: (Sc, inc) around. (12)
    Round 3: (2 sc, inc) around. (16)
    Round 4-8: Sc in each st around. (16)
    Round 9: (2 sc, dec) around. (12)
    Round 10: Dec around. (6)

    Ears (Make 2)

    Row 1: Ch 6, sc in 2nd ch from hook, sc across. (5)
    Row 2: Ch 1, turn, dec, sc. (3)
    Row 3: Ch 1, turn, dec. (2)

    Arms (Make 2)

    Round 1: Magic ring, 5 sc. (5)
    Round 2: Inc around. (10)
    Round 3-4: Sc in each st around. (10)
    Round 5: (Sc, dec) around. (5)

    Legs (Make 2)

    Round 1: Magic ring, 6 sc. (6)
    Round 2: Inc around. (12)
    Round 3-4: Sc in each st around. (12)
    Round 5: (Sc, dec) around. (8)

    Tail

    Row 1: Ch 6, sc in 2nd ch from hook, sc across. (5)
    Row 2: Ch 1, turn, dec. (4)

    Assembly

    • Start by sewing the head onto the body, positioning it at the neck.
    • Attach the ears at the top of the head, slightly splayed for a cute look.
    • Position the arms on each side of the body and sew securely.
    • Attach the legs at the bottom of the body, making sure they are facing forward.
    • For the tail, sew it onto the back of the body.

    Facial Features and Finishing Details

    • Attach safety eyes between rounds 5 and 6 of the head.
    • Use embroidery thread to create a nose and mouth below the eyes for a friendly expression.
    • Add any additional details such as blush spots with yarn or embroidery.

    Tips for a Better Result

    • Use a softer yarn for a cuddlier feel.
    • Take your time to ensure consistent stitches for a polished look.
    • When assembling, make adjustments as needed for symmetry and shape.

    Customization Ideas

    • Experiment with different shades of yarn for a unique capybara.
    • Add accessories like hats or scarves for personalization.
    • Use variegated yarn for a fun striped effect.

    Common Problems and Troubleshooting

    • Uneven Stuffing: Gradually add stuffing and adjust as you go.
    • Loose Stitches: Consider using a smaller hook next time to tighten your work.
    • Assembly Alignment: Lay out pieces before sewing to visualize the best arrangement.

    Care and Safety

    Handmade crochet animals can be delicate; spot cleaning is recommended to maintain their appearance. Safety eyes are secure, but always inspect for wear before giving to small children.

    Frequently Asked Questions

    • Is this crochet capybara pattern beginner-friendly?
      While some prior crochet experience is recommended, confident beginners can tackle this project.

    • What yarn is best for this crochet capybara?
      Acrylic or cotton yarn provide a durable and soft result.

    • How long does it take to crochet this animal?
      Expect to spend approximately 5-8 hours completing the capybara.

    • Can I make this crochet animal larger or smaller?
      Yes! Adjust your hook size and yarn weight for different dimensions.

    • Can I use different yarn colors?
      Absolutely! Customizing with various colors can add character to your capybara.

    • How do I keep the finished animal in shape?
      Use stuffing to fill adequately and store it in a cool, dry place.

    Conclusion

    Embrace your creativity and bring a playful capybara to life with these unique crochet patterns. You’ll enjoy the process of making this adorable animal, and it will surely delight anyone who receives it. Grab