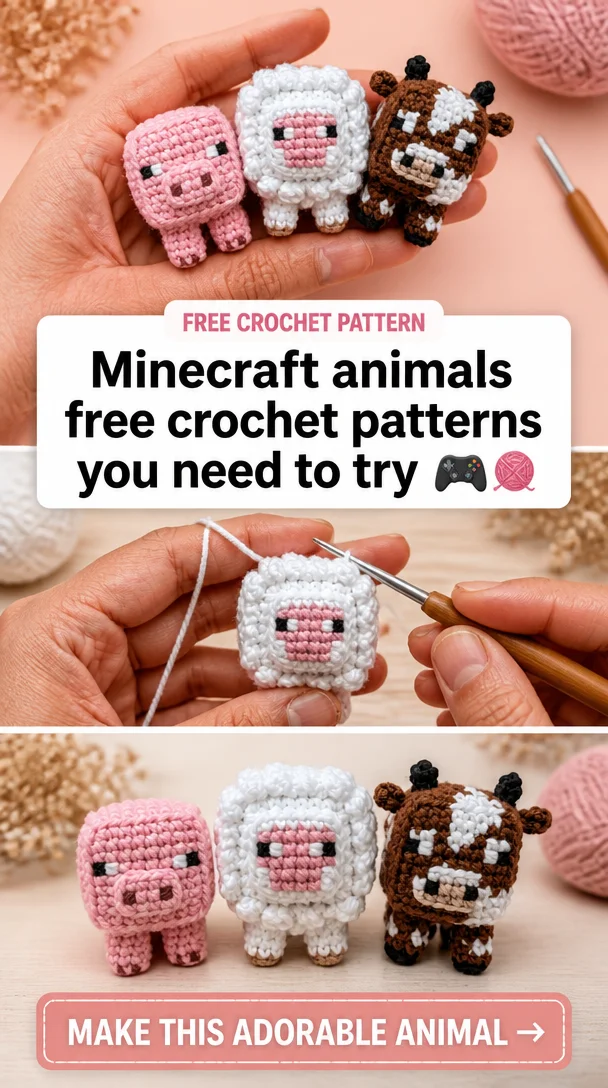
This little pig trades round curves for a chunky, blocky silhouette, giving it a fun geometric, pixel-art inspired look. It is an original design, built for crochet fans who enjoy a more angular amigurumi style.
Quick Pattern Overview
| Skill level | Easy to intermediate |
| Finished size | About 10 cm (4 in) cube-ish |
| Yarn | DK or 8-ply cotton yarn, pink |
| Hook size | 2.5 mm |
| Estimated time | 3 to 4 hours |
Materials You’ll Need
- DK cotton yarn in pink, plus a little black and darker pink
- 2.5 mm crochet hook
- 6 mm safety eyes, or thread to embroider the eyes
- Polyester stuffing
- Tapestry needle, stitch marker and scissors
Crochet Abbreviations
| MR | magic ring |
| ch | chain |
| sc | single crochet |
| inc | increase (2 sc in same st) |
| dec | decrease (sc 2 sts together) |
| st(s) | stitch(es) |
| FO | fasten off |
Before You Start
- Work in continuous rounds; do not join or turn.
- Use a stitch marker in the first stitch of each round.
- The number in brackets at the end of a round is your stitch count.
- Stuff firmly but stop before the stitches start to gap.
Free Crochet Pixel Pig Pattern
Body (worked as a rounded cube shape)
- Round 1: 6 sc in MR (6)
- Round 2: inc in each st (12)
- Round 3: (1 sc, inc) x 6 (18)
- Round 4: (2 sc, inc) x 6 (24)
- Rounds 5 to 12: sc in each st (24), working through the back loop only every third round to create subtle blocky ridges. Add safety eyes between rounds 6 and 7, about 8 sts apart.
- Round 13: (2 sc, dec) x 6 (18)
- Round 14: (1 sc, dec) x 6 (12). Stuff firmly.
- Round 15: dec x 6 (6). FO and close the hole.
Snout (square-ish, darker pink)
- Round 1: 6 sc in MR (6)
- Round 2: inc in each st (12)
- Round 3: sc in each st (12)
FO and leave a long tail. Stuff lightly.
Ears (make 2)
- Round 1: 6 sc in MR (6)
- Round 2: (1 sc, inc) x 3 (9)
FO and leave a long tail. Do not stuff. Flatten into a small triangle.
Legs (make 4, short and blocky)
- Round 1: 6 sc in MR (6)
- Rounds 2 to 4: sc in each st (6)
FO and leave a short tail. Stuff lightly.
Assembly
- Sew the snout to the centre front of the body, just below the eyes.
- Sew the two ears to the top of the body.
- Sew the four legs to the underside of the body so the pig can stand.
Facial Features & Finishing
Embroider two small black dot nostrils on the snout, and a simple curved mouth below it.
Tips for a Better Result
- Use a hook one size smaller than the yarn label suggests, so no stuffing shows.
- Work rounds a little tighter than usual for a firm, well-shaped body.
- Count your stitches after every round to catch mistakes early.
Care & Safety
If this toy is for a baby or small child, embroider the eyes instead of using safety eyes. Spot clean with a damp cloth and let it air dry.
Frequently Asked Questions
0
Why does this pig look blocky instead of round?
1
Working through the back loop only every third round pulls a subtle ridge into the fabric, giving a chunkier, more geometric look than a standard smooth round.
Can I make this pattern perfectly cube-shaped?
A crochet sphere naturally rounds the corners, so this gives a friendly, blocky impression rather than sharp right angles, which keeps it comfortable to stuff and sew.
Love original amigurumi shapes? Browse all our free crochet patterns.




Leave a Reply