Category: Free Patterns

Free animal crochet patterns for cute amigurumi friends. Easy step by step patterns for pandas, bunnies, foxes and more.

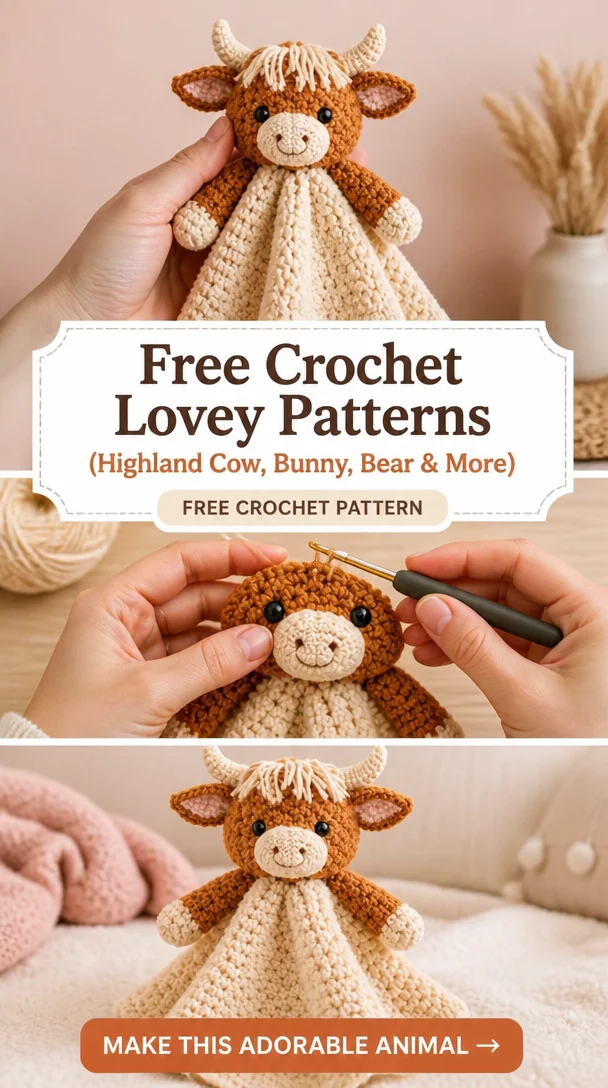
  • Free Crochet Lovey Patterns (Highland Cow, Bunny, Bear & More)

    Free Crochet Lovey Patterns (Highland Cow, Bunny, Bear & More)

    Free Crochet Lovey Patterns (Highland Cow, Bunny, Bear & More)

    If you’re in search of adorable and practical crochet projects for little ones, look no further than these charming crochet lovey patterns! Combining the cuteness of amigurumi animals with the soothing comfort of security blankets, this collection features a delightful mix of favorites like the highland cow, bunny, lamb, bear, and owl. These loveys are not only perfect for snuggling but also serve as cherished nursery keepsakes or thoughtful baby gifts. Each pattern offers unique textures and styles that are sure to delight babies and parents alike, making them perfect for anyone looking to infuse warmth and creativity into their gifting.

    Crochet Lovey Pattern Overview

    • Skill level: Beginner to Intermediate
    • Finished size: Varies by pattern
    • Crochet hook: Typically 4.00 mm (G/6) or as specified in individual patterns
    • Yarn type: Worsted weight (medium) yarn or as specified
    • Main colors: Various depending on the specific animal design
    • Construction method: Generally worked in rounds, combining amigurumi techniques with a flat blanket base
    • Approximate time: Dependent on experience; typically 4-8 hours
    • Beginner-friendly: Most patterns are suitable for those with basic crochet skills

    Materials You’ll Need

    • Worsted weight yarn (medium)
    • Crochet hook (generally 4.00 mm / G)
    • Stuffing (polyester or cotton)
    • Safety eyes (if applicable)
    • Yarn needle
    • Stitch marker
    • Scissors
    • Embroidery thread (for facial features)
    • Additional materials based on specific animal features (e.g., felt, buttons)

    Crochet Abbreviations

    • ch: chain
    • sl st: slip stitch
    • sc: single crochet
    • dc: double crochet
    • inc: increase
    • dec: decrease
    • st: stitch
    • rnd: round

    Before You Start

    • Work in continuous rounds unless indicated otherwise to prevent seams.
    • Use a stitch marker to keep track of the beginning of each round.
    • Always check stitch counts to ensure accuracy.
    • Stuff the head and body gradually to maintain shape and firmness.
    • Keep notes on rounds and any specific details, especially for assembly.

    Free Crochet Animal Lovey Pattern

    Highland Cow

    Head

    Round 1: Start with a magic ring, ch 1, 6 sc in the ring.
    Round 2: Inc in each st around (12).
    Round 3: Sc in the next st, inc in the next around (18).
    Round 4: Sc in the next 2 st, inc in the next around (24).
    Continue to shape the head as indicated in the further instructions.

    Body

    Round 1: Create a magic ring, ch 1, 12 sc in the ring.
    Continue working in rounds to form the body.

    Ears

    To make ears, create two separate pieces.
    Ear Pattern:
    Round 1: Start with a ch of 6, turn and sc in each back loop.
    Continue until the desired ear shape is achieved.

    Arms

    For arms, ch 4, and sc into the second ch from the hook.
    Work rounds until the arms reach the desired length for sewing onto the body.

    Assembly

    • Head: Attach securely to the top of the body, ensuring the position is centered.
    • Ears: Sew on either side of the head, adjusting for a cute look.
    • Arms: Position on the sides of the body, stitching them down carefully for stability.
    • Tail: If working on the highland cow tail, stitch it at the rear, fluffing it as needed.

    Facial Features and Finishing Details

    • Eyes: Attach safety eyes appropriately.
    • Muzzle: Create a small circle using a different yarn, sew it underneath the eyes.
    • Embroidery: Use embroidery thread to add details such as nostrils and mouth.

    Tips for a Better Result

    • Take your time stuffing to avoid lumps.
    • Use contrasting colors for features to enhance visibility.
    • Keep your tension consistent throughout the project to ensure uniformity.

    Customization Ideas

    • Change the main color of the yarn to create a different animal look.
    • Use a variegated yarn for unique textures.
    • Add accessories like bows or hats for extra character.
    • Change the size by using different yarn weights and appropriate hooks.

    Common Problems and Troubleshooting

    • Uneven stuffing: Check as you work; add or remove stuffing until satisfied.
    • Loose stitches: Tighten tension on your crochet or switch hook size.
    • Parts looking uneven: Ensure all pieces match by counting rounds.

    Care and Safety

    Handmade crocheted loveys should be washed gently by hand and air-dried to maintain their shape. For safety, always ensure that small parts such as safety eyes are securely attached, as they can pose a choking hazard for young children.

    Frequently Asked Questions

    • Is this crochet lovey pattern beginner-friendly?
      Yes, most patterns are designed for beginners with basic skills.
    • What yarn is best for this crochet lovey?
      Worsted weight yarn is recommended for a soft and durable result.
    • How long does it take to crochet this lovey?
      Expect anywhere from 4-8 hours depending on your skill level.
    • Can I make this crochet animal larger or smaller?
      Yes, simply adjust the yarn size and hook to achieve your desired dimensions.
    • Can I use different yarn colors?
      Absolutely! Feel free to employ any color scheme that you like.
    • How do I keep the finished lovey in shape?
      Gently hand-wash and reshape after washing for the best results.

    Conclusion

    Creating these delightful crochet loveys can be a rewarding experience, offering both a sense of achievement and a heartfelt gift for a baby. With patterns featuring adorable animals like the highland cow, bunny, and bear, you’re sure to find one that will bring smiles to little faces. So grab your yarn and start crafting today!
  • Free Crochet Zebra Pattern – A Cute Amigurumi You’ll Love to Make

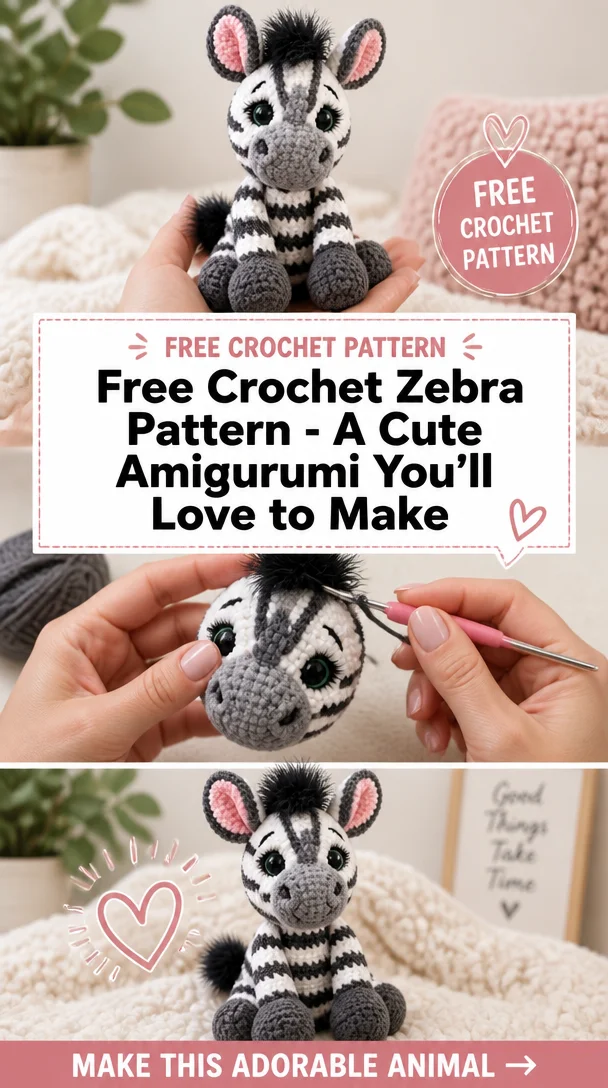
    Free Crochet Zebra Pattern – A Cute Amigurumi You’ll Love to Make

    Zebra Crochet Pattern – Cute Amigurumi Zebra Crochet Pattern

    Crocheting an adorable zebra can bring joy to both the creator and the recipient! This cute amigurumi zebra pattern is perfect for those who enjoy making handmade gifts, nursery decor, and children’s toys. Not only does this project capture the fun spirit of zebras, but it also offers a delightful challenge for crocheters of all skill levels. Whether you’re adding to an animal crochet collection or looking for a creative gift idea, this zebra crochet pattern is sure to be a hit. Gather your materials and let’s get started on this fun project that’s perfect for animal lovers!

    Crochet Zebra Pattern Overview

    • Skill Level: Suitable for all skill levels, including beginners
    • Finished Size: Approximately the size of a standard stuffed toy (exact dimensions not specified)
    • Crochet Hook: Recommended hook size (not specified)
    • Yarn Type: Suitable yarn for amigurumi (specific type not mentioned)
    • Main Colors: Typical zebra colors (Precise colors not indicated)
    • Construction Method: Worked in continuous rounds
    • Approximate Time: Project duration is variable based on skill level
    • Beginner-Friendly: Yes, great for beginners!

    Materials You’ll Need

    • Yarn in black and white (specific types not mentioned)
    • Crochet hook (size not specified)
    • Stuffing material
    • Safety eyes (if desired)
    • Yarn needle
    • Stitch marker
    • Scissors
    • Embroidery thread for details

    Crochet Abbreviations

    • ch: chain
    • sc: single crochet
    • inc: increase
    • dec: decrease
    • sl st: slip stitch

    Before You Start

    • Work in continuous rounds to avoid seams showing on your finished piece.
    • Use a stitch marker to keep track of your rounds as you go along.
    • Check your stitch counts periodically to ensure accuracy.
    • Stuff your zebra gradually to maintain shape and avoid overstuffing.
    • Keep track of all rounds to make assembly easier at the end.
    • Assemble all pieces before starting to sew them onto the body for a seamless finish.

    Free Crochet Zebra Pattern

    Head

    Round 1: Start with a magic ring, ch 1, and make 6 sc.
    Round 2: Inc in each stitch around (12 sc).
    Round 3: Sc in next stitch, inc in the next repeat around (18 sc).
    (Continue adding more rounds as needed for head shaping.)

    Body

    Round 1: Start with a magic ring, ch 1, and make 6 sc.
    Round 2: Inc in each stitch around (12 sc).
    (Continue to build out the body, incorporating color changes for the zebra’s stripes where applicable.)

    Ears (Make 2)

    Round 1: Start with a magic ring, ch 1, and make 4 sc.
    (Continue to shape ears, leaving a small opening to attach to the head.)

    Legs (Make 4)

    Round 1: Start with a magic ring, ch 1, and make 6 sc.
    (Work to desired length, paying attention to assembling legs symmetrically.)

    Tail

    Round 1: Make a small chain and work a few rows in sc.
    (Attach to the body securely to finish the tail.)

    Assembly

    1. Position the head on the body and sew securely with matching yarn.
    2. Sew ears on either side of the head at a slight angle for a natural look.
    3. Attach the legs by sewing them strategically to maintain balance.
    4. Place the tail at the back of the body, securing it firmly.
    5. Ensure all pieces are well-stuffed and evenly shaped.

    Facial Features and Finishing Details

    • Attach safety eyes evenly spaced on the head and embroider a small nose below.
    • Use embroidery thread to create mouth details.
    • Add extra stripes using black thread or fabric paint to enhance the zebra pattern.

    Tips for a Better Result

    • Check your tension to ensure even stitches throughout.
    • Use a contrasting yarn for the nose or mouth to add personality.
    • Experiment with different crochet techniques for added texture.

    Customization Ideas

    • Change yarn colors for a unique look (e.g., pastel colors for a softer aesthetic).
    • Make the zebra larger by using bulkier yarn and a larger hook.
    • Create different facial expressions by adjusting the embroidery.
    • Add accessories like a small scarf or bow to enhance personality.

    Common Problems and Troubleshooting

    • Uneven Stuffing: Adjust stuffing gradually, making sure to fill all corners and avoid lumps.
    • Loose Stitches: Consider going down a hook size to achieve a tighter weave.
    • Incorrect Stitch Counts: Double-check each round before moving on to ensure you’re on track.
    • Shape Problems: Adjust stuffing and have a good look at the assembly to correct misaligned parts.

    Care and Safety

    To keep your handmade crochet zebra looking its best, hand wash gently in cold water and lay flat to dry. Ensure that any small parts, like safety eyes, are securely attached if the zebra is intended as a toy, especially for young children.

    Frequently Asked Questions

    • Is this crochet zebra pattern beginner-friendly?
      Yes, it is suitable for beginners and experienced crocheters alike.
    • What yarn is best for this crochet zebra?
      A medium-weight yarn is typically used for similar projects.
    • How long does it take to crochet this animal?
      The time will vary based on skill level, but it can take a few hours to complete.
    • Can I make this crochet animal larger or smaller?
      Yes, using a larger or smaller hook with appropriate yarn will change the size.
    • Can I use different yarn colors?
      Absolutely! Feel free to customize the colors to match your preferences.
    • How do I keep the finished animal in shape?
      Ensure proper stuffing and avoid overhandling to maintain its form.

    Conclusion

    Crocheting this cute amigurumi zebra pattern is a delightful project that blends creativity with functionality. Perfect for gifts or personal collections, this zebra will surely bring happiness to anyone who lays eyes on it. Enjoy your crafting experience, and don’t forget to share your finished zebra with friends and family!


  • Low Sew Amigurumi – Free Crochet Patterns!

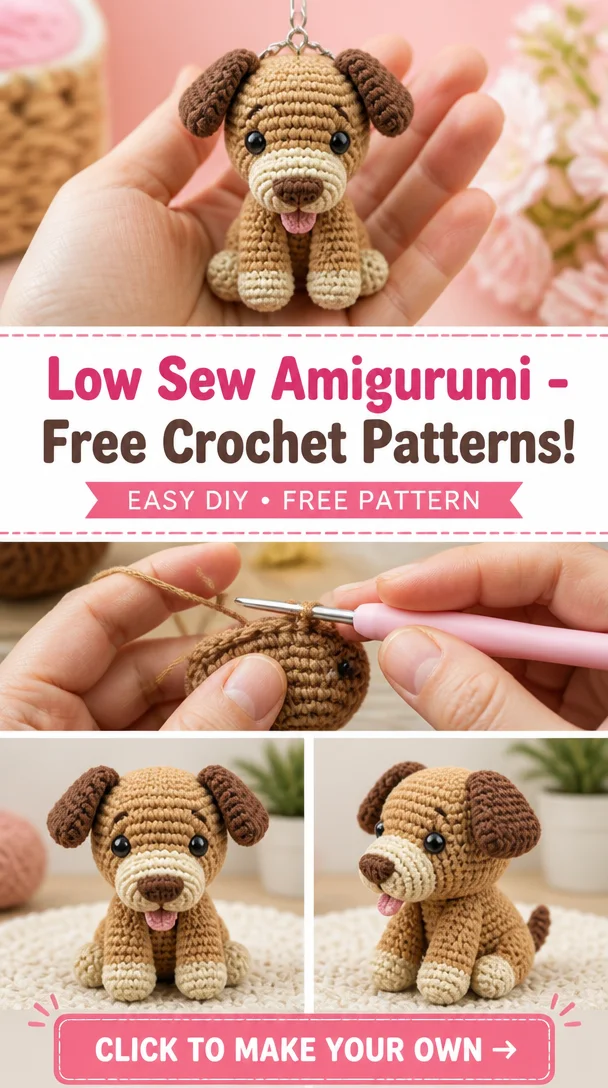
    Low Sew Amigurumi – Free Crochet Patterns!

    Low Sew Amigurumi – Free Crochet Patterns!

    If you’re looking for an engaging and enjoyable crochet project, then creating low sew amigurumi animals is the perfect choice! These adorable creations not only stand approximately 14 inches (35 cm) tall when made with worsted-weight yarn and a 3.5mm hook, but they also come together with minimal sewing, as the limbs and ears are crocheted directly into the body. This feature makes them an appealing option for both beginners and seasoned crocheters alike. With a variety of possibilities for customization, you’ll have the freedom to make a unique piece that can bring joy as a toy or decorative item. So, grab your yarn and hooks, and let’s dive into this fun crochet adventure!

    Crochet Animal Pattern Overview

    • Skill Level: Easy
    • Finished Size: ~14 inches (~35 cm) tall
    • Crochet Hook: 3.5mm
    • Yarn Type: Worsted-weight yarn
    • Main Colors: Your choice!
    • Construction Method: Low sew amigurumi (limbs and ears are crocheted in)
    • Approximate Time: Varies by skill
    • Beginner-Friendly: Yes

    Materials You’ll Need

    • Worsted-weight yarn
    • 3.5mm crochet hook
    • Stuffing (polyester fiberfill)
    • Safety eyes (size optional)
    • Yarn needle
    • Stitch marker
    • Scissors
    • Embroidery thread (for facial features)
    • Any animal-specific materials (as desired)

    Crochet Abbreviations

    • Ch: Chain
    • Sc: Single crochet
    • Inc: Increase
    • Dec: Decrease
    • Sl st: Slip stitch
    • Rnd: Round

    Before You Start

    • Work in continuous rounds to avoid additional seams.
    • Use a stitch marker to keep track of your rounds.
    • Check your stitch counts regularly to ensure accuracy.
    • Stuff your pieces gradually as you go, ensuring a nice shape.
    • Keep track of your rounds and row counts as you progress.
    • Prepare for assembly by organizing your crocheted pieces.

    Free Crochet Animal Pattern

    Head

    • Round 1: Ch 2, 6 sc in 1st ch. (6)
    • Round 2: Inc in each sc around. (12)
    • Round 3: Sc in next sc, inc around. (18)
    • Round 4-8: Sc in each sc around. (18)
    • Round 9: Sc in next sc, dec around. (12)
    • Round 10: Dec around. (6)

    Body

    • Round 1: Ch 2, 6 sc in 1st ch. (6)
    • Round 2: Inc in each sc around. (12)
    • Round 3: Sc in next sc, inc around. (18)
    • Round 4-10: Sc in each sc around. (18)
    • Round 11: Sc in next sc, dec around. (12)
    • Round 12: Dec around. (6)

    Ears

    • Round 1: Ch 2, 6 sc in 1st ch. (6)
    • Round 2: Inc in each sc around. (12)
    • Round 3: Sc in each sc around. (12)
    • Attach to the head directly.

    Arms / Front Legs

    (Shape as desired using similar increase/decrease methods to create arms attached directly to the body)

    Legs / Back Legs

    (Shape as desired using similar increase/decrease methods to create legs attached directly to the body)

    Tail

    • Crochet a small chain or round shape, then attach to the body.

    Assembly

    1. Position the head on top of the body and sew in place, or crochet directly to attach.
    2. Attach the arms by placing them on the sides of the body and stitching securely.
    3. Place the ears in your desired position on the head and sew them in.
    4. Sew the tail to the back of the body.
    5. Stuff the body as you assemble, providing a rounded shape.

    Facial Features and Finishing Details

    • Attach safety eyes securely, following your chosen placement.
    • Use embroidery thread to create a nose and mouth, adding personality to your creation.
    • Consider any other facial features like brows or cheeks to enhance expressiveness.

    Tips for a Better Result

    • Take your time with assembly to avoid uneven pieces.
    • Use a firm stuffing for a well-defined shape.
    • Experiment with different yarn colors for unique designs.

    Customization Ideas

    • Use multiple colors for patches or stripes.
    • Adjust the yarn weight for a smaller or larger animal.
    • Add accessories like scarves, hats, or bows for personalization.
    • Experiment with facial expressions by altering the embroidery.

    Common Problems and Troubleshooting

    • Uneven Stuffing: Ensure even distribution of stuffing throughout the body and limbs.
    • Loose Stitches: Maintain a consistent tension while crocheting to avoid gaps.
    • Incorrect Stitch Counts: Count stitches at the end of each round to catch mistakes.
    • Assembly Alignment: Lay out pieces before sewing to ensure correct placement.
    • Shape Problems: Adjust stuffing levels and positions as needed during assembly.

    Care and Safety

    To care for your handcrafted crochet animal, spot clean as required and avoid immersing it in water. Safety is essential, especially if given as a toy; ensure that safety eyes are securely attached and monitor for wear and tear.

    Frequently Asked Questions

    • Is this crochet animal pattern beginner-friendly?
      Yes, this pattern is designed to be accessible for beginners with clear instructions.
    • What yarn is best for this crochet animal?
      Worsted-weight yarn is recommended for best results.
    • How long does it take to crochet this animal?
      This varies depending on your skill level, but it typically takes a few hours.
    • Can I make this crochet animal larger or smaller?
      Yes, by adjusting the yarn weight and hook size, you can modify the dimensions.
    • Can I use different yarn colors?
      Absolutely! Feel free to explore your creativity with color choices.
    • How do I keep the finished animal in shape?
      Regularly check for any stuffing that might shift and reshape it as needed.

    Conclusion

    Creating low sew amigurumi animals is both a delightful and rewarding experience! With simple construction and endless possibilities for creativity, you’re bound to create a cherished keepsake or gift. So, gather your materials, follow the pattern, and start your amigurumi adventure today!


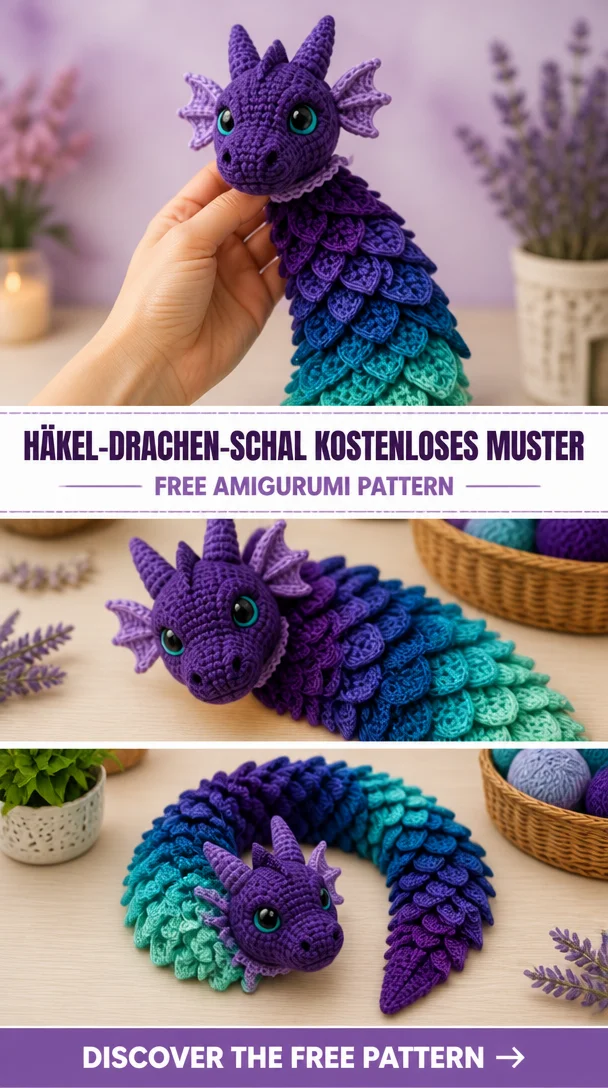
  • HĂ€kel-Drachen-Schal Kostenloses Muster

    HĂ€kel-Drachen-Schal Kostenloses Muster

    HĂ€kel-Drachen-Schal Kostenloses Muster

    Welcome to our delightful crochet project featuring a charming dragon scarf! This whimsical design brings to life a friendly dragon, making it the perfect accessory for both children and adults who wish to add a touch of magic to their outfits. Whether you’re looking to brighten up a cold winter’s day or searching for a unique handmade gift, this crochet dragon scarf is an engaging project to work on. Suitable for crocheters with an intermediate skill level, this pattern allows you to explore creative colors and textures while crafting a one-of-a-kind piece. Let’s dive into the pattern and discover the materials and techniques you’ll need to bring this enchanting design to life!

    Crochet Dragon Scarf Pattern Overview

    • Skill Level: Intermediate
    • Finished Size: Approximately 5 feet long (including the dragon heads)
    • Crochet Hook: Size G/6 (4.0 mm)
    • Yarn Type: Worsted weight yarn
    • Main Colors: Green for the body, various colors for accents
    • Construction Method: Worked in rows and joined
    • Approximate Time: 6-8 hours
    • Beginner-Friendly: Not specifically; suitable for intermediate crocheters

    Materials You’ll Need

    • Worsted weight yarn (green for the main body, various colors for accents)
    • Crochet hook (size G/6, 4.0 mm)
    • Stuffing (for dragon heads)
    • Safety eyes (if desired for added effect)
    • Yarn needle
    • Stitch marker
    • Scissors
    • Embroidery thread (for detailing)
    • Optional: Additional yarn colors for customization

    Crochet Abbreviations

    • Ch – Chain
    • Sc – Single Crochet
    • Dc – Double Crochet
    • Rnd – Round
    • Sl st – Slip Stitch
    • St(s) – Stitch(es)

    Before You Start

    Before you begin, here are some helpful tips to ensure a smooth start:

    • Work in continuous rows when creating the body of the scarf for a seamless look.
    • Use a stitch marker to keep track of the beginning of each row.
    • Regularly check your stitch counts to avoid any errors.
    • Stuff the dragon heads gradually for an even look.
    • Keep track of rows to maintain consistency in length and shape.

    Free Crochet Dragon Scarf Pattern

    Body

    Row 1: Ch 20, sc in each ch across (19 sc).
    Row 2: Ch 1, turn, sc in each sc across (19 sc).
    Repeat Row 2 until the scarf reaches your desired length, approximately 5 feet.

    Dragon Heads (Make 2)

    Row 1: Ch 4, sc in 2nd ch from hook, sc in next 2 ch (3 sc).
    Row 2: Ch 1, turn, inc in each sc (6 sc).
    Row 3: Ch 1, turn, (sc in next st, inc in next st) repeat 3 times (9 sc).
    Row 4-5: Ch 1, turn, sc in each sc across (9 sc).
    Row 6: Ch 1, turn, (sc in next 2 st, dec) repeat 3 times (6 sc).
    Row 7: Ch 1, turn, dec across (3 sc).
    Fasten off and stuff.

    Tail

    Ch 10, then sc in each ch across. Fasten off.

    Assembly

    1. Attach the Dragon Heads: Position one head at each end of the scarf and sew securely.
    2. Shape the Tail: Fold the tail to create a slight curve and sew it onto the opposite end of the scarf.
    3. Positioning: Ensure the heads face outward and are evenly spaced when attached.

    Facial Features and Finishing Details

    1. Eyes: Sew safety eyes onto each head, or use black yarn to embroider eyes for a more whimsical effect.
    2. Details: Use embroidery thread to create nostrils and a smiling mouth.

    Tips for a Better Result

    • Choose a variety of yarn colors for a more vibrant dragon.
    • Experiment with different stuffing materials to find your desired firmness.
    • Trim any excess yarn ends to maintain a tidy finish.

    Customization Ideas

    • Use different colors for each dragon head to create a unique look.
    • Add embellishments like small wings or fins using different yarn.
    • Adjust the scarf’s length to suit the wearer’s size.

    Common Problems and Troubleshooting

    • Uneven Stuffing: If one head is floppy, redistribute stuffing evenly.
    • Loose Stitches: Tighten your tension as you crochet to avoid gaps.
    • Alignment Issues: Double-check the positioning of the heads and tail before sewing.

    Care and Safety

    To care for your dragon scarf, gently hand wash in cold water and lay flat to dry. If using safety eyes, ensure they are securely attached, especially if the item may be used as a toy.

    Frequently Asked Questions

    • Is this crochet dragon pattern beginner-friendly?
      • This pattern is suitable for intermediate crocheters looking to challenge themselves.
    • What yarn is best for this crochet dragon?
      • Worsted weight yarn in bright colors works well for this project.
    • How long does it take to crochet this animal?
      • Expect to spend about 6-8 hours completing the scarf.
    • Can I make this crochet animal larger or smaller?
      • Yes, adjust the number of chains in the initial row to modify the scarf’s length.
    • Can I use different yarn colors?
      • Absolutely! Different colors can add a fun personal touch to your dragon scarf.
    • How do I keep the finished animal in shape?
      • Use adequate stuffing and ensure all parts are securely sewn to maintain shape.

    Conclusion

    This crochet dragon scarf is a fun and creative project that combines skill with whimsy. We encourage you to get started with this pattern and enjoy the process of bringing your dragon to life! Happy crocheting!


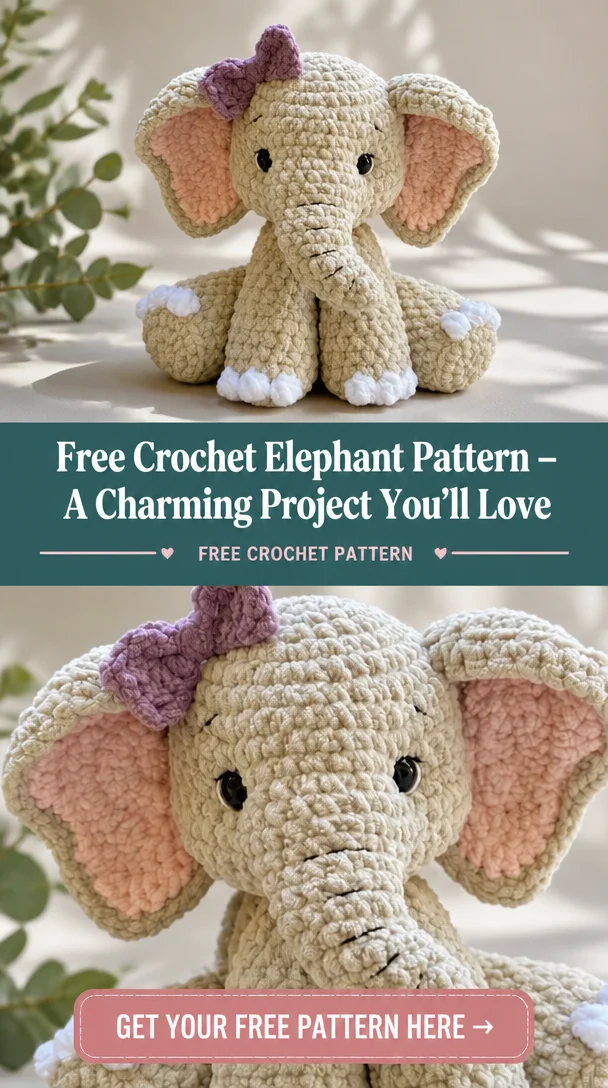
  • Free Crochet Elephant Pattern – A Charming Project You’ll Love

    Free Crochet Elephant Pattern – A Charming Project You’ll Love

    25 Crochet Elephants Free Patterns

    Crochet elephants are adorable and versatile creations that bring a touch of whimsy to any space. Whether you’re a seasoned crocheter or a beginner looking to try something new, these crochet elephant patterns are perfect for enhancing your wildlife design collection. They make fantastic gifts for zoo-themed parties and are excellent additions to nursery or kid’s room decor. Many of these elephant amigurumi patterns are petite enough to serve as charming desktop accessories for animal lovers. With a dozen amazing designs to choose from, you’ll find something irresistible in the list below! If you love small handmade friends, try the Free Crochet Cat Pattern.

    Crochet Elephant Pattern Overview

    • Skill Level: Varies by pattern (beginner to intermediate)
    • Finished Size: Varies by pattern (typically small to medium-sized)
    • Crochet Hook: Recommended size varies by pattern
    • Yarn Type: Acrylic or cotton yarn recommended
    • Main Colors: Flexible; choose your favorites!
    • Construction Method: Amigurumi, worked in rounds
    • Approximate Time: 2-5 hours per elephant, depending on complexity
    • Beginner-Friendly: Some patterns suitable for beginners

    Materials You’ll Need

    • Soft yarn (in your chosen colors)
    • Crochet hook (size as required)
    • Stuffing (polyester fiberfill)
    • Safety eyes (size to match your design)
    • Yarn needle (for weaving in ends)
    • Stitch marker (to keep track of rounds)
    • Scissors
    • Embroidery thread (for details)
    • Any other animal-specific materials as dictated by the pattern

    Crochet Abbreviations

    • ch – chain
    • sc – single crochet
    • dc – double crochet
    • sl st – slip stitch
    • st(s) – stitch(es)
    • R – round

    Before You Start

    • Work in continuous rounds to maintain a clean finish, especially for amigurumi.
    • Utilize a stitch marker each round to help track your progress.
    • Check your stitch counts often to avoid any mistakes.
    • Stuff the elephant gradually to ensure it retains a nice shape.
    • Pay attention to assembly preparation to make the final sewing easier.

    Free Crochet Elephant Pattern

    Head

    Round 1: Begin with a magic ring, 6 sc in ring.
    Round 2: 2 sc in each st (12).
    Round 3: 1 sc, 2 sc in next repeat around (18).
    Round 4: 2 sc, 2 sc in next repeat around (24).
    …

    Body

    Round 1: Magic ring, 6 sc in ring.
    Round 2: 2 sc in each st (12).
    Round 3: 1 sc, 2 sc in next repeat around (18).
    …

    Ears

    Round 1: Begin with a magic ring, 4 sc in ring.
    Round 2: 2 sc in each st (8).
    …

    Legs (x4)

    Round 1: Magic ring, 7 sc in ring.
    Round 2: 2 sc in each st (14).
    …

    Tail

    Round 1: Ch 9, sl st in first st to form a loop.
    …

    Assembly

    • Sew the head to the body using the yarn needle, positioning it slightly forward for balance.
    • Attach the ears to the sides of the head, using small stitches to secure them.
    • Position and sew on the legs, ensuring they’re evenly spaced for stability.
    • Stitch the tail to the back of the body and trim to desired length.
    • Add safety eyes and embroider facial features for a cute finish.
    • Gradually stuff the elephant as you assemble to maintain shape.

    Facial Features and Finishing Details

    • Attach safety eyes securely, ensuring they are positioned symmetrically.
    • Use embroidery thread to create the mouth and any additional facial details.
    • You may consider adding blush marks or other embellishments to enhance cuteness.

    Tips for a Better Result

    • Use a smaller hook for tighter stitches, especially if you’re using safety eyes.
    • Experiment with different yarn textures to add a unique touch to each elephant.
    • Consider adding a little bell or ribbon for additional flair.

    Customization Ideas

    • Choose different shades for the elephant’s body for a unique look.
    • Use variegated yarn for a colorful effect.
    • Add accessories like bows, hats, or outfits.
    • Experiment with sizes by adjusting the yarn and hook sizes.

    Common Problems and Troubleshooting

    • Uneven stuffing: Add polyfill gradually to ensure even distribution.
    • Loose stitches: Try using a smaller crochet hook or tightening your tension.
    • Assembly alignment: Use pins to temporarily hold pieces before sewing them.
    • Shape problems: Adjust stuffing as needed, and verify stitch counts for accuracy.

    Care and Safety

    For best maintenance, gently hand wash your crochet elephant in cold water and lay it flat to dry. If it has safety eyes, ensure they are firmly attached to avoid choking hazards, especially if used as a toy. For another huggable friend, try the Free Crochet Bear Pattern.

    Frequently Asked Questions

    • Is this crochet elephant pattern beginner-friendly? Some patterns are easier than others; check individual descriptions for details.
    • What yarn is best for this crochet elephant? Acrylic or cotton yarn works great for durability and softness.
    • How long does it take to crochet this animal? Each elephant typically takes 2-5 hours, depending on the complexity.
    • Can I make this crochet animal larger or smaller? Yes, adjusting the yarn type and hook size allows for size customization.
    • Can I use different yarn colors? Absolutely! Use any color to match your decor or personality.
    • How do I keep the finished animal in shape? Regularly adjust stuffing and store it carefully to maintain its form.

    Conclusion

    Making crochet elephants is a joyful project that results in delightful keepsakes or gifts. With an array of patterns to choose from, you’ll find the perfect fit for your skills and style. Start crocheting today and bring these adorable creatures to life! And if you want a different animal next, try the Free Crochet Capybara Pattern.


  • 17 Amigurumi Zoo Animal Crochet patterns AND ideas | Crochet animal patterns free amigurumi, Crochet stuff animals free patterns easy, Animal knitting

    17 Amigurumi Zoo Animal Crochet patterns AND ideas | Crochet animal patterns free amigurumi, Crochet stuff animals free patterns easy, Animal knitting

    17 Amigurumi Zoo Animal Crochet Patterns and Ideas | Crochet Animal Patterns Free Amigurumi, Crochet Stuffed Animals Free Patterns Easy, Animal Knitting

    Amigurumi animals are playful, plush creations made through a delightful crochet technique. These adorable little creatures inspire both novice and experienced crocheters to explore their crafty side. Crafting an amigurumi zoo animal not only provides a fun project but also results in charming decorations or thoughtful gifts for loved ones. Whether you’re looking to make a whimsical giraffe, a cuddly elephant, or a mischievous monkey, the possibilities are endless! This article will share a variety of 17 amigurumi zoo animal patterns that are perfect for sparking creativity and building your crochet skills.

    Crochet Animal Pattern Overview

    • Skill Level: Beginner to Intermediate
    • Finished Size: Varies by animal
    • Crochet Hook: G/6 (4.0 mm) or as recommended
    • Yarn Type: Medium-weight acrylic or similar
    • Main Colors: Your choice based on the animal
    • Construction Method: Worked in continuous rounds
    • Approximate Time: 3-6 hours depending on the animal
    • Beginner-Friendly: Yes, patterns suitable for beginners are included

    Materials You’ll Need

    • Medium-weight yarn (Acrylic or Cotton)
    • Crochet hook size G/6 (4.0 mm)
    • Polyester fiberfill stuffing
    • Safety eyes (various sizes depending on the animal)
    • Yarn needle
    • Stitch marker
    • Scissors
    • Embroidery thread for facial features
    • Additional animal-specific materials (e.g., felt for features)

    Crochet Abbreviations

    • ch: chain
    • sc: single crochet
    • inc: increase (2 sc in same stitch)
    • dec: decrease (2 stitches together)
    • sl st: slip stitch
    • rnd: round

    Before You Start

    • Work in continuous rounds for a seamless finish where applicable.
    • Use a stitch marker to keep track of your rounds.
    • Check stitch counts as you go to ensure uniformity.
    • Stuff the animal gradually to achieve a desirable firmness without overstuffing.
    • Keep track of the number of rounds completed.
    • Organize all your pieces before assembly for a smoother process.

    Free Crochet Animal Pattern: Amigurumi Zoo Animals

    Head

    Round 1: Start with a magic ring.
    Round 2: 6 sc in ring. (6)
    Round 3: Inc around (12)
    Round 4: (Sc in next, inc) repeat around (18)
    …(Complete additional rounds as per specific animal requirements)

    Body

    Round 1: Start with a magic ring.
    Round 2: 6 sc in ring. (6)
    Round 3: Inc around (12)
    …(Same method applies as with the head for different animals)

    Arms/Front Legs

    Round 1: Start with a magic ring.
    Round 2: 5 sc in ring. (5)
    Round 3: (Sc, inc) repeat around (7)
    …(Provide specific details for each leg type as needed)

    Legs/Back Legs

    Round 1: Start with a magic ring.
    Round 2: 6 sc in ring. (6)
    Round 3: Inc around (12)
    …(Add further instructions depending on the patterns you choose)

    Tail

    Round 1: Start with a magic ring.
    Round 2: 6 sc in ring. (6)
    …(Detail the specifics of each animal’s tail here)

    Other Animal-Specific Parts

    Provide instructions for ears, wings, etc., according to the chosen zoo animals.

    Assembly

    When assembling your amigurumi, begin by pinning each part in place first.

    • Placement: Position the head on the body securely before sewing.
    • Sewing: Use a yarn needle to stitch pieces together securely and neatly.
    • Limbs: Attach the arms and legs by aligning them carefully with the body.
    • Facial Features: Use safety eyes at an appropriate distance to ensure a pleasant expression.
    • Shaping: Adjust stuffing levels as needed during placement to achieve your desired look.

    Facial Features and Finishing Details

    Add the safety eyes firmly and stitch in any facial features using embroidery thread. Customize expressions by altering the mouth shape and nose details during this step.

    Tips for a Better Result

    • Check tension: Keeping your stitches consistent will help your pieces come together better.
    • Alternate colors: For stripes or patterns, switch yarn colors seamlessly.
    • Have fun: Personalizing your project will make it unique and enjoyable.

    Customization Ideas

    • Experiment with color combinations for a distinctive version of each animal.
    • Use different yarn textures (like a fluffy yarn) for a creative twist on traditional patterns.
    • Create accessories like hats, bows, or scarves to add character.
    • Alter the size by using thicker or thinner yarn and adjusting your hook accordingly.

    Common Problems and Troubleshooting

    • Uneven stuffing: Adjust as needed by removing some stuffing to create an even shape.
    • Loose stitches: Pull the yarn tighter as you crochet to maintain uniform tension.
    • Incorrect stitch counts: Keep a close eye on your counts to avoid misalignment.
    • Parts not aligning: Reassess stitching points and adjust as needed.

    Care and Safety

    For crochet animals intended as toys, ensure safety by securely attaching all small parts like eyes. When washing, hand wash with mild soap and air dry to keep your amigurumi in excellent condition.

    Frequently Asked Questions

    • Is this crochet animal pattern beginner-friendly?
      Yes! Many patterns are simple and designed for beginners.
    • What yarn is best for this crochet animal?
      Medium-weight acrylic yarn is recommended for durability and color variety.
    • How long does it take to crochet this animal?
      Depending on skill level, it typically takes 3-6 hours per animal.
    • Can I make this crochet animal larger or smaller?
      Yes, by adjusting the yarn weight and hook size accordingly.
    • Can I use different yarn colors?
      Absolutely! Mixing colors can create unique patterns and designs for your animal.
    • How do I keep the finished animal in shape?
      Regularly adjust stuffing and consider storing them carefully.

    Conclusion

    Creating an amigurumi zoo animal is a rewarding and fun experience perfect for crocheters of all levels. Embrace the delight of crafting and cherish the unique finished products that can bring joy to others or serve as charming decor in your home. Happy crocheting!


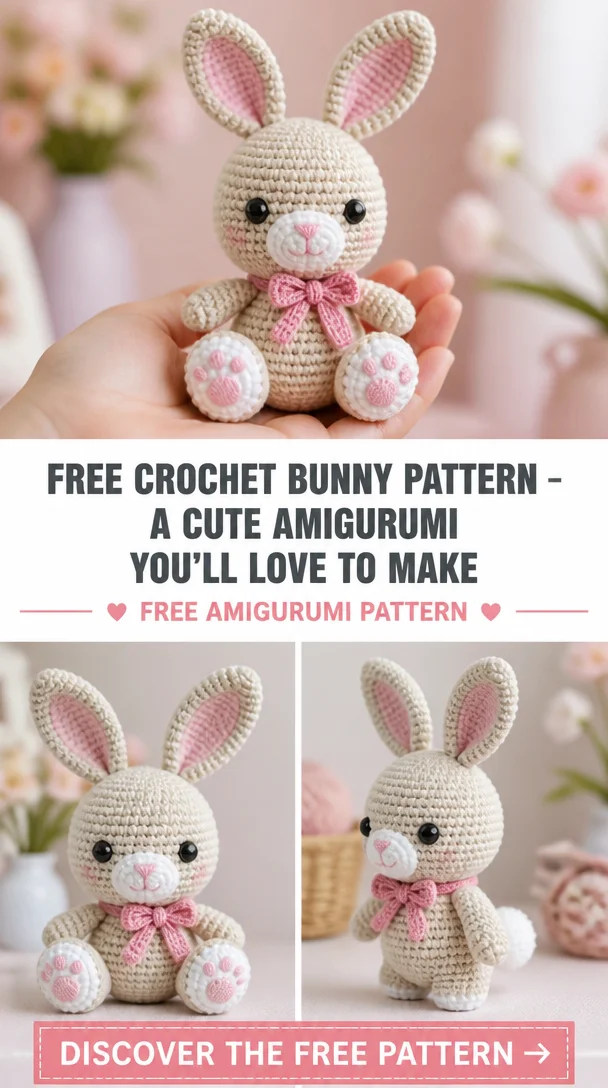
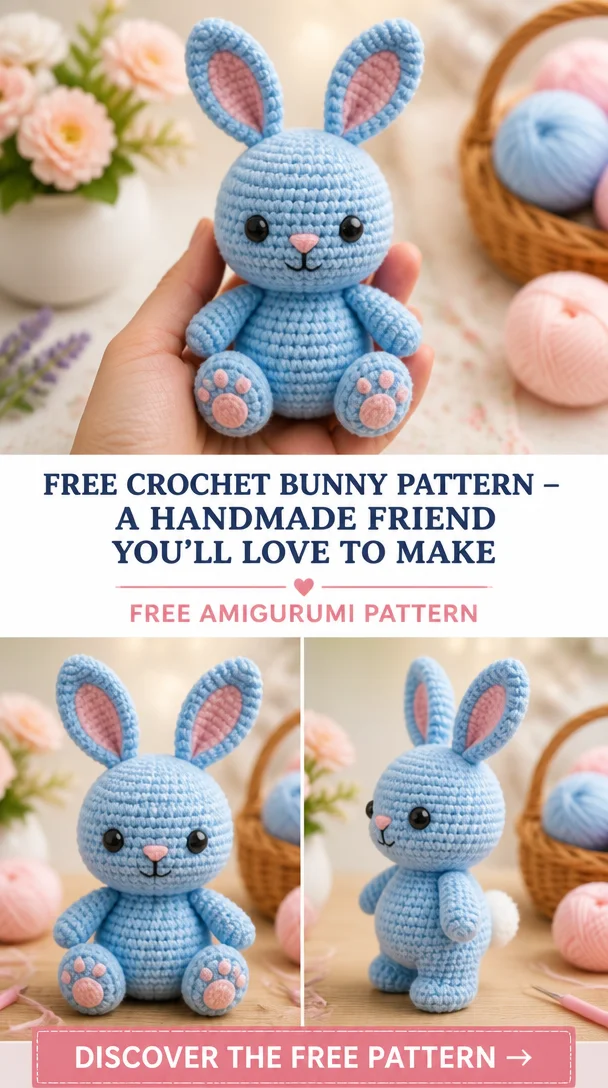
  • Free Crochet Bunny Pattern – A Cute Amigurumi You’ll Love to Make

    Free Crochet Bunny Pattern – A Cute Amigurumi You’ll Love to Make

    Easy & Free Amigurumi Patterns

    Crocheting adorable animal companions has never been easier with our easy and free amigurumi patterns! This guide will help you create delightful crochet animals that are perfect for gifts, decor, or simply for your enjoyment. Amigurumi, the Japanese art of crocheting small stuffed creatures, offers a unique way to express your creativity and craftsmanship. This pattern is designed to be accessible for all skill levels, making it a fantastic choice for beginners and experienced crocheters alike. Let’s dive into the colorful world of amigurumi animals and find joy in crafting your very own cuddly creation!

    Crochet Animal Pattern Overview

    • Skill Level: Beginner to intermediate
    • Finished Size: Approximately 8 inches tall
    • Crochet Hook: 4mm (G/6)
    • Yarn Type: Medium weight (worsted)
    • Main Colors: Varied based on the animal choice
    • Construction Method: Worked in continuous rounds
    • Approximate Time: 4-5 hours
    • Beginner-Friendly: Yes

    Materials You’ll Need

    • Yarn (colors of your choice)
    • Crochet hook (4mm / G/6)
    • Stuffing (polyester fiberfill)
    • Safety eyes (12mm)
    • Yarn needle
    • Stitch marker
    • Scissors
    • Embroidery thread (for facial features)
    • Any additional animal-specific materials (e.g., buttons, felt for accessories)

    Crochet Abbreviations

    • ch: chain
    • sc: single crochet
    • inc: increase (two single crochet in one stitch)
    • dec: decrease (single crochet two together)
    • sl st: slip stitch
    • st: stitch
    • Rnd: round

    Before You Start

    • Work in continuous rounds to avoid seams.
    • Use a stitch marker to keep track of your rounds.
    • Check your stitch counts regularly to ensure accuracy.
    • Stuff your amigurumi gradually to achieve the desired firmness.
    • Keep track of rounds for easy assembly later.

    Free Crochet Animal Pattern

    Head

    Round 1: ch 2, 6 sc in the second ch from hook.
    Round 2: inc in each st around (12 sc).
    Round 3: sc in the next st, inc in next around (18 sc).
    Round 4-6: sc in each st around.
    Round 7: sc in the next st, dec in next around (12 sc).
    Round 8: dec around (6 sc).

    Body

    Round 1: ch 2, 6 sc in the second ch from the hook.
    Round 2: inc in each st around (12 sc).
    Round 3: sc in the next st, inc in next around (18 sc).
    Round 4-7: sc in each st around.
    Round 8: sc in the next st, dec in next around (12 sc).
    Round 9: dec around (6 sc).

    Ears (make 2)

    Round 1: ch 2, 4 sc in the second ch from the hook.
    Round 2: inc in next st, sc in next around (6 sc).
    Round 3: sc in each st around.
    Fasten off, leaving a long tail for sewing.

    Arms (make 2)

    Round 1: ch 2, 6 sc in the second ch from the hook.
    Round 2-4: sc in each st around.
    Fasten off, leaving a long tail for sewing.

    Legs (make 2)

    Round 1: ch 2, 6 sc in the second ch from the hook.
    Round 2: inc in next st, sc in next around (9 sc).
    Round 3-5: sc in each st around.
    Fasten off, leaving a long tail for sewing.

    Tail

    Round 1: ch 2, 4 sc in the second ch from hook.
    Round 2: inc in each st around (8 sc).
    Fasten off, leaving a long tail for sewing.

    Assembly

    • Start with the body and attach the head, ensuring it is centered and secure.
    • Position the arms on either side of the body, sewing them in place.
    • Attach the legs at the bottom of the body, aligning them directly below the arms.
    • Finally, sew the tail onto the back of the body.

    Facial Features and Finishing Details

    • Attach safety eyes securely in the appropriate position on the head.
    • Use embroidery thread to create a nose and mouth.
    • Consider adding blushing cheeks or eyebrows with blush or embroidery for added character.

    Tips for a Better Result

    • Choose high-quality yarn that provides good stitch definition.
    • Keep your tension consistent for a smooth finish.
    • Reference photos of the animal for accurate color placements and features.

    Customization Ideas

    • Change yarn colors for a unique look.
    • Add accessories like bows or hats.
    • Experiment with different facial expressions using embroidery.
    • Make larger or smaller versions by adjusting your hook size and yarn weight.

    Common Problems and Troubleshooting

    • Uneven stuffing: Stuff gradually and adjust until evenly filled.
    • Loose stitches: Check your tension and make adjustments where needed.
    • Incorrect stitch counts: Mark your rounds clearly to track your work.
    • Parts looking uneven: Count your stitches regularly to ensure symmetry.
    • Assembly alignment: Lay out pieces before sewing to find the best positioning.

    Care and Safety

    For easy care, handwash your crocheted animal in mild detergent and air dry. Be mindful of small parts like safety eyes, especially if the item is intended for small children.

    Frequently Asked Questions

    • Is this crochet animal pattern beginner-friendly?
      Yes, this pattern is designed to be accessible for beginners.
    • What yarn is best for this crochet animal?
      Medium weight (worsted) yarn provides a good structure for amigurumi.
    • How long does it take to crochet this animal?
      Approximately 4-5 hours, depending on your skill level.
    • Can I make this crochet animal larger or smaller?
      Yes, adjusting the yarn weight and hook size can change the finished dimensions.
    • Can I use different yarn colors?
      Absolutely! Feel free to personalize your animal with your favorite colors.
    • How do I keep the finished animal in shape?
      Store it away from direct sunlight and reshape as needed after washing.

    Conclusion

    Whether you want to create a cheerful gift or a new friend for yourself, this easy and free amigurumi pattern is just what you need. Gather your materials and start crocheting your charming animal companion today!


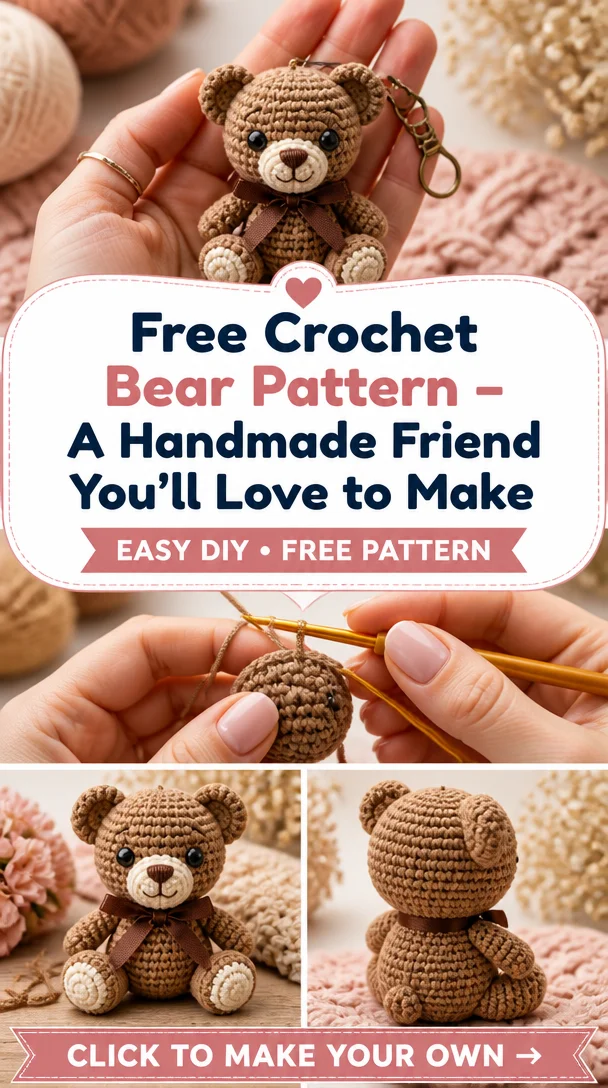
  • Free Crochet Bear Pattern – A Handmade Friend You’ll Love to Make

    Free Crochet Bear Pattern – A Handmade Friend You’ll Love to Make

    15 Crochet Animal Lovey Patterns You’ll Want To Make

    Crochet animal loveys are delightful handmade treasures, combining a blanket and a toy into one cuddly companion for babies and toddlers. These endearing designs—from elephants and puppies to monkeys and giraffes—serve as comforting aids for little ones, making them ideal gifts for baby showers and nurseries. Each lovey provides not just an adorable aesthetic, but also promotes tactile stimulation, encouraging imaginative play. Suitable for crocheters of all skill levels, these patterns vary in complexity, ensuring that everyone can find a project that fits their capabilities and taste. Plus, they make memorable keepsakes that can be cherished for years to come.

    Crochet Lovey Pattern Overview

    • Skill Level: Beginner to Intermediate
    • Finished Size: Varies by pattern
    • Crochet Hook Size: Depends on yarn used
    • Yarn Type: Worst-weight or Baby yarns
    • Main Colors: Customizable according to preference
    • Construction Method: Amigurumi style
    • Approximate Time: 5-10 hours (varies by complexity)
    • Beginner-Friendly: Yes, many patterns are designed with novices in mind.

    Materials You’ll Need

    • Yarn (in various colors)
    • Crochet hook (size depending on yarn)
    • Stuffing (fiberfill)
    • Safety eyes (if applicable)
    • Yarn needle
    • Stitch marker
    • Scissors
    • Embroidery thread (for facial features)
    • Additional animal-specific materials (as needed)

    Crochet Abbreviations

    • ch: chain
    • sl st: slip stitch
    • sc: single crochet
    • dc: double crochet
    • inc: increase
    • dec: decrease
    • rnd: round

    Before You Start

    • Make sure to work in continuous rounds for smoother edges.
    • Use a stitch marker to keep track of your rounds.
    • Check stitch counts frequently to ensure the integrity of your pattern.
    • Stuff your lovey gradually to avoid lumps and ensure an even shape.
    • Keep track of rounds as you progress through the project.

    Free Crochet Animal Lovey Pattern

    Head

    1. Start with a magic ring, work in the round.
    2. Increase as necessary according to the desired head shape and size.

    Body

    1. Begin from the head and work downwards.
    2. Follow the same increase and decrease patterns to create a smooth body shape.

    Arms / Front Legs

    1. Create two identical pieces.
    2. Attach them to the body at the desired location.

    Legs / Back Legs

    1. Repeat the same method as for the arms.
    2. Position the legs symmetrically for stability.

    Tail

    1. For animals that have tails, crochet a small strip and attach it at the back.
    2. Ensure it’s securely fastened.

    Ears (for animal-specific patterns)

    1. Create two ears, varying the shape based on the animal’s characteristics.
    2. Attach securely to the top of the head.

    Assembly

    • Position the head on the body and secure by sewing it in place.
    • Attach the arms and legs using a yarn needle for added durability.
    • Take care with the placement of the tail and ears to maintain the balance of your lovey.

    Facial Features and Finishing Details

    1. Attach safety eyes or embroider eyes using black embroidery thread.
    2. Stitch on a small nose and mouth, adding personality to your lovey.
    3. A touch of blush can be added with crochet thread for a rosy appearance.

    Tips for a Better Result

    • Use a tight gauge to prevent stuffing from showing through.
    • Experiment with different colors to create unique animals.
    • Refer to photographs of finished loveys to inspire your assembly process.

    Customization Ideas

    • Change color schemes for a personalized touch, such as pastels or bright shades.
    • Experiment with different yarn types (such as fuzzy or textured yarn).
    • Scale the lovey to create larger or smaller versions based on preference.
    • Alter facial expressions by modifying the placement of features or using different embroidery techniques.
    • Add accessories like hats or scarves for seasonal flair.

    Common Problems and Troubleshooting

    • Uneven Stuffing: Add stuffing in small amounts and distribute evenly.
    • Loose Stitches: Use a firmer tension while crocheting if issues arise.
    • Incorrect Stitch Counts: Count stitches every few rounds to catch miscounts early.
    • Assembly Alignment: Lay the pieces out first to visually assess placement before sewing.

    Care and Safety

    For handmade crochet loveys, hand wash in cold water and lay flat to dry. If your lovey includes small parts like safety eyes, ensure they are secured properly to minimize choking hazards. Always supervise young children during playtime with toys made from soft materials.

    Frequently Asked Questions

    • Is this crochet lovey pattern beginner-friendly?
      Yes, many patterns are designed to be accessible for beginners.
    • What yarn is best for this crochet lovey?
      A soft worsted weight or baby yarn is ideal for comfort.
    • How long does it take to crochet this animal?
      Time varies depending on your experience, but it generally takes 5-10 hours.
    • Can I make this crochet animal larger or smaller?
      Yes, adjusting the crochet hook size or yarn weight can change the size.
    • Can I use different yarn colors?
      Absolutely! Customizing colors is a fun way to make each lovey unique.
    • How do I keep the finished animal in shape?
      Store in a dry place and reshape as needed, stuffing it evenly during the process.

    Conclusion

    Creating a crochet animal lovey is a rewarding experience that results in a cherished gift for babies and toddlers. The combination of creativity and practicality makes these lovely creations both fun and functional. So gather your yarn and hook, and begin crafting a special handmade keepsake today!


  • Free Crochet Duck Pattern – A Cute Amigurumi You’ll Love to Make

    Free Crochet Duck Pattern – A Cute Amigurumi You’ll Love to Make

    Duck Crochet Pattern Ideas: 10 Free Amigurumi Patterns – From Britain with Love

    Crocheting adorable duck figures is a delightful project for crafters of all skill levels. Whether you’re a beginner looking to refine your technique or an experienced crocheter wanting to create a charming gift, these duck patterns offer something for everyone. Ducks are not only cute but also versatile; you can make them in various sizes and styles, perfect for toys, decorations, or even gifts. Plus, with a blend of vibrant yarn colors, you can customize each piece, making it uniquely yours!

    Crochet Duck Pattern Overview

    • Skill Level: Beginner to Intermediate
    • Finished Size: Varies by pattern, typically around 6-10 inches
    • Crochet Hook: Size recommended varies by pattern
    • Yarn Type: Worsted weight yarn (usually acrylic or cotton)
    • Main Colors: Yellow, white, orange (customizable)
    • Construction Method: Worked in rounds
    • Approximate Time: 2-4 hours, depending on the pattern
    • Beginner-Friendly: Yes, many patterns include video tutorials

    Materials You’ll Need

    • Yarn (worsted weight)
    • Crochet hook (size as per the selected pattern)
    • Stuffing (fiberfill)
    • Safety eyes (size according to pattern)
    • Yarn needle
    • Stitch marker
    • Scissors
    • Embroidery thread (for mouth/nose)
    • Any specific embellishments (like ribbons or hats)

    Crochet Abbreviations

    • CH: chain
    • SC: single crochet
    • DC: double crochet
    • INC: increase (2 stitches in one)
    • DEC: decrease (crochet 2 stitches together)
    • RND: round

    Before You Start

    • To achieve a seamless look, work in continuous rounds.
    • Use a stitch marker to keep track of the beginning of rounds.
    • Regularly check that your stitch counts are accurate.
    • Gradually stuff the pieces to avoid lumps.
    • Keep track of your rounds for uniform size and shape.

    Free Crochet Duck Pattern

    Head

    • Round 1: 6 SC in a magic ring (6)
    • Round 2: INC in each stitch around (12)
    • Round 3: SC in next stitch, INC in next stitch; repeat (18)
    • Continue to shape until reaching desired size.

    Body

    • Round 1: 6 SC in a magic ring (6)
    • Round 2: INC in each stitch around (12)
    • Rnd 3: SC in each stitch (12)
    • Work until desired body length, following similar increasing rounds.

    Beak

    • Round 1: 4 SC in a magic ring (4)
    • Round 2: INC in each stitch (8)
    • Finish off, leaving a long tail for sewing.

    Wings

    • Round 1: 5 SC in a magic ring (5)
    • Round 2: SC in each stitch (5)
    • Finish off, leaving a long tail for sewing.

    Assembly

    To assemble your duck:

    1. Sew the head to the body using the yarn tail.
    2. Position the wings on either side of the body and attach securely.
    3. Attach the beak to the front of the head.
    4. Add safety eyes to the head and tweak any features as needed.

    Facial Features and Finishing Details

    Add safety eyes for a playful look. Embroider small, simple outlines for the mouth to give your duck character. Consider adding accents like blush or embellishments for a unique design.

    Tips for a Better Result

    • Experiment with different yarn textures for varying effects.
    • Practice with different crochet hook sizes for tightness.
    • Make a swatch if you’re uncertain about your gauge.

    Customization Ideas

    • Change yarn colors: pastel shades for softer vibes.
    • Use different yarn types: try fuzzy or glittery yarn for fun textures.
    • Create different duck sizes by adjusting your hook size.
    • Add accessories: tiny hats or bows can enhance the design.

    Common Problems and Troubleshooting

    • Uneven Stuffing: Ensure stuffing is smooth and evenly distributed.
    • Loose Stitches: Maintain consistent tension throughout.
    • Incorrect Stitch Counts: Double-check each round as you go.

    Care and Safety

    Keep your crocheted ducks clean by hand washing with mild soap and air drying. Safety eyes should be securely attached, especially if intended for young children.

    Frequently Asked Questions

    • Is this crochet duck pattern beginner-friendly?
      Yes, many patterns are suitable for beginners with tutorials available.
    • What yarn is best for this crochet duck?
      Worsted weight yarn is ideal, but you can experiment with other types.
    • How long does it take to crochet this duck?
      About 2-4 hours, depending on your experience and chosen pattern.
    • Can I make this crochet animal larger or smaller?
      Yes, simply adjust your yarn weight and hook size.
    • Can I use different yarn colors?
      Absolutely! Customize with any colors you love for a unique look.
    • How do I keep the finished animal in shape?
      Use a sufficient amount of stuffing and follow the shape of the pattern closely.

    Conclusion

    Crocheting a duck is not only a fun project but also a rewarding way to express creativity. With these patterns, you’ll be able to create adorable ducks in no time—perfect for gifts or decorating your home. Grab your yarn and hook, and let your imagination take flight!


  • Free Crochet Bunny Pattern – A Handmade Friend You’ll Love to Make

    Free Crochet Bunny Pattern – A Handmade Friend You’ll Love to Make

    40+ Free Amigurumi Crochet Patterns for Adorable Animals & Toys! – Amigurumi Space

    Crocheting plump and adorable animals has never been more satisfying! Amigurumi, the art of crocheting stuffed animals and toys, captures the hearts of many crafters. Whether you’re a seasoned crocheter or just starting out, creating your own plush toys allows for endless customization and creativity. From delightful little bunnies to cuddly bears, this collection of over 40 free amigurumi crochet patterns offers something for everyone. This article will guide you through a charming crochet animal pattern, perfect for adding a handmade touch to your decor or gifting to a loved one.

    Crochet Animal Pattern Overview

    • Skill Level: Beginner-friendly
    • Finished Size: Approximately 8-10 inches tall
    • Crochet Hook: Size G (4.0 mm)
    • Yarn Type: Medium weight (worsted)
    • Main Colors: Versatile options for customization
    • Construction Method: Worked in continuous rounds
    • Approximate Time: 8-10 hours
    • Beginner-Friendly: Yes

    Materials You’ll Need

    • Yarn (medium weight in your color choices)
    • Crochet hook (size G)
    • Stuffing (polyester fiberfill)
    • Safety eyes (12 mm)
    • Yarn needle
    • Stitch marker
    • Scissors
    • Embroidery thread (for facial features)
    • Any animal-specific materials (e.g., felt for accessories)

    Crochet Abbreviations

    • Ch: Chain
    • Sc: Single crochet
    • Inc: Increase (2 sc in one stitch)
    • Dec: Decrease (sc 2 together)
    • R: Round

    Before You Start

    • Work in continuous rounds to avoid seams.
    • Use a stitch marker to mark the beginning of each round.
    • Check your stitch counts frequently to ensure accuracy.
    • Stuff your pieces gradually to avoid lumps.
    • Keep track of rounds for consistency.

    Free Crochet Animal Pattern

    Head

    Round 1: 6 sc in a magic ring (6)
    Round 2: Inc in each stitch (12)
    Round 3: (Sc 1, Inc) repeat around (18)
    Round 4-6: Sc in each stitch (18)

    Body

    Round 1: 6 sc in a magic ring (6)
    Round 2: Inc in each stitch (12)
    Round 3: (Sc 1, Inc) repeat around (18)
    Round 4-8: Sc in each stitch (18)

    Arms / Front Legs

    Round 1: 5 sc in a magic ring (5)
    Round 2: Sc in each stitch (5)
    Round 3-4: Sc in each stitch (5)
    Fasten off.

    Legs / Back Legs

    Round 1: 6 sc in a magic ring (6)
    Round 2: Inc in each stitch (12)
    Round 3: Sc in each stitch (12)
    Fasten off.

    Tail

    Ch 4, then work back along chain: Sc in each chain (3)
    Fasten off.

    Assembly

    • Position the head on top of the body and sew securely in place.
    • Attach the arms and legs, aligning them symmetrically.
    • Position the tail at the back and sew it in place.
    • Gently stuff each piece before sealing.

    Facial Features and Finishing Details

    • Attach safety eyes securely into the head.
    • Use embroidery thread to create a nose and mouth for added character.
    • Add blush or color to the cheeks if desired.

    Tips for a Better Result

    • Keep your stitches even for a polished look.
    • Experiment with yarn types to achieve different textures.
    • Make sure to securely attach all features to ensure durability.

    Customization Ideas

    • Choose different colors and textures of yarn to create unique animals.
    • Experiment with different facial expressions.
    • Add accessories like bows or scarves for extra charm.

    Common Problems and Troubleshooting

    • If stuffing looks uneven, gradually adjust by redistributing.
    • To fix loose stitches, consider reworking some rounds to tighten the tension.
    • Ensure alignment of limbs during assembly to maintain shape integrity.

    Care and Safety

    For handmade crochet animals, it’s essential to keep them clean, especially if they are used as toys. Hand wash in warm water and lay flat to dry. Safety eyes should be securely attached to avoid any small parts coming loose.

    Frequently Asked Questions

    • Is this crochet animal pattern beginner-friendly?
      Yes, it is designed with beginners in mind.
    • What yarn is best for this crochet animal?
      Medium weight yarn is recommended for a sturdy and soft finish.
    • How long does it take to crochet this animal?
      The approximate time to complete the project is 8-10 hours.
    • Can I make this crochet animal larger or smaller?
      You can adjust your hook size and yarn weight to customize the finished size.
    • Can I use different yarn colors?
      Absolutely! Feel free to play with colors to create your unique design.
    • How do I keep the finished animal in shape?
      Proper stuffing helps maintain the shape, and regular hand washing can keep it looking fresh.

    Conclusion

    Creating your own plush crochet animals can be an incredibly rewarding experience. With various patterns and endless customization options, there’s no limit to the joy these handmade toys can bring. So grab your crochet hook and get ready to make something adorable!