Category: Free Patterns

Free animal crochet patterns for cute amigurumi friends. Easy step by step patterns for pandas, bunnies, foxes and more.

  • Rainbow Sprinkle Donut Turtle Free Crochet Pattern

    Rainbow Sprinkle Donut Turtle Free Crochet Pattern

    Rainbow Sprinkle Donut Turtle Free Crochet Pattern

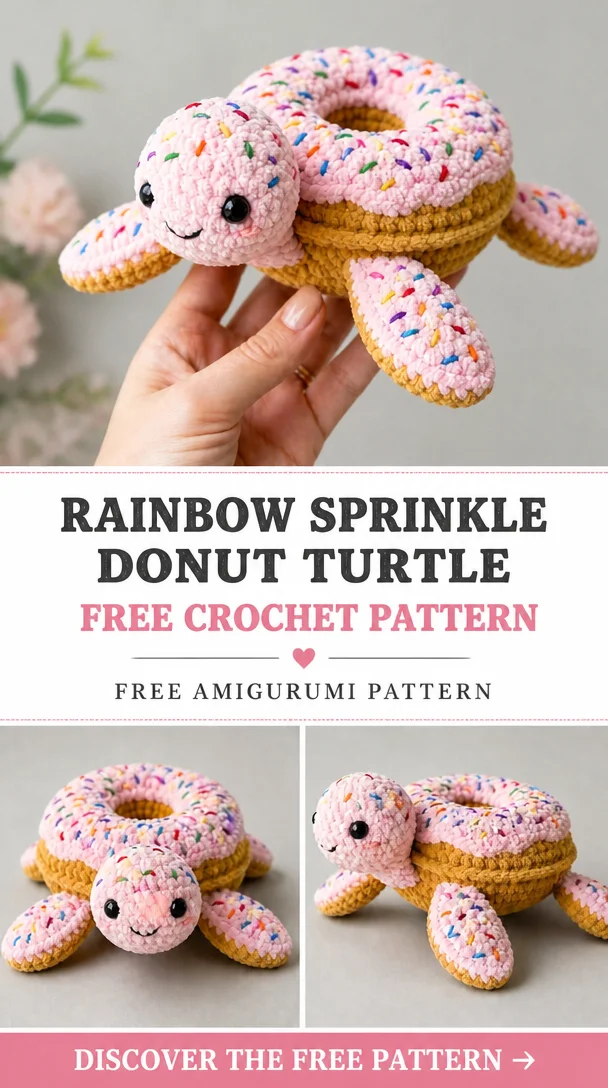
    Are you ready to add a splash of color and whimsy to your crochet collection? The Rainbow Sprinkle Donut Turtle is a delightful free crochet pattern that combines the charm of a turtle with the fun of a sprinkle-covered donut. This adorable project is perfect for both beginners looking to learn crochet techniques and seasoned pros seeking a fun, quick project. As you crochet this cheerful little friend, you’ll see your creative ideas come to life in vibrant hues and plush textures. Whether it’s for gifting or introducing some whimsy into your decor, this DIY crochet project is sure to spark joy in anyone who encounters it. Grab your yarn and hooks; you’re just a few stitches away from your next favorite crochet masterpiece!

    Crochet Turtle Pattern Overview

    • Skill Level: Easy
    • Finished Size: Approximately 6 inches
    • Crochet Hook: G (4.0 mm)
    • Yarn Type: Worsted weight yarn
    • Main Colors: Various colors for the shell and sprinkles
    • Construction Method: Worked in continuous rounds
    • Approximate Time: 2-3 hours
    • Beginner-Friendly: Yes

    Materials You’ll Need

    • Worsted weight yarn in various colors
    • G (4.0 mm) crochet hook
    • Fiberfill stuffing
    • Safety eyes (12 mm)
    • Yarn needle
    • Stitch marker
    • Scissors
    • Embroidery thread (for facial features)

    Crochet Abbreviations

    • ch: chain
    • sl st: slip stitch
    • sc: single crochet
    • inc: increase
    • dec: decrease
    • rnd: round

    Before You Start

    • Work in continuous rounds; do not join each round unless specified.
    • Use a stitch marker to keep track of your rounds.
    • Check your stitch counts at the end of each round to avoid errors.
    • Stuff your turtle gradually to achieve the desired firmness.
    • Keep track of your rounds for proper assembly later on.

    Free Crochet Turtle Pattern

    Shell

    Round 1: Start with a magic ring and work 6 sc in the ring.
    Round 2: Inc in each st around (12 sc).
    Round 3: Sc in next st, inc around (18 sc).
    Round 4: Sc in next 2 st, inc around (24 sc).
    Round 5: Sc in next 3 st, inc around (30 sc).
    Round 6: Sc in next 4 st, inc around (36 sc).
    Round 7: Sc in each st around (36 sc) for 5 rounds.
    Switch colors for sprinkles.
    Round 12: Sc in next 5 st, inc around (42 sc).
    Continue to finish the shell as desired shape is formed.

    Body

    Round 1: Start with a magic ring and work 6 sc in the ring.
    Round 2: Inc in each st around (12 sc).
    Continue increasing similarly to the shell until you have a round shape before connecting to the shell.

    Assembly

    Sew the body to the shell ensuring it aligns correctly. Attach safety eyes to the head. Use embroidery thread to create a mouth and other facial features.

    Facial Features and Finishing Details

    Secure the safety eyes and embroider a cute smile on your turtle. You can also add blush using embroidered stitches or fabric markers for an added touch of cuteness.

    Tips for a Better Result

    • Always check your stitch counts at the end of each round.
    • Stuff your turtle well but don’t overstuff, as you may distort its shape.
    • Try to keep your stitches consistent in tension for an even appearance.

    Customization Ideas

    • Experiment with different color combinations for the shell and sprinkles.
    • Use a variegated yarn for a unique colorful effect.
    • Add accessories like tiny hats or scarves using leftover yarn.
    • Adjust the size by using different yarn weights and hook sizes.

    Common Problems and Troubleshooting

    • Uneven Stuffing: Add small amounts of stuffing evenly as you go.
    • Loose Stitches: Check your tension and consistency as you crochet.
    • Incorrect Stitch Counts: Count stitches at the end of each round to ensure accuracy.
    • Assembly Alignment: Check alignment of limbs as you sew to maintain symmetry.

    Care and Safety

    If your Rainbow Sprinkle Donut Turtle will be used as a toy, ensure all safety eyes and embellishments are secured tightly. Hand wash gently in cold water and lay flat to dry to maintain the shape of your crochet turtle.

    Frequently Asked Questions

    • Is this crochet turtle pattern beginner-friendly?
      Yes, it’s designed for beginners with clear instructions.
    • What yarn is best for this crochet turtle?
      Worsted weight yarn works best, but you can experiment with any soft, similar weight yarn.
    • How long does it take to crochet this animal?
      Approximately 2-3 hours depending on your skill level.
    • Can I make this crochet turtle larger or smaller?
      Yes, you can change yarn weight and hook size for desired dimensions.
    • Can I use different yarn colors?
      Absolutely! Feel free to customize with your favorite colors.
    • How do I keep the finished animal in shape?
      Store it in a dry place and avoid excessive pressure to maintain its shape.

    Conclusion

    Dive into this fun and colorful Rainbow Sprinkle Donut Turtle crochet project! It’s an enjoyable way to express your creativity and add charm to your crochet collection. Whether for a personal touch to your decor or a heartfelt gift, this pattern is sure to delight. So gather your supplies and start crocheting today!
     

  • Free Crochet Eeyore Pattern – A Cute Amigurumi Project You’ll Love

    Free Crochet Eeyore Pattern – A Cute Amigurumi Project You’ll Love

    Eeyore Amigurumi – Free Pattern | Cartoon crochet patterns, Gray crochet ideas, Eyore crochet pattern free

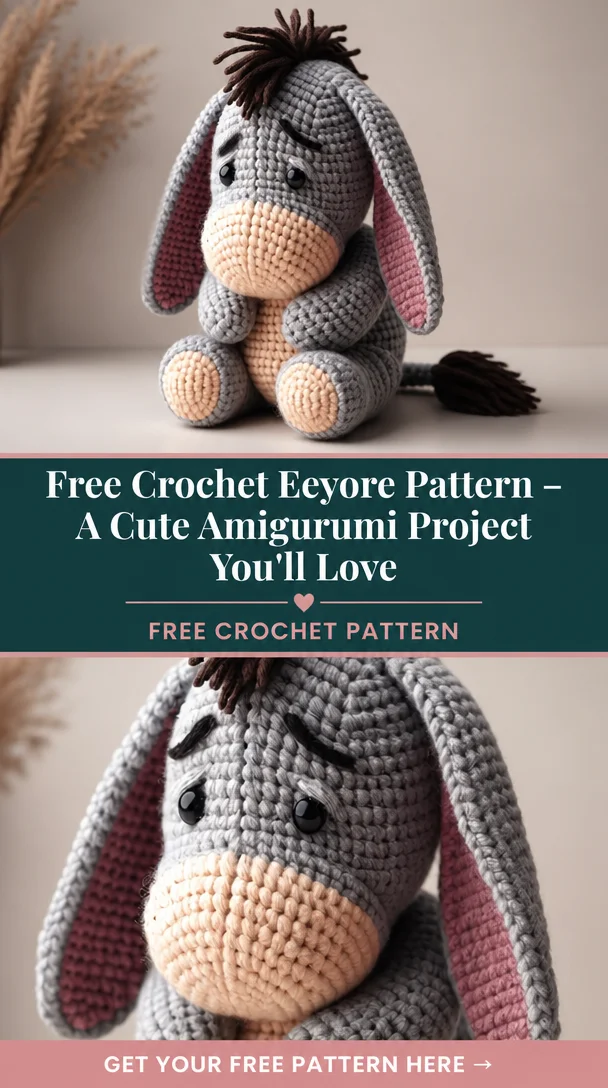
    Bring a touch of whimsy into your life with this adorable Eeyore amigurumi! This lovable character from the Hundred Acre Wood is not only cute but also perfect for anyone looking to create a charming gift for kids or an exciting project for keen crocheters. The Eeyore amigurumi pattern is fun and engaging, allowing you to explore various crochet techniques while creating a cherished keepsake or toy. This pattern is suitable for crocheters with some experience, making it a delightful step-up for those ready to tackle a more intricate project.

    Crochet Eeyore Pattern Overview

    • Skill Level: Intermediate
    • Finished Size: Approximately 10 inches tall
    • Crochet Hook: 3.5 mm (E/4)
    • Yarn Type: Acrylic yarn
    • Main Colors: Gray, dark gray, pink
    • Construction Method: Worked in continuous rounds
    • Approximate Time: 8-10 hours
    • Beginner-Friendly: Not suitable for complete beginners

    Materials You’ll Need

    • Yarn in gray, dark gray, and pink
    • 3.5 mm crochet hook
    • Stuffing (fiberfill)
    • Safety eyes (12 mm)
    • Yarn needle
    • Stitch marker
    • Scissors
    • Embroidery thread (black for details)
    • Fabric for additional features, if desired

    Crochet Abbreviations

    • ch = chain
    • sc = single crochet
    • inc = increase
    • dec = decrease
    • sl st = slip stitch
    • rnd = round
    • st = stitch

    Before You Start

    • Work in continuous rounds to avoid noticeable seams unless indicated otherwise.
    • Use a stitch marker to mark the beginning of each round.
    • Check your stitch count regularly to maintain uniformity in pieces.
    • Stuff Eeyore gradually to ensure he has a nice shape.
    • Keep track of rounds to avoid confusion, especially in multi-part constructions.
    • Prepare all pieces before assembly for smooth construction.

    Free Crochet Eeyore Pattern

    Head

    Round 1: 6 sc in a magic ring.
    Round 2: Inc in each st (12).
    Round 3: (sc in next st, inc) repeat around (18).
    Round 4: (sc in next 2 sts, inc) repeat around (24).
    Round 5-9: sc in each st around (24).
    Round 10: (sc in next 2 sts, dec) repeat around (18).
    Round 11: (sc in next st, dec) repeat around (12).
    Round 12: Dec around (6).

    Body

    Round 1: 6 sc in a magic ring.
    Round 2: Inc in each st (12).
    Round 3: (sc in next st, inc) repeat around (18).
    Round 4: (sc in next 2 sts, inc) repeat around (24).
    Round 5-12: sc in each st around (24).
    Round 13: (sc in next 2 sts, dec) repeat around (18).
    Round 14: (sc in next st, dec) repeat around (12).
    Round 15: Dec around (6).

    Ears (make 2)

    Round 1: 6 sc in a magic ring.
    Round 2: Inc in each st (12).
    Round 3: (sc in next st, inc) repeat around (18).
    Round 4: (sc in next 4 sts, dec) repeat around (12).
    Finish, leaving long tail for sewing.

    Arms (make 2)

    Round 1: 6 sc in a magic ring.
    Round 2-4: sc in each st around (6).
    Finish, leaving long tail for sewing.

    Legs (make 2)

    Round 1: 6 sc in a magic ring.
    Round 2-6: sc in each st around (6).
    Finish, leaving long tail for sewing.

    Tail

    Ch 12, sc in each ch back to the start.
    Fasten off, leaving long tail for attaching.

    Assembly

    1. Stuff the head and body evenly.
    2. Attach the head to the body with a yarn needle by sewing securely.
    3. Position the ears on top of the head and sew to secure.
    4. Position the arms at the sides and sew them in place.
    5. Attach the legs to the bottom of the body.
    6. Stuff the tail and attach it to the back of the body.
    7. Shape the head and body as needed by adjusting stuffing.

    Facial Features and Finishing Details

    • Sew on safety eyes, positioning them evenly.
    • Use black embroidery thread to create a smile and nostrils.
    • Add details such as the inner ear color with pink embroidery for an extra touch.

    Tips for a Better Result

    • Take your time with each piece to ensure quality and symmetry.
    • Experiment with different shades of gray for a unique Eeyore.
    • Carefully place features to achieve an expressive look.

    Customization Ideas

    • Change colors to a lighter or darker palette.
    • Experiment with yarn types like cotton for a different texture.
    • Adjust size by using a larger hook and thicker yarn.
    • Add accessories like a tiny bow or scarf.

    Common Problems and Troubleshooting

    • If the head looks misshaped, ensure it’s stuffed evenly and adjust as necessary.
    • Loose stitches can be tightened by tightening your grip on the yarn as you work.
    • Check stitch counts to prevent unevenness in height.
    • Adjust assembly placement if parts look out of alignment.

    Care and Safety

    To clean your Eeyore, spot clean with mild detergent. As it contains small parts (safety eyes), it’s not recommended for very young children. Ensure all parts are securely attached before giving it as a toy.

    Frequently Asked Questions

    • Is this crochet Eeyore pattern beginner-friendly?
      No, it’s better suited for those with some prior crochet experience.
    • What yarn is best for this crochet Eeyore?
      Acrylic yarn works well, providing both softness and durability.
    • How long does it take to crochet this animal?
      Expect to spend around 8-10 hours on completion.
    • Can I make this crochet animal larger or smaller?
      Yes, adjusting your hook size or yarn thickness will change the size.
    • Can I use different yarn colors?
      Absolutely! Customizing colors will make your Eeyore unique.
    • How do I keep the finished animal in shape?
      Avoid washing in the machine; spot clean instead to maintain its form.

    Conclusion

    Creating your very own Eeyore amigurumi is a fulfilling project that will surely bring joy to your crafting experience. So gather your materials and get crocheting; Eeyore is waiting to come to life!

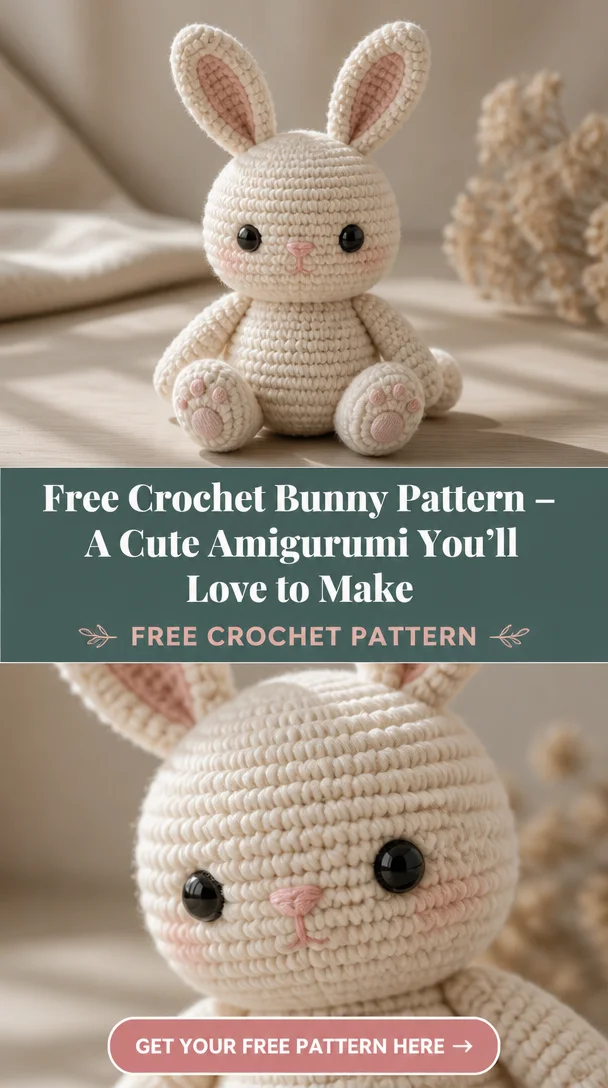
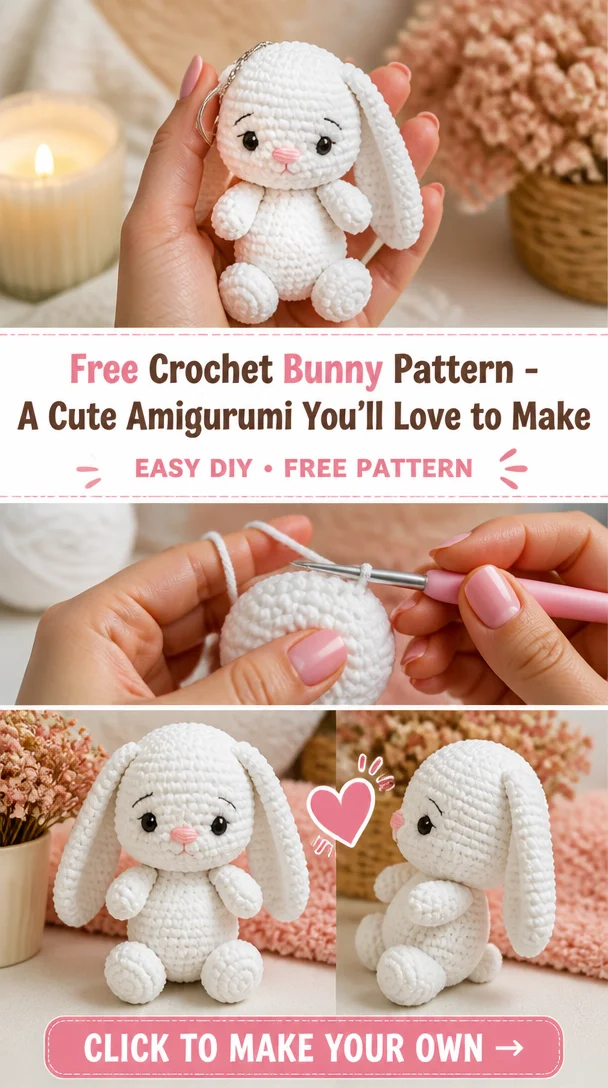
  • Free Crochet Bunny Pattern – A Cute Amigurumi You’ll Love to Make

    Free Crochet Bunny Pattern – A Cute Amigurumi You’ll Love to Make

    Elya The Crochet Bunny Amigurumi Free Pattern

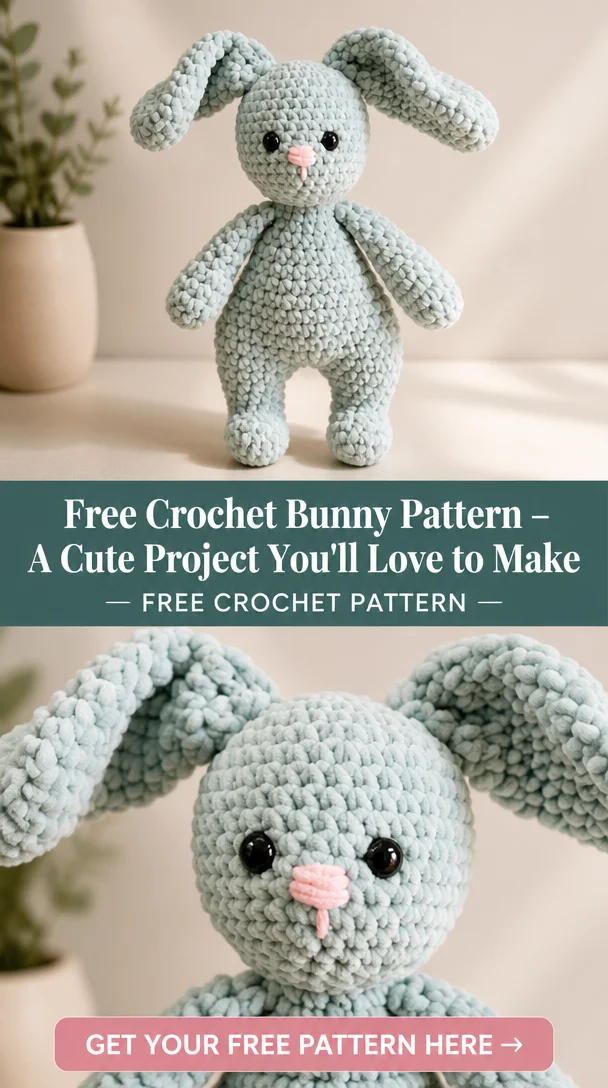
    Elya the Crochet Bunny is an adorable plush amigurumi project that brings a touch of charm to any stuffed animal collection. This delightful rabbit not only serves as a great decorative piece but also makes a lovely gift for children and adults alike. Crocheting Elya provides an engaging experience for crafters of all skill levels, from beginners looking to tackle their first project to seasoned makers in search of a quick, satisfying finish. With Elya’s cute features and cuddly size, you’ll find yourself falling in love with this crochet companion.

    Crochet Bunny Pattern Overview

    • Skill level: Beginner-friendly
    • Finished size: Approximately 24 cm (excluding ears)
    • Crochet hook: 3.5 mm (E/4)
    • Yarn type: Worsted weight yarn (medium)
    • Main colors: Your choice of colors
    • Construction method: Worked in continuous rounds
    • Approximate time: 5-8 hours
    • Beginner-friendly: Yes

    Materials You’ll Need

    • Worsted weight yarn (in desired colors)
    • 3.5 mm (E/4) crochet hook
    • Polyester stuffing
    • Safety eyes (12 mm)
    • Yarn needle
    • Stitch marker
    • Scissors
    • Embroidery thread (for facial features)
    • Optional: Small decorative accessories (like ribbons)

    Crochet Abbreviations

    • ch: chain
    • sc: single crochet
    • inc: increase (2 sc in the same stitch)
    • dec: decrease (sc 2 stitches together)
    • sl st: slip stitch
    • R: round

    Before You Start

    Before diving into the pattern, here are a few tips:

    • Work in continuous rounds to maintain a neat finish.
    • Use a stitch marker to keep track of your rounds.
    • Check your stitch counts at the end of each round to ensure consistency.
    • Gradually stuff your bunny as you go to shape it accurately.
    • Prepare for assembly by ensuring your pieces are completed and ready to be joined.

    Free Crochet Bunny Pattern

    Head

    Round 1: 6 sc in magic ring
    Round 2: inc in each st around (12)
    Round 3: sc, inc repeat around (18)
    Round 4: 2 sc, inc repeat around (24)
    Round 5-10: sc in each st around (24)
    Round 11: 2 sc, dec repeat around (18)
    Round 12: sc, dec repeat around (12)
    Round 13: dec around (6)
    Finish off, leaving a long tail for sewing.

    Body

    Round 1: 6 sc in magic ring
    Round 2: inc in each st around (12)
    Round 3: sc, inc repeat around (18)
    Round 4: 2 sc, inc repeat around (24)
    Round 5-15: sc in each st around (24)
    Round 16: 2 sc, dec repeat around (18)
    Round 17: sc, dec repeat around (12)
    Round 18: dec around (6)
    Finish off, leaving a long tail for sewing.

    Ears (Make 2)

    Round 1: 6 sc in magic ring
    Round 2: inc in each st around (12)
    Round 3: sc, inc repeat around (18)
    Round 4-8: sc in each st around (18)
    Finish off, leaving a long tail for sewing.

    Arms (Make 2)

    Round 1: 6 sc in magic ring
    Round 2: inc in each st around (12)
    Round 3-5: sc in each st around (12)
    Finish off, leaving a long tail for sewing.

    Legs (Make 2)

    Round 1: 6 sc in magic ring
    Round 2: inc in each st around (12)
    Round 3-6: sc in each st around (12)
    Finish off, leaving a long tail for sewing.

    Tail

    Round 1: 6 sc in magic ring
    Round 2: inc in each st around (12)
    Finish off, leaving a long tail for sewing.

    Assembly

    1. Sew the head onto the body, ensuring it is centered.
    2. Attach the arms to the sides of the body.
    3. Position the legs at the bottom of the body, slightly spaced apart.
    4. Attach the ears at the top of the head.
    5. For the tail, sew it onto the back of the body.
    6. Carefully stuff the head and body as needed, ensuring a good shape while keeping it soft.
    7. Join any loose ends and secure your stitches.

    Facial Features and Finishing Details

    Using the safety eyes, secure them onto the head at an appropriate distance apart. The nose can be made with pink or contrasting yarn using the embroidery thread. For a mouth, you can stitch a simple curve below the nose, adding any desired expressions to bring Elya to life.

    Tips for a Better Result

    • Make sure to maintain even tension throughout the work.
    • Use a stitch marker consistently to avoid losing your place.
    • Experiment with different stitch styles for unique textures.

    Customization Ideas

    • Change yarn colors to make Elya unique.
    • Use different yarn types for varied textures.
    • Add accessories like bows or scarves for added character.
    • Adjust the size by changing the hook size or yarn weight.
    • Create personal facial expressions using different embroidery techniques.

    Common Problems and Troubleshooting

    • Ensure even stuffing to prevent a lumpy appearance.
    • If stitches are too loose, consider using a smaller hook.
    • Pay attention to stitch counts to avoid uneven pieces.
    • Align parts correctly during assembly for a balanced look.

    Care and Safety

    To care for your finished Elya bunny, hand wash it gently and lay it flat to dry. Because safety eyes are used, ensure that they are securely attached if the bunny is intended for small children.

    Frequently Asked Questions

    • Is this crochet bunny pattern beginner-friendly?
      Yes, this pattern is suitable for beginners.
    • What yarn is best for this crochet bunny?
      Worsted weight yarn is ideal for achieving the right size and texture.
    • How long does it take to crochet this animal?
      It typically takes about 5-8 hours, depending on experience.
    • Can I make this crochet animal larger or smaller?
      Yes, adjusting the hook size or yarn weight can help change the final size.
    • Can I use different yarn colors?
      Absolutely! Use any colors you like to create a personalized bunny.
    • How do I keep the finished animal in shape?
      Gently shape and stuff the bunny evenly during construction to maintain its form.

    Conclusion

    Elya the Crochet Bunny is not only a lovely project to enhance your skills but also provides a delightful creation that can be cherished or gifted. Dive into this pattern and enjoy every stitch that brings Elya to life!

  • Free Crochet Bunny Pattern – A Cute Amigurumi You’ll Love to Make

    Free Crochet Bunny Pattern – A Cute Amigurumi You’ll Love to Make

    35+ Amazing toy FREE crochet patterns!

    Crochet animals have a special charm that captivates crafters of all ages. Whether for playful children or as delightful decorations, these handmade toys are perfect for gifting or keeping. What makes these patterns genuinely fascinating is the variety in styles, characters, and techniques, allowing for both creative expression and skill development. This collection features 35+ amazing crochet animal patterns, suitable for everyone from beginners to experienced crocheters, making it easy to find the perfect project for your skill level and interests.

    Crochet Animal Pattern Overview

    • Skill Level: Varies from beginner to advanced
    • Finished Size: Generally around 8-12 inches tall, depending on the pattern
    • Crochet Hook: Size G (4.0 mm) or H (5.0 mm), depending on the yarn used
    • Yarn Type: Medium-weight (worsted) yarn or suitable alternatives
    • Main Colors: Various, depending on the animal being crocheted
    • Construction Method: Worked in the round, often using continuous rounds
    • Approximate Time: 5-10 hours for completion based on complexity
    • Beginner-Friendly: Many patterns are suitable for beginners

    Materials You’ll Need

    • Medium-weight yarn (variety of colors)
    • Matching crochet hook (usually G or H)
    • Stuffing (polyester fiberfill)
    • Safety eyes (if applicable)
    • Yarn needle (for weaving in ends and sewing pieces)
    • Stitch marker (to mark the beginning of rounds)
    • Scissors
    • Embroidery thread (for facial features)
    • Any animal-specific materials (like felt for accents)

    Crochet Abbreviations

    • ch: chain
    • st: stitch
    • sc: single crochet
    • inc: increase (2 sc in the same st)
    • dec: decrease (sc 2 together)
    • sl st: slip stitch

    Before You Start

    Before diving into this fun crochet adventure, keep these tips in mind:

    • Use a stitch marker to help track the beginning of each round.
    • Always check your stitch counts at the end of each round to avoid errors.
    • Stuff your animal gradually to achieve a smooth finish and avoid lumps.
    • Assemble the pieces when they are fully completed to ensure proper alignment and finishing touches.

    Free Crochet Animal Pattern

    Head

    Round 1: 6 sc in a magic ring.
    Round 2: Inc in each stitch around (12).
    Round 3: (1 sc, inc) repeat around (18).
    Round 4-6: Sc in each st around (18).

    Body

    Round 1: 6 sc in a magic ring.
    Round 2: Inc in each stitch around (12).
    Round 3: (1 sc, inc) repeat around (18).
    Round 4-8: Sc in each st around (18).

    Arms

    Round 1: 6 sc in a magic ring.
    Round 2-5: Sc in each st around (6).

    Legs

    Round 1: 6 sc in a magic ring.
    Round 2-5: Sc in each st around (6).

    Assembly

    • Attach the head to the body by sewing securely with the yarn needle.
    • Position and sew the arms and legs in a comfortable pose.
    • Ensure the limbs are evenly spaced and well-attached.

    Facial Features and Finishing Details

    Use safety eyes or embroider eyes with thread. Add a small felt or embroidered nose, and stitch a smiling mouth. You can also use tiny pieces of felt for added details like whiskers or eyebrows.

    Tips for a Better Result

    • Maintain consistent tension for even stitches.
    • Experiment with yarn colors to create unique animal patterns.
    • Always check for loose ends and weave in yarn ends neatly.

    Customization Ideas

    • Change up colors for a seasonal theme or personal preference.
    • Use different yarn types for varied textures.
    • Consider adding accessories like bows or hats to personalize each animal.
    • Adjust size by using thicker or thinner yarn.

    Common Problems and Troubleshooting

    • If your stitches look uneven, check tension and try to maintain consistency throughout the pattern.
    • Difficulty in assembly can often be resolved by checking alignment and ensuring pieces are securely stitched.
    • For parts appearing oddly shaped, adjust stuffing or reshape pieces gently while filling.

    Care and Safety

    Crochet animals should be spot cleaned to maintain their shape and integrity. If using safety eyes, ensure they are securely attached to avoid any choking hazards.

    Frequently Asked Questions

    • Is this crochet animal pattern beginner-friendly?
      Yes, several patterns in this collection are designed for beginners.
    • What yarn is best for this crochet animal?
      Medium-weight yarn works best, but feel free to experiment with blends.
    • How long does it take to crochet this animal?
      Completion time can vary from 5 to 10 hours based on complexity.
    • Can I make this crochet animal larger or smaller?
      Yes, altering the yarn weight and hook size will adjust the finished size.
    • Can I use different yarn colors?
      Absolutely! Customizing colors adds a unique touch to each creation.
    • How do I keep the finished animal in shape?
      Regular stuffing and careful handling help maintain the shape.

    Conclusion

    Crocheting an adorable animal is not just a fun crafting activity; it’s a wonderful way to create cherished keepsakes or gifts. Dive into these patterns and let your creativity shine. Happy crocheting!

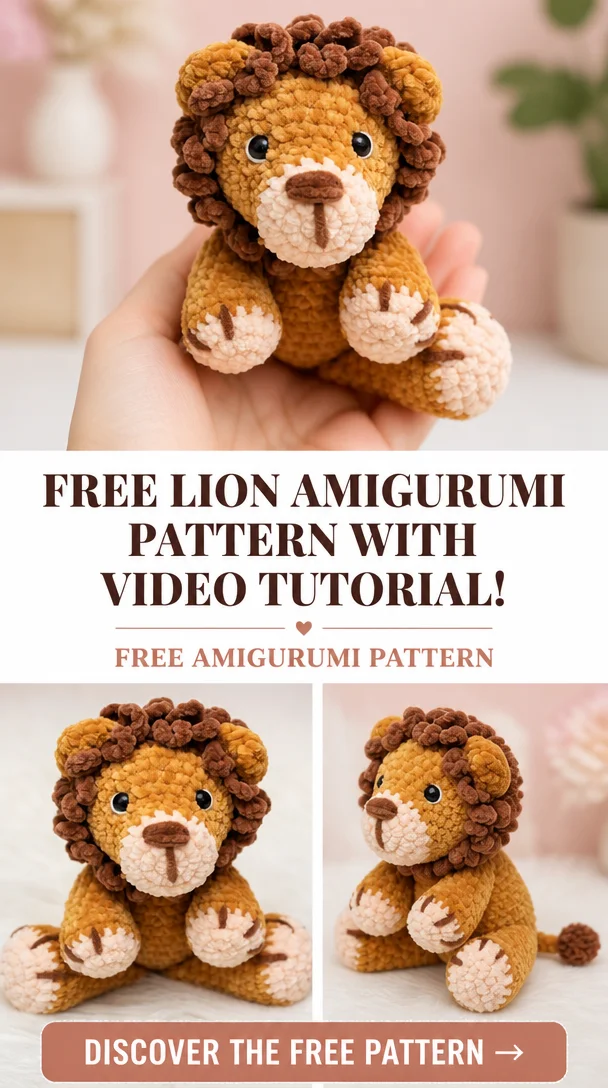
  • FREE Lion Amigurumi Pattern with Video Tutorial!

    FREE Lion Amigurumi Pattern with Video Tutorial!

    FREE Lion Amigurumi Pattern with Video Tutorial!

    Are you ready to crochet an adorable lion character? The FREE Lion Amigurumi Pattern is perfect for beginners and seasoned crafters alike, ensuring a delightful and satisfying experience. This cheerful lion will not only brighten your crafting space but also serve as a wonderful gift or decoration for kids’ rooms. With easy-to-follow instructions and engaging photo tutorials, as well as a comprehensive video guide, you’ll find creating this lovable lion a breeze. Grab your yarn and hooks, as you’re about to embark on a fun crochet adventure!

    Crochet Lion Pattern Overview

    • Skill Level: Beginner-Friendly
    • Finished Size: Approximately a typical amigurumi size
    • Crochet Hook: Suitable for the yarn chosen
    • Yarn Type: Any soft yarn can be used
    • Main Colors: Lion’s main body color, mane color, and optional accents
    • Construction Method: Worked in continuous rounds
    • Approximate Time: Varies by experience, but generally a few hours
    • Project Suitability: Perfect for beginners

    Materials You’ll Need

    • Yarn (in colors for body, mane, accents)
    • Crochet hook (appropriate size for your yarn)
    • Stuffing (polyester fiberfill recommended)
    • Safety eyes (to add charm to your lion’s face)
    • Yarn needle (for sewing parts together)
    • Stitch marker (to keep track of rounds)
    • Scissors (for cutting yarn)
    • Embroidery thread (for facial detailing)
    • Optional animal-specific materials (such as additional decorative yarn)

    Crochet Abbreviations

    • ch: chain
    • sc: single crochet
    • inc: increase (2 sc in one stitch)
    • dec: decrease (2 sc together)
    • sl st: slip stitch
    • rnd: round

    Before You Start

    Before crocheting your lion, keep in mind the following tips:

    • Work in continuous rounds to create a seamless look.
    • Use a stitch marker to mark the beginning of each round.
    • Regularly check your stitch counts to ensure accuracy.
    • Stuff the lion gradually to shape it as desired.
    • Keep track of your rounds to maintain consistent shaping.
    • Prepare for assembly by ensuring all pieces are crocheted and ready.

    Free Crochet Lion Pattern

    Head

    Round 1: Start with a magic ring, 6 sc in the ring.
    Round 2: Inc in each stitch around (12 sc).
    Round 3: (sc in next stitch, inc in next) 6 times (18 sc).
    Round 4: (sc in next 2 stitches, inc in next) 6 times (24 sc).
    Continue to shape the head as per your desired look.

    Body

    Round 1: Start with a magic ring, 6 sc in the ring.
    Round 2: Inc in each stitch around (12 sc).
    Continue to increase and shape according to your desired body size.

    Ears (Make 2)

    Round 1: Start with a magic ring, 6 sc in the ring.
    Round 2: Inc in each stitch around (12 sc).
    Round 3: (sc in next stitch, inc in next) 6 times (18 sc).
    Round 4: (sc in next 2 stitches, inc in next) 6 times (24 sc).
    Fasten off.

    Mane

    Crochet a series of small yarn pieces and attach them around the head in a circular fashion to form the lion’s mane.

    Assembly

    1. Attach the head to the body securely using your yarn needle.
    2. Position the ears on top of the head and sew them down.
    3. Firmly attach the mane around the head.
    4. Stuff the body thoroughly, ensuring a nice shape.
    5. Sew on safety eyes in desired position, and embroider facial features such as the nose and mouth.

    Facial Features and Finishing Details

    Complete the lion’s face by attaching safety eyes and using embroidery thread to create a nose and mouth. Choose colors that create a striking contrast with the main body to enhance your lion’s expression.

    Tips for a Better Result

    • Consider using a soft yarn for a plush and huggable result.
    • Keep your stitches tight to avoid gaps in your work.
    • Double-check your stitch counts to ensure symmetry in your design.

    Customization Ideas

    • Experiment with color combinations for the body, mane, and accents.
    • Add a fun accessory like a bow or a scarf for extra personality.
    • Change the size by using thicker or thinner yarn and a corresponding hook.

    Common Problems and Troubleshooting

    • Uneven Stuffing: Distribute stuffing evenly to ensure a balanced shape.
    • Loose Stitches: Tighten your tension to achieve a neater finish.
    • Incorrect Stitch Counts: Count your stitches regularly, especially after increases.

    Care and Safety

    To maintain your handmade lion, spot clean with a damp cloth. If used as a toy, ensure all parts like safety eyes are securely attached, particularly for young children, and supervise during play.

    Frequently Asked Questions

    • Is this crochet lion pattern beginner-friendly?
      Yes, the pattern is designed for beginners with straightforward instructions.
    • What yarn is best for this crochet lion?
      Any soft yarn is suitable, allowing for a cuddly result.
    • How long does it take to crochet this lion?
      The time varies by experience but typically takes a few hours.
    • Can I make this crochet lion larger or smaller?
      Yes, you can adjust the size by using different yarn weights and hook sizes.
    • Can I use different yarn colors?
      Absolutely! Feel free to personalize your lion with your favorite colors.
    • How do I keep the finished animal in shape?
      Use stuffing adequately and shape your lion while assembling.

    Conclusion

    We hope this crochet lion pattern inspires you to create your own adorable amigurumi friend. With the guidance of this tutorial and your creativity, you’ll end up with a sweet lion that brings joy to anyone who sees it. Happy crocheting!

  • 20 Crochet Disney Toys Free Patterns

    20 Crochet Disney Toys Free Patterns

    20 Crochet Disney Toys Free Patterns

    Do you have a soft spot for Disney characters? If so, crafting crochet toys inspired by beloved characters can be a delightful project! From the iconic Mickey Mouse to the charming Dumbo, these crochet patterns bring to life the fairy-tale joy of your favorite Disney friends. Not only do they offer a fun crafting experience, but they also make for adorable gifts or cherished keepsakes. Perfect for crocheters of all levels, these patterns will inspire creativity while keeping you connected to the magic of Disney.

    Crochet Animal Pattern Overview

    • Skill Level: Beginner to Intermediate
    • Finished Size: Varies by pattern
    • Crochet Hook: Standard size (varies by yarn)
    • Yarn Type: Acrylic or cotton (depending on the project)
    • Main Colors: Typically based on character visuals
    • Construction Method: Amigurumi style
    • Approximate Time: 1-3 hours per toy
    • Beginner-Friendly: Most patterns can be adapted for beginners

    Materials You’ll Need

    • Yarn (color varies by character)
    • Crochet hook
    • Stuffing (polyester fiberfill)
    • Safety eyes (if applicable)
    • Yarn needle
    • Stitch marker
    • Scissors
    • Embroidery thread (for facial features)
    • Additional character-specific materials (like felt for accessories)

    Crochet Abbreviations

    • ch: chain
    • sc: single crochet
    • st: stitch
    • rnd: round
    • inc: increase
    • dec: decrease
    • fo: finish off

    Before You Start

    • Work in continuous rounds for a seamless finish.
    • Use a stitch marker to mark the beginning of your rounds.
    • Regularly check your stitch counts to keep your dimensions accurate.
    • Stuff your pieces gradually for better shape and control.
    • Keep track of your rounds with a note or by revisiting previous rounds.

    Free Crochet Animal Pattern

    Head

    Round 1: Start with a magic ring, 6 sc.
    Round 2: Inc in each st around (12).
    Round 3: Sc in next st, inc repeat around (18).
    Round 4-6: Sc in each st around (18).

    Body

    Round 1: Start with a magic ring, 6 sc.
    Round 2: Inc in each st around (12).
    Round 3: Sc in next st, inc repeat around (18).
    Round 4: Sc in each st around (18).
    Round 5: Sc in next 2 st, inc repeat around (24).
    Round 6-10: Sc in each st around (24).

    Arms / Front Legs

    Round 1: Start with a magic ring, 6 sc.
    Round 2: Inc in each st around (12).
    Round 3: Sc in each st around (12).
    Round 4: Sc in next st, dec repeat around (8).

    Legs / Back Legs

    Similar to the front legs, but adjust the rounds for length as needed.

    Tail

    Round 1: Start with a magic ring, 4 sc.
    Rounds (2-5): Sc in each st around (4).

    Assembly

    • Head to Body: Sew the head securely to the body using the yarn needle.
    • Limbs: Attach arms and legs by positioning them symmetrically on the body.
    • Tail: Secure the tail at the back of the body for a playful finish.
    • Facial Features: Carefully embroider or attach eyes, nose, and mouth to the head.

    Facial Features and Finishing Details

    • Use safety eyes or embroider eyes using a black thread.
    • For the nose, use a small black yarn ball or embroider.
    • Add a smile with embroidery, and shape the face to your preference.

    Tips for a Better Result

    • Keep your tension consistent for even stitches throughout your project.
    • Use a yarn needle to weave in ends carefully to maintain a clean look.
    • Experiment with stuffing for different textures.

    Customization Ideas

    • Use different colors and yarn types to reflect your favorite character.
    • Create variations in size by adjusting your hook and yarn thickness.
    • Change facial expressions by altering the embroidery style.

    Common Problems and Troubleshooting

    • Uneven Stuffing: Adjust stuffing as you go, ensuring a smooth finish.
    • Loose Stitches: Tighten your tension, especially in early rounds.
    • Assembly Alignment: Always check the position before securing pieces.

    Care and Safety

    For handmade crochet toys, wash gently by hand and lay flat to dry. If using safety eyes, ensure they’re securely attached before allowing small children to play with the toy.

    Frequently Asked Questions

    • Is this crochet pattern beginner-friendly?
      Yes, with many patterns suitable for beginners.
    • What yarn is best for this crochet animal?
      Acrylic or cotton works best, depending on desired softness.
    • How long does it take to crochet this animal?
      Typically, 1-3 hours depending on detail and size.
    • Can I make this crochet animal larger or smaller?
      Yes, adjust the yarn and hook size to manipulate the final dimensions.
    • Can I use different yarn colors?
      Absolutely! Customize it to fit your vision.
    • How do I keep the finished animal in shape?
      Use adequate stuffing and stitch tension to maintain form.

    Conclusion

    Embarking on the journey of creating these 20 Crochet Disney Toys Free Patterns is a fantastic way to blend creativity with nostalgia. Each character you crochet can bring joy, not only as a project but as a treasured toy. So grab your yarn and hook, and let the magic of Disney inspire your next crafting adventure!

  • Free Crochet Bunny Pattern – A Cute Amigurumi You’ll Love to Make

    Free Crochet Bunny Pattern – A Cute Amigurumi You’ll Love to Make

    22 Free Amigurumi Crochet Patterns for Cute Stuffed Animals

    Amigurumi has taken the crafting world by storm, charming creators with its whimsical and cuddly designs. If you’re looking to make adorable stuffed animals, this collection of 22 free amigurumi crochet patterns is perfect for you! Featuring a delightful variety of cute creatures—from cuddly penguins to playful dinosaurs and enchanting octopuses—these patterns cater to crocheters of all skill levels. Each project offers you the opportunity to create thoughtful handmade gifts or enjoy a relaxing crafting session. Get ready to whip out your yarn and hook because these adorable designs will surely spark your creativity and elevate your crochet skills!

    Crochet Amigurumi Pattern Overview

    • Skill Level: Suitable for beginners and experienced crocheters
    • Finished Size: Varies per project; typically 6-12 inches tall
    • Crochet Hook: Size G (4.0 mm) or as directed in specific patterns
    • Yarn Type: Worsted weight yarn (or as specified)
    • Main Colors: Varied depending on the design
    • Construction Method: Worked in rounds
    • Approximate Time: 2-5 hours per animal
    • Beginner-Friendly: Yes, many patterns include clear, step-by-step instructions

    Materials You’ll Need

    • Worsted weight yarn
    • Size G (4.0 mm) crochet hook
    • Polyester fiberfill stuffing
    • Safety eyes (suitable size for the animal)
    • Yarn needle for sewing
    • Stitch marker
    • Scissors
    • Embroidery thread (for facial features)

    Crochet Abbreviations

    • CH: Chain
    • SC: Single Crochet
    • INC: Increase (2 SC in the same stitch)
    • DEC: Decrease (single crochet two stitches together)
    • MR: Magic Ring

    Before You Start

    • Work in Continuous Rounds: To avoid a visible seam, crochet in spirals.
    • Use a Stitch Marker: Place a stitch marker in the first stitch of each round to help keep track of your rounds.
    • Check Stitch Counts: Regularly check your stitch count to avoid losing track.
    • Stuff Gradually: Add stuffing as you go, ensuring even distribution and maintaining the desired shape.
    • Keep Track of Rounds: Make a note of your round numbers to help with assembly later on.

    Free Crochet Animal Pattern

    Head

    • Round 1: MR 6
    • Round 2: INC around (12)
    • Round 3: (1 SC, INC) x 6 (18)
    • Continue increasing until the desired head circumference is reached.

    Body

    • Round 1: MR 6
    • Round 2: INC around (12)
    • Round 3: (1 SC, INC) x 6 (18)
    • Work even until reaching the length specified, adding stuffing along the way.

    Legs

    • This section will differ per animal; generally, you will work in rounds similar to the head or body but perhaps in smaller increments for limbs.

    Ears

    • Depending on your animal, you may have rounded or pointed ears to attach after completing the head.

    Tail

    • Create a small cylindrical shape, stuffing lightly and attaching at the back of the body.

    Assembly

    1. Placement: Position the head on the body and pin to hold.
    2. Sewing: Use a yarn needle to sew the head securely to the body with small stitches.
    3. Attaching Limbs: Secure arms and legs in place on the body, ensuring symmetry and balance.
    4. Adding Facial Features: Use embroidery thread for the nose and mouth. Attach safety eyes securely.
    5. Finishing Touches: Stuff as needed and gently reshape the animal.

    Facial Features and Finishing Details

    Create expressive eyes and a cute smile with safety eyes and embroidery. You can customize expressions by changing the shape of the mouth or adding blush with embroidery.

    Tips for a Better Result

    • Tension Consistency: Keep your tension even for a neat look.
    • Choose Soft Yarn: Opt for soft yarn to add extra cuddly texture.
    • Take Breaks: Step away when needed. Reevaluating can improve your next sections.

    Customization Ideas

    • Color Variations: Choose any color theme for your stuffed animal.
    • Yarn Types: Experiment with different yarn textures (e.g., cotton, acrylic).
    • Accessories: Add a bow tie, hat, or scarf for character.
    • Facial Expressions: Create different looks such as a smiling or surprised face.

    Common Problems and Troubleshooting

    • Uneven Stuffing: Adjust stuffing as needed; use small amounts to control firmness.
    • Loose Stitches: Revisit previous rounds to tighten or redo if necessary.
    • Incorrect Stitch Counts: Always recount before assembly if unsure.
    • Shape Issues: Adjust stuffing and try reshaping with your hands.

    Care and Safety

    To maintain your crochet animal, hand wash gently or spot clean. If the toy has small parts (like safety eyes), ensure they are securely attached to prevent hazards.

    Frequently Asked Questions

    • Is this crochet animal pattern beginner-friendly? Yes, many patterns are designed with clear instructions for beginners.
    • What yarn is best for this crochet animal? Worsted weight yarn is commonly recommended for durability and ease.
    • How long does it take to crochet this animal? Most patterns can be completed in 2-5 hours, depending on complexity.
    • Can I make this crochet animal larger or smaller? Yes, by adjusting your yarn weight and hook size, you can change the size.
    • Can I use different yarn colors? Absolutely! Feel free to mix and match colors.
    • How do I keep the finished animal in shape? Regularly fluff and reshape after washing to maintain its form.

    Conclusion

    With these 22 free amigurumi crochet patterns for cute stuffed animals, your creativity knows no bounds. Dive into the world of crochet and enjoy making delightful gifts or cuddly companions that can bring smiles to anyone’s face. Happy crocheting!

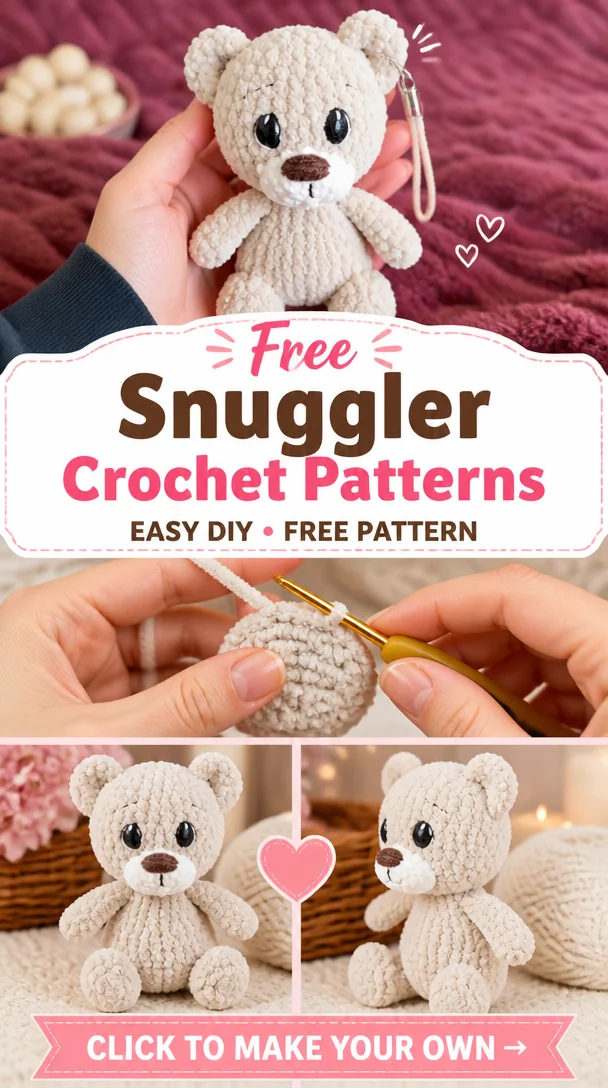
  • Free Snuggler Crochet Patterns

    Free Snuggler Crochet Patterns

    Free Snuggler Crochet Patterns

    Creating your own snuggler crochet animal can bring a sense of joy and comfort to both the maker and the recipient. These unique loveys blend a soft blanket with an adorable stuffed animal design, perfect for cuddling and play. Particularly delightful for little hands, they can also serve as beautiful handmade gifts for all ages. With their whimsical charm and functional design, these crochet patterns not only enhance creativity but also provide warmth and companionship, making them an exciting project for anyone passionate about crochet.

    Crochet Lovey Pattern Overview

    • Skill level: Beginner-friendly
    • Finished size: Approximately 18 inches
    • Crochet hook: G (4.0 mm)
    • Yarn type: Soft, medium-weight (worsted) yarn
    • Main colors: To be chosen based on your design preference
    • Construction method: Amigurumi style
    • Approximate time: 4–6 hours
    • Project suitability: Ideal for beginners and experienced crocheters alike

    Materials You’ll Need

    • Yarn (medium-weight, colors of your choice)
    • Crochet hook (G/4.0 mm)
    • Stuffing (fiberfill)
    • Safety eyes (if applicable)
    • Yarn needle
    • Stitch marker
    • Scissors
    • Embroidery thread (for facial details)
    • Any animal-specific materials (felt, buttons for embellishments)

    Crochet Abbreviations

    • CH: Chain
    • SC: Single crochet
    • INC: Increase
    • DEC: Decrease
    • RND: Round

    Before You Start

    To ensure a smooth crocheting experience, consider the following tips:

    • Work in continuous rounds when specified to avoid visible seams.
    • Use a stitch marker to keep track of your rounds.
    • Check stitch counts often to maintain the correct shape.
    • Gradually stuff the lovey to ensure even shape and prevent over-stuffing.
    • Keep track of rounds carefully to ensure symmetric and balanced limbs.

    Free Crochet Lovey Pattern

    Head

    Round 1: Start with a magic ring and make 6 SC.
    Round 2: INC in each stitch (12 SC).
    Round 3: (1 SC, INC) repeat around (18 SC).
    Round 4: (2 SC, INC) repeat around (24 SC).
    Round 5-8: SC in each stitch for 4 rounds.
    Round 9: (2 SC, DEC) repeat around (18 SC).
    Round 10: (1 SC, DEC) repeat around (12 SC).
    Round 11: DEC around (6 SC). Finish off and leave a long tail for sewing.

    Body

    Round 1: Magic ring, 6 SC.
    Round 2: INC in each stitch (12 SC).
    Round 3: (1 SC, INC) repeat around (18 SC).
    Round 4: (2 SC, INC) repeat around (24 SC).
    Round 5-10: SC in each stitch for 6 rounds.
    Round 11: (2 SC, DEC) repeat around (18 SC).
    Round 12: (1 SC, DEC) repeat around (12 SC).
    Round 13: DEC around (6 SC). Finish with stuffing.

    Arms

    (Work 2)
    Round 1: Magic ring, 6 SC.
    Round 2-6: SC in each stitch for 5 rounds.
    Finish off with a long tail for sewing onto the body.

    Legs

    (Work 2)
    Round 1: Magic ring, 6 SC.
    Round 2: INC in each stitch (12 SC).
    Round 3: SC in each stitch for 3 rounds.
    Finish off leaving a long tail.

    Tail

    Round 1: Magic ring, 6 SC.
    Round 2: SC in each stitch for 3 rounds.
    Finish off with a long tail for attachment.

    Assembly

    To assemble your snuggler:

    • Begin by attaching the head to the top front of the body using the long tail. Position securely.
    • Sew the arms to either side of the body, ensuring they’re evenly spaced.
    • Attach the legs at the bottom, directly underneath the body.
    • Sew the tail at the back center.
    • Gently stuff the head and body as you assemble to add stability and shape.

    Facial Features and Finishing Details

    For facial features, attach safety eyes securely. To create a nose and mouth, use embroidery thread. You can also add blush with fabric markers for a cute finish. Ensure all features are securely fastened, especially if the lovey is intended for young children.

    Tips for a Better Result

    • Experiment with yarn textures for varying looks and feels.
    • Secure your stitches tightly to avoid gaps, especially around the arms and head.
    • Choose a blend of yarn that makes the lovey machine washable for easy care.

    Customization Ideas

    • Swap yarn colors to create unique designs or patterns.
    • Add accessories like bows, hats, or scarves.
    • Use contrasting yarn for facial details to make expressions pop.
    • Experiment with different animal shapes to create a menagerie of snuggler loveys.

    Common Problems and Troubleshooting

    • Uneven stuffing: Ensure to gradually fill each part, adjusting as needed during assembly.
    • Loose stitches: Maintain even tension, particularly in critical areas like the head and limbs.
    • Parts looking uneven: Check your stitch counts after every round, making adjustments as necessary.

    Care and Safety

    For care, hand wash your snuggler in mild soap and air dry to maintain its shape. As with any crochet item that includes small parts (like safety eyes), ensure they are secured safely, especially if intended for small children.

    Frequently Asked Questions

    • Is this crochet lovey pattern beginner-friendly?
      Yes, this pattern is designed with beginner crocheters in mind.
    • What yarn is best for this crochet lovey?
      A soft medium-weight yarn is recommended for comfort and easy handling.
    • How long does it take to crochet this lovey?
      The average completion time is around 4–6 hours, depending on your skill level.
    • Can I make this crochet lovey larger or smaller?
      Yes, you can adjust the hook size and yarn to fit your desired dimensions.
    • Can I use different yarn colors?
      Absolutely! Feel free to mix and match colors to create a unique design.
    • How do I keep the finished animal in shape?
      Stuff the pieces adequately and wash gently as needed to maintain form.

    Conclusion

    Embarking on this crochet lovey project can be a delightful experience that results in a cherished companion for kids or a thoughtful gift. Let your creativity shine and enjoy every stitch of making this adorable snuggler!

  • 15 Fat Animal Toys Free Crochet Patterns

    15 Fat Animal Toys Free Crochet Patterns

    15 Fat Animal Toys Free Crochet Patterns

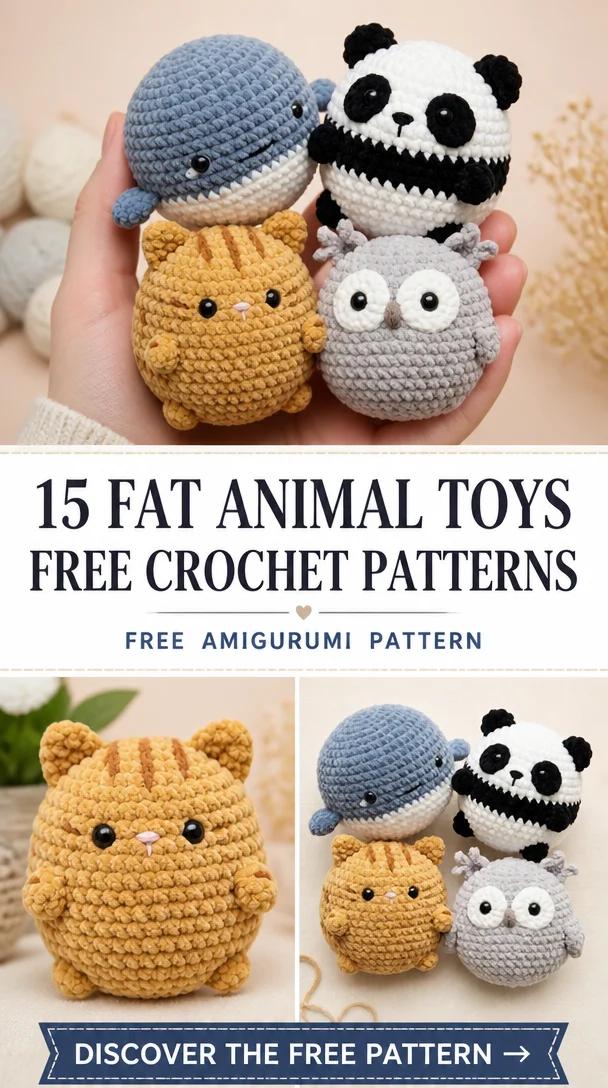
    Crocheting fat animal toys is a delightful way to create cuddly and adorable companions for children and family members alike. These chubby critters, with their round forms and sweet expressions, are not only satisfying to make but also serve as cherished playthings that can bring joy on any day, whether it’s dazzling or dreary. The patterns included in this collection are designed to be easy to follow, making them suitable for beginners and experienced crocheters alike. Gather your yarn and hooks; you’re about to embark on a joyous crafting adventure!

    Crochet Animal Pattern Overview

    • Skill Level: Beginner to Intermediate
    • Finished Size: Varies by pattern
    • Crochet Hook: Recommended size varies (typically 4mm – 5mm)
    • Yarn Type: Worsted or bulky weight yarn
    • Main Colors: Various, depending on animal choice
    • Construction Method: Worked in rounds and joined
    • Approximate Time: 2-5 hours per toy
    • Beginner-Friendly: Yes, with detailed instructions

    Materials You’ll Need

    • Yarn: Choose your favorite colors
    • Crochet hook: Size recommended by your yarn label
    • Stuffing: Polyester fiberfill
    • Safety eyes: Size appropriate for your animal
    • Yarn needle: For sewing parts together
    • Stitch marker: To track rounds
    • Scissors: For yarn cutting
    • Embroidery thread: For facial features and detailing
    • Any animal-specific materials: Such as felt for embellishments

    Crochet Abbreviations

    • Ch: Chain
    • Sc: Single crochet
    • Dc: Double crochet
    • Inc: Increase
    • Dec: Decrease
    • Rnd: Round

    Before You Start

    • Work in continuous rounds to avoid seams.
    • Use a stitch marker to keep track of your rounds.
    • Regularly check your stitch count to ensure accuracy.
    • Stuff your toy gradually to achieve the desired firmness.
    • Keep track of completed rounds to guide assembly and shaping.

    Free Crochet Animal Pattern

    Head

    Round 1: Ch 2, 6 sc in second ch from hook.
    Round 2: Inc in each sc around (12).
    Round 3: Sc in next sc, inc in next around (18).
    Round 4: Sc in next 2 sc, inc in next around (24).
    [Continue your head as per the pattern specified in your chosen fat animal.]

    Body

    Round 1: Ch 2, 6 sc in second ch from hook.
    Round 2: Inc in each sc around (12).
    [Continue building the body with necessary increases and rounds.]

    Arms

    Round 1: Ch 2, 5 sc in second ch from hook, finish and leave a long tail for sewing.
    [Follow similar steps for the other arm.]

    Legs

    Round 1: Ch 2, 6 sc in second ch from hook.
    [Complete legs similarly, keeping in mind the weight and body balance.]

    Assembly

    1. Attach the head to the body: Sew securely using the yarn needle.
    2. Position and sew arms to the body: Place them where they seem most natural and attach firmly.
    3. Position legs accordingly and sew in place, ensuring your toy can stand or sit well.
    4. Add any tail or other features specific to your animal.

    Facial Features and Finishing Details

    • Attach safety eyes securely, or embroider eyes using your chosen thread.
    • For the nose, create a small circle using embroidery thread.
    • Add a smile with simple backstitch, or use felt for a more dimensional look.

    Tips for a Better Result

    • Use a stitch marker to denote your starting point in rows.
    • Keep your tension consistent for a smoother finish.
    • For a more professional look, block your finished pieces gently.

    Customization Ideas

    • Experiment with different yarn colors to create unique flairs.
    • Add accessories like scarves or hats for added character.
    • Adjust the size using different yarn weights to scale your toy up or down.

    Common Problems and Troubleshooting

    • Uneven Stuffing: Use small amounts and mold while stuffing to maintain shape.
    • Loose Stitches: Check your tension and sew any gaps carefully.
    • Mismatched Parts: Lay them out visually before sewing to ensure the correct placements.

    Care and Safety

    For maintaining your crocheted animals, hand wash gently in cold water and lay flat to dry. If using safety eyes, ensure there are no loose parts that could be a choking hazard, especially for small children.

    Frequently Asked Questions

    • Is this crochet fat animal pattern beginner-friendly?
      Yes, the patterns are designed with clear instructions suitable for beginners.
    • What yarn is best for this crochet fat animal?
      Worsted or bulky weight yarn is recommended for achieving a cuddly look.
    • How long does it take to crochet this animal?
      Typically, it takes about 2-5 hours depending on the specific pattern and your crocheting speed.
    • Can I make this crochet animal larger or smaller?
      Yes, by using different yarn weights and appropriate hook sizes, you can customize the dimensions.
    • Can I use different yarn colors?
      Absolutely! Feel free to get creative with colors for added personality.
    • How do I keep the finished animal in shape?
      Regularly check stuffing and adjust as necessary; blocking might also help in retaining shape.

    Conclusion

    Creating these fat animal toys is a rewarding experience that allows you to indulge in a creative outlet while crafting sweet, snug companions. With simple patterns and customization options, your chubby creations will surely bring joy to anyone fortunate enough to receive one.

  • Free Crochet Bunny Pattern – A Cute Project You’ll Love to Make

    Free Crochet Bunny Pattern – A Cute Project You’ll Love to Make

    20 Crochet Snuggler Free Patterns for Cozy Gifts ⋆ The Nomad Knot

    Crochet snugglers are the perfect blend between a lovey and a stuffed animal, making them an irresistible gift for kids and adults alike! These charming creations provide comfort and companionship, ideal for snuggling during bedtime or travel. With over 20 delightful patterns available, there’s something for every crocheting enthusiast—whether you’re a beginner honing your skills or a seasoned pro looking for a new project. Many of these patterns come with video tutorials, ensuring that you can follow along with ease. Share the joy of crafting and give a handmade gift that will be cherished for years to come!

    Crochet Snuggler Pattern Overview

    • Skill Level: Beginner-friendly options are available
    • Finished Size: Varies by pattern
    • Crochet Hook: Size options vary; refer to individual patterns
    • Yarn Type: Worsted weight and other suitable yarns
    • Main Colors: Customizable based on personal preference
    • Construction Method: Primarily worked in continuous rounds
    • Approximate Time: Varies; check individual patterns for estimates
    • Beginner-Friendly: Yes, many patterns include detailed instructions and tutorials

    Materials You’ll Need

    • Worsted weight yarn (or according to pattern)
    • Appropriate crochet hook
    • Stuffing (polyester fiberfill)
    • Safety eyes (optional, based on design)
    • Yarn needle
    • Stitch marker
    • Scissors
    • Embroidery thread (for facial features)
    • Any additional animal-specific materials

    Crochet Abbreviations

    • sc: single crochet
    • dc: double crochet
    • ch: chain
    • rnd: round
    • st: stitch
    • inc: increase
    • dec: decrease

    Before You Start

    • It’s recommended to work in continuous rounds for a seamless finish.
    • Use a stitch marker to keep track of rounds, especially in larger projects.
    • Check your stitch counts regularly to ensure accuracy.
    • Stuff your snuggler gradually, adding more stuffing as you finish each section.
    • Keep track of your rounds for consistency throughout the pattern.
    • Prepare your pieces for assembly before moving on to ensure a smooth process.

    Free Crochet Snuggler Pattern

    Head

    Round 1: Start with a magic ring, 6 sc.
    Round 2: Inc in each st around (12).
    Round 3: (1 sc, inc) repeat around (18).
    Round 4: (2 sc, inc) repeat around (24).

    Body

    Round 1: Start with a magic ring, 6 sc.
    Round 2: Inc in each st around (12).
    Round 3: (1 sc, inc) repeat around (18).
    Round 4: (2 sc, inc) repeat around (24).
    Continue working as required until the desired body length is achieved.

    Arms

    Round 1: Magic ring, 6 sc. Expand to the desired arm length.

    Legs

    Round 1: Magic ring, 6 sc. Work according to body pattern to create a consistent look.

    Tail

    Round 1: Magic ring, 6 sc. Alter the length and shape as desired.

    Assembly

    • Attach the head to the body securely, ensuring it is centered.
    • Position and sew the arms and legs in place, ensuring they are even for balance.
    • For the tail, attach at the base of the body, sewing firmly.
    • Position the facial features appropriately, using the safety eyes in suitable locations.

    Facial Features and Finishing Details

    • Add safety eyes according to your pattern’s instructions.
    • Embroider the nose and mouth with embroidery thread for added character.
    • Ensure all features are securely attached to avoid any safety hazards.

    Tips for a Better Result

    • Choose a yarn color that contrasts well to highlight facial features.
    • Stuff limbs and the body evenly to ensure a consistent shape.
    • Consider blocking your finished pieces if they curl or warp to achieve a polished look.

    Customization Ideas

    • Play with different color combinations for a unique look.
    • Experiment with yarn types (like cotton or acrylic) for varied textures.
    • Adjust the size by using bulkier or thinner yarn.
    • Add accessories like scarves or hats to personalize each snuggler.
    • Change facial expressions by altering embroidery techniques.

    Common Problems and Troubleshooting

    • Uneven Stuffing: Gradually add stuffing until achieving a uniform shape.
    • Loose Stitches: Tighten your tension if stitches appear too loose.
    • Incorrect Stitch Counts: Use a stitch marker to help keep accurate counts.
    • Assembly Alignment Issues: Resew visible seams and adjust as necessary for symmetry.

    Care and Safety

    To maintain your crochet snuggler, hand wash in cold water and lay flat to dry. If it features any small parts (like safety eyes), ensure they are secure for safety, especially for young children.

    Frequently Asked Questions

    • Is this crochet snuggler pattern beginner-friendly?
      Yes, many patterns are designed with beginners in mind and include tutorials.
    • What yarn is best for this crochet snuggler?
      Worsted weight yarn is commonly recommended for a cozy finish.
    • How long does it take to crochet this snuggler?
      The time varies by complexity but can range from a few hours to a couple of days, depending on your speed.
    • Can I make this crochet snuggler larger or smaller?
      Yes, by adjusting the yarn weight or hook size, you can modify the finished dimensions.
    • Can I use different yarn colors?
      Absolutely! Use any colors that inspire you.
    • How do I keep the finished snuggler in shape?
      Ensure even stuffing and consider blocking the finished pieces.

    Conclusion

    Embarking on the journey to create a cozy crochet snuggler is not just a gratifying craft; it’s also an opportunity to create lasting memories through handmade gifts. With these 20 delightful free patterns, you can share warmth and love with every stitch. Get started on your crochet snuggler today, and experience the joy of crafting something special!