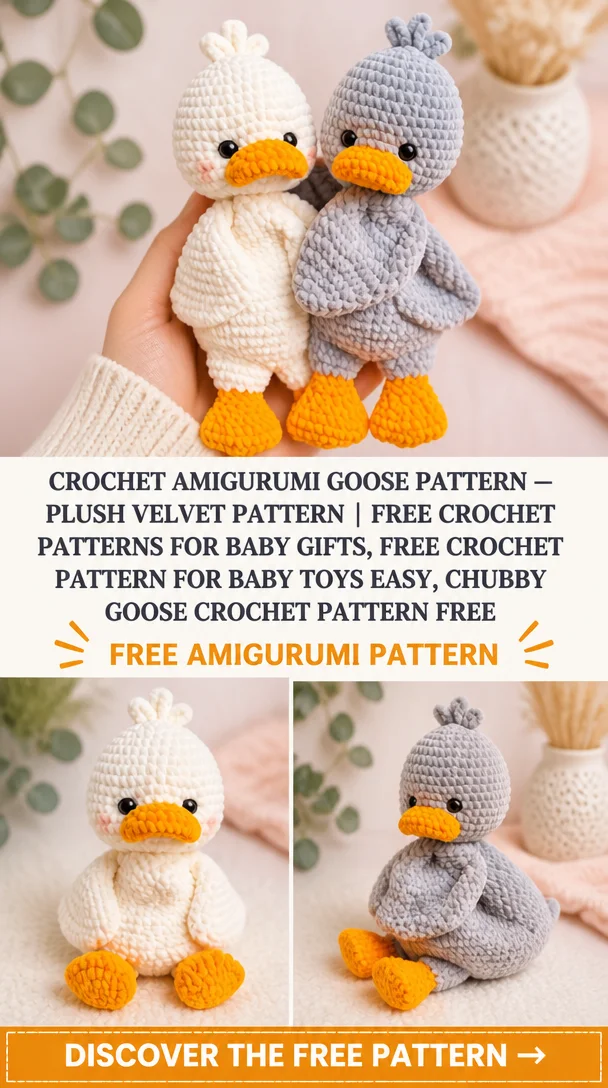
Crochet Amigurumi Goose Pattern — Plush Velvet Pattern | Free crochet patterns for baby gifts, Free crochet pattern for baby toys easy, Chubby goose crochet pattern free
Welcome to this delightful crochet amigurumi goose pattern! This adorable chubby goose is not just a charming addition to any nursery but also makes for a perfect gift for baby showers or birthdays. Its plush velvet texture adds a luxurious touch, making it soft and cuddly for little ones to snuggle with. Experienced crocheters and beginners alike can tackle this project, as it is designed to be easy and fun. Follow this pattern to create a lovely, handmade keepsake that will surely bring joy and comfort to any child.
Crochet Goose Pattern Overview
- Skill Level: Easy
- Finished Size: Approximately 10 inches tall
- Crochet Hook: 4.5 mm (US 7)
- Yarn Type: Plush velvet yarn (medium weight)
- Main Colors: White for the body, yellow for the beak, and black for the eyes
- Construction Method: Worked in continuous rounds
- Approximate Time: 4-6 hours
- Beginner-Friendly: Yes
Materials You’ll Need
- Plush velvet yarn (white, yellow, black)
- 4.5 mm crochet hook
- Polyester stuffing
- Safety eyes (12mm)
- Yarn needle
- Stitch marker
- Scissors
- Embroidery thread (for detailing)
Crochet Abbreviations
- Ch: Chain
- Sc: Single crochet
- Inc: Increase (2 sc in same stitch)
- Dec: Decrease (sc 2 together)
- Rnd: Round
Before You Start
- Work in continuous rounds to keep the shape smooth and avoid visible seams.
- Use a stitch marker to mark the beginning of each round; this will help keep track of your progress.
- Check your stitch counts regularly to prevent unevenness.
- Stuff the goose gradually to ensure it has a nice, plush form.
- Keep a notebook handy to jot down your rounds and adjustments.
Free Crochet Goose Pattern
Body
Round 1: 6 sc in a magic ring (6)
Round 2: Inc in each stitch around (12)
Round 3: (Sc, inc) around (18)
Round 4-11: Sc in each stitch around (18)
Round 12: (Sc, dec) around (12)
Round 13: Dec in each stitch around (6)
Fasten off and leave a long tail for sewing.
Head
Round 1: 6 sc in a magic ring (6)
Round 2: Inc in each stitch around (12)
Round 3: (Sc, inc) around (18)
Round 4-6: Sc in each stitch around (18)
Round 7: (Sc, dec) around (12)
Round 8: Dec in each stitch around (6)
Fasten off, leave a long tail.
Beak
Round 1: 4 sc in a magic ring (4)
Round 2: Inc in each stitch around (8)
Fasten off and leave a long tail for sewing to the head.
Assembly
- Attach the Head: Position the head on top of the body and sew securely.
- Attach the Beak: Sew the beak onto the center of the head.
- Eyes: Insert safety eyes on either side of the beak, about one round down from the top of the head.
- Stuffing: Gradually stuff the head, making sure the shape is well-defined.
- Body Stuffing: Stuff the body lightly so it remains soft and cuddly.
Facial Features and Finishing Details
To enhance your goose’s personality, use the embroidery thread to stitch a small smile beneath the beak. You can also add blush using pink yarn for rosy cheeks, giving the goose an endearing look.
Tips for a Better Result
- Keep your tension consistent throughout the project to ensure an even finish.
- Add a little more stuffing for a more rounded appearance.
- Use a needle to hide any loose yarn tails neatly after finishing.
Customization Ideas
- Experiment with different color combinations for the body and wings.
- Add accessories like a tiny scarf or hat for seasonal variations.
- Change the size of the goose by adjusting the yarn thickness or hook size.
Common Problems and Troubleshooting
- Uneven Stuffing: Add or remove stuffing gradually until you achieve the desired shape.
- Loose Stitches: Check your tension and practice your stitch counting as you work.
- Parts Looking Uneven: Regularly compare both sides and adjust with additional stitches if needed.
Care and Safety
To care for your handmade crochet goose, spot clean as needed using a damp cloth. If washing is required, hand wash and air dry to maintain the fabric’s integrity. Always supervise babies and toddlers with toys that contain small components like safety eyes.
Frequently Asked Questions
- Is this crochet goose pattern beginner-friendly?
Yes, it’s designed to be easy to follow for beginners. - What yarn is best for this crochet goose?
Plush velvet yarn provides a soft and cuddly finish ideal for a toy. - How long does it take to crochet this animal?
Typically, it takes between 4 to 6 hours depending on your skill level. - Can I make this crochet animal larger or smaller?
Yes, you can adjust the size by changing the yarn weight or crochet hook size. - Can I use different yarn colors?
Absolutely! Feel free to use any color combinations you like. - How do I keep the finished animal in shape?
Use appropriate stuffing and avoid excessive washing to retain its shape.
Conclusion
Creating your own amigurumi goose is a rewarding journey that will add a personal touch to your home or gift-giving. Dive into this charming project, and enjoy the process of bringing this delightful plush goose to life!




Leave a Reply