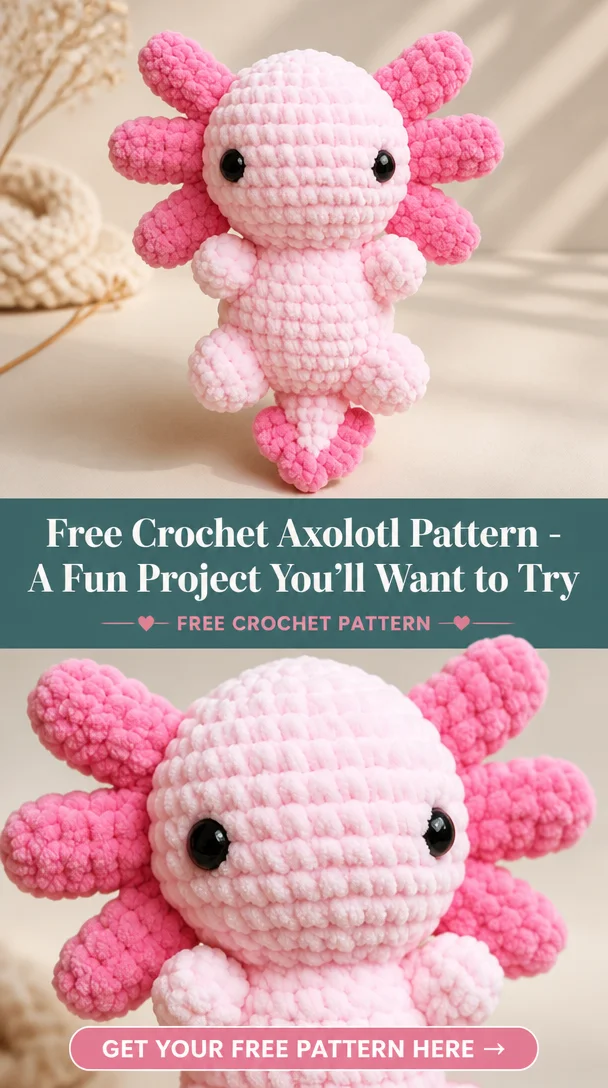
With its wide smiling face and feathery external gills, an axolotl is one of the most charming aquatic animals to crochet, and this pattern keeps the construction simple and beginner friendly.
Quick Pattern Overview
| Skill level | Easy |
| Finished size | About 16 cm (6.25 in) long |
| Yarn | DK or 8-ply cotton yarn, pink or light purple |
| Hook size | 2.5 mm |
| Estimated time | 3 to 4 hours |
Materials You’ll Need
- DK cotton yarn in pink or light purple
- 2.5 mm crochet hook
- 9 mm safety eyes, or thread to embroider the eyes
- Polyester stuffing
- Tapestry needle, stitch marker and scissors
Crochet Abbreviations
| MR | magic ring |
| ch | chain |
| sc | single crochet |
| inc | increase (2 sc in same st) |
| dec | decrease (sc 2 sts together) |
| st(s) | stitch(es) |
| FO | fasten off |
Before You Start
- Work in continuous rounds; do not join or turn.
- Use a stitch marker in the first stitch of each round.
- The number in brackets at the end of a round is your stitch count.
- Stuff firmly but stop before the stitches start to gap.
Free Crochet Axolotl Pattern
Head and Body (worked as one long piece)
- Round 1: 6 sc in MR (6)
- Round 2: inc in each st (12)
- Round 3: (1 sc, inc) x 6 (18)
- Round 4: (2 sc, inc) x 6 (24)
- Rounds 5 to 16: sc in each st (24). Add safety eyes between rounds 5 and 6, wide apart, about 9 sts apart, for that classic axolotl smile look.
- Round 17: (2 sc, dec) x 6 (18)
- Round 18: (1 sc, dec) x 6 (12). Stuff firmly.
- Round 19: dec x 6 (6). FO and close the hole.
Gills (make 6, feathery)
Chain 6, sl st in the 2nd chain from the hook and across to form a small feathery frond. FO leaving a short tail. Repeat for 6 gills, 3 per side.
Tail Fin (flat, worked in rows)
Chain 10, sc in the 2nd chain from the hook and across (9 sts). Work 4 more rows of sc, decreasing one stitch at the start of every other row, until 3 sts remain, then FO.
Legs (make 4, tiny)
- Round 1: 6 sc in MR (6)
- Rounds 2 to 3: sc in each st (6)
FO and leave a short tail. Stuff very lightly.
Assembly
- Sew 3 feathery gills to each side of the head, just behind the eyes.
- Sew the flat tail fin to the back end of the body, along the top.
- Sew the four tiny legs evenly along the underside of the body.
Facial Features & Finishing
A simple upward curved mouth beneath the eyes gives the axolotl its signature happy smile; keep it wide for the most authentic look.
Tips for a Better Result
- Use a hook one size smaller than the yarn label suggests, so no stuffing shows.
- Work rounds a little tighter than usual for a firm, well-shaped body.
- Count your stitches after every round to catch mistakes early.
Care & Safety
If this toy is for a baby or small child, embroider the eyes instead of using safety eyes. Spot clean with a damp cloth and let it air dry.
Frequently Asked Questions
0
Why are the eyes placed so far apart?
1
Axolotls have a distinctively wide, flat face, and spacing the eyes further apart than on a typical round-faced animal helps capture that look.
Can I use a different colour than pink?
Yes, pale blue, white or even spotted combinations are also realistic axolotl colourings and work just as well with this pattern.
Love aquatic amigurumi? Try our free crochet patterns for more unique creatures.




Leave a Reply