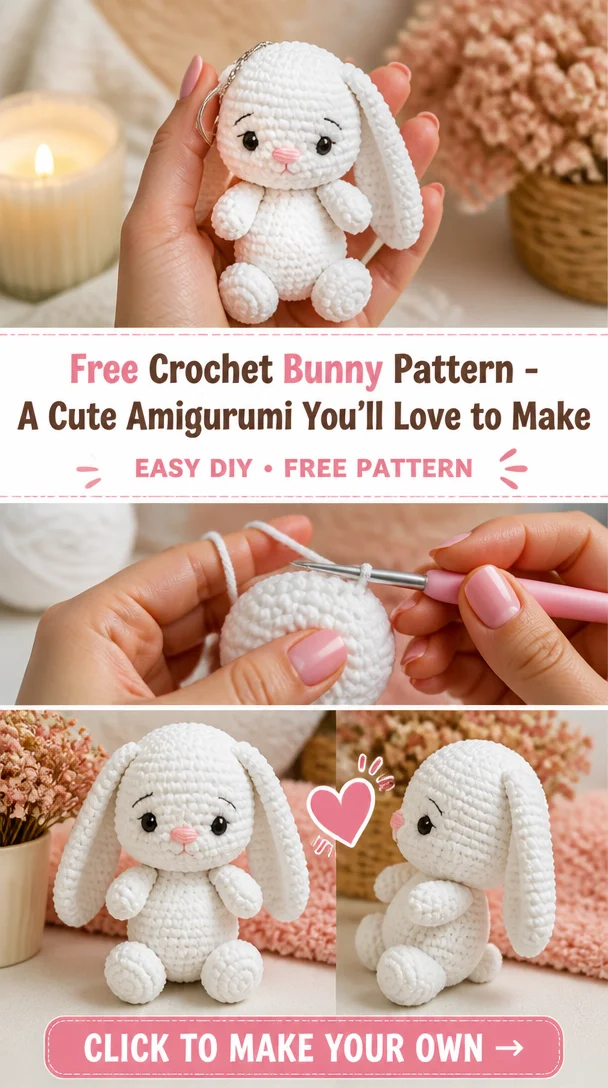
Elya The Crochet Bunny Amigurumi Free Pattern
Elya the Crochet Bunny is an adorable plush amigurumi project that brings a touch of charm to any stuffed animal collection. This delightful rabbit not only serves as a great decorative piece but also makes a lovely gift for children and adults alike. Crocheting Elya provides an engaging experience for crafters of all skill levels, from beginners looking to tackle their first project to seasoned makers in search of a quick, satisfying finish. With Elya’s cute features and cuddly size, you’ll find yourself falling in love with this crochet companion.
Crochet Bunny Pattern Overview
- Skill level: Beginner-friendly
- Finished size: Approximately 24 cm (excluding ears)
- Crochet hook: 3.5 mm (E/4)
- Yarn type: Worsted weight yarn (medium)
- Main colors: Your choice of colors
- Construction method: Worked in continuous rounds
- Approximate time: 5-8 hours
- Beginner-friendly: Yes
Materials You’ll Need
- Worsted weight yarn (in desired colors)
- 3.5 mm (E/4) crochet hook
- Polyester stuffing
- Safety eyes (12 mm)
- Yarn needle
- Stitch marker
- Scissors
- Embroidery thread (for facial features)
- Optional: Small decorative accessories (like ribbons)
Crochet Abbreviations
- ch: chain
- sc: single crochet
- inc: increase (2 sc in the same stitch)
- dec: decrease (sc 2 stitches together)
- sl st: slip stitch
- R: round
Before You Start
Before diving into the pattern, here are a few tips:
- Work in continuous rounds to maintain a neat finish.
- Use a stitch marker to keep track of your rounds.
- Check your stitch counts at the end of each round to ensure consistency.
- Gradually stuff your bunny as you go to shape it accurately.
- Prepare for assembly by ensuring your pieces are completed and ready to be joined.
Free Crochet Bunny Pattern
Head
Round 1: 6 sc in magic ring
Round 2: inc in each st around (12)
Round 3: sc, inc repeat around (18)
Round 4: 2 sc, inc repeat around (24)
Round 5-10: sc in each st around (24)
Round 11: 2 sc, dec repeat around (18)
Round 12: sc, dec repeat around (12)
Round 13: dec around (6)
Finish off, leaving a long tail for sewing.
Body
Round 1: 6 sc in magic ring
Round 2: inc in each st around (12)
Round 3: sc, inc repeat around (18)
Round 4: 2 sc, inc repeat around (24)
Round 5-15: sc in each st around (24)
Round 16: 2 sc, dec repeat around (18)
Round 17: sc, dec repeat around (12)
Round 18: dec around (6)
Finish off, leaving a long tail for sewing.
Ears (Make 2)
Round 1: 6 sc in magic ring
Round 2: inc in each st around (12)
Round 3: sc, inc repeat around (18)
Round 4-8: sc in each st around (18)
Finish off, leaving a long tail for sewing.
Arms (Make 2)
Round 1: 6 sc in magic ring
Round 2: inc in each st around (12)
Round 3-5: sc in each st around (12)
Finish off, leaving a long tail for sewing.
Legs (Make 2)
Round 1: 6 sc in magic ring
Round 2: inc in each st around (12)
Round 3-6: sc in each st around (12)
Finish off, leaving a long tail for sewing.
Tail
Round 1: 6 sc in magic ring
Round 2: inc in each st around (12)
Finish off, leaving a long tail for sewing.
Assembly
- Sew the head onto the body, ensuring it is centered.
- Attach the arms to the sides of the body.
- Position the legs at the bottom of the body, slightly spaced apart.
- Attach the ears at the top of the head.
- For the tail, sew it onto the back of the body.
- Carefully stuff the head and body as needed, ensuring a good shape while keeping it soft.
- Join any loose ends and secure your stitches.
Facial Features and Finishing Details
Using the safety eyes, secure them onto the head at an appropriate distance apart. The nose can be made with pink or contrasting yarn using the embroidery thread. For a mouth, you can stitch a simple curve below the nose, adding any desired expressions to bring Elya to life.
Tips for a Better Result
- Make sure to maintain even tension throughout the work.
- Use a stitch marker consistently to avoid losing your place.
- Experiment with different stitch styles for unique textures.
Customization Ideas
- Change yarn colors to make Elya unique.
- Use different yarn types for varied textures.
- Add accessories like bows or scarves for added character.
- Adjust the size by changing the hook size or yarn weight.
- Create personal facial expressions using different embroidery techniques.
Common Problems and Troubleshooting
- Ensure even stuffing to prevent a lumpy appearance.
- If stitches are too loose, consider using a smaller hook.
- Pay attention to stitch counts to avoid uneven pieces.
- Align parts correctly during assembly for a balanced look.
Care and Safety
To care for your finished Elya bunny, hand wash it gently and lay it flat to dry. Because safety eyes are used, ensure that they are securely attached if the bunny is intended for small children.
Frequently Asked Questions
- Is this crochet bunny pattern beginner-friendly?
Yes, this pattern is suitable for beginners. - What yarn is best for this crochet bunny?
Worsted weight yarn is ideal for achieving the right size and texture. - How long does it take to crochet this animal?
It typically takes about 5-8 hours, depending on experience. - Can I make this crochet animal larger or smaller?
Yes, adjusting the hook size or yarn weight can help change the final size. - Can I use different yarn colors?
Absolutely! Use any colors you like to create a personalized bunny. - How do I keep the finished animal in shape?
Gently shape and stuff the bunny evenly during construction to maintain its form.
Conclusion
Elya the Crochet Bunny is not only a lovely project to enhance your skills but also provides a delightful creation that can be cherished or gifted. Dive into this pattern and enjoy every stitch that brings Elya to life!




Leave a Reply